How To Install Rain Gutters: 10-Step DIY Guide
Protect your home from water damage with easy steps to add seamless drainage systems.

Image: HearthJunction Design Team
How to Install Rain Gutters: A Complete DIY Guide
Rain gutters are an essential component of your home’s water management system, directing rainwater away from your foundation, preventing soil erosion, and protecting your landscaping. While professional installation is always an option, installing gutters yourself can save you money and give you the satisfaction of completing a valuable home improvement project. This comprehensive guide will walk you through the entire process of installing rain gutters, from selecting the right materials to finishing the installation.
Why Your Home Needs Rain Gutters
Before diving into installation, it’s important to understand why gutters are crucial for protecting your home:
- Prevent foundation damage by directing water away from your home’s base
- Protect siding from water stains and damage
- Reduce soil erosion around your property
- Preserve landscaping by controlling water runoff
- Prevent basement flooding and moisture issues
- Extend the life of your home’s exterior paint and materials
Without proper gutters, rainwater cascading off your roof can lead to costly repairs and maintenance issues over time. Investing in a quality gutter system is a preventative measure that pays dividends in home protection.
Types of Rain Gutters
When planning your gutter installation, you’ll need to choose from several common types of gutters:
K-Style Gutters
K-style gutters are the most popular residential option, featuring a decorative front edge that resembles crown molding. These gutters hold more water than similarly sized half-round gutters and attach more securely to the fascia board.
Half-Round Gutters
With their semicircular shape, half-round gutters are often found on older, historic homes. They’re generally more expensive than K-style gutters but offer a classic, traditional appearance that complements certain architectural styles.
Box Gutters
Built into the roof structure rather than attached to the eaves, box gutters are less visible from the ground. They’re commonly used in commercial buildings but can also be found in some residential applications, particularly in homes with specific architectural designs.
Gutter Materials
Gutters come in various materials, each with distinct advantages and price points:
Aluminum Gutters
Lightweight, rust-resistant, and available in many colors, aluminum is the most popular gutter material for DIY installations. While not as durable as some other options, aluminum gutters are relatively inexpensive and easy to work with, making them ideal for most homeowners.
Vinyl Gutters
The most economical option, vinyl gutters are lightweight and simple to install. They won’t rust or corrode but may become brittle in extreme cold or deteriorate faster under intense sunlight. Vinyl is best suited for milder climates and budget-conscious projects.
Steel Gutters
Available in galvanized or stainless varieties, steel gutters offer exceptional strength and durability. Galvanized steel is less expensive but may eventually rust, while stainless steel costs more but provides superior longevity without corrosion concerns.
Copper Gutters
The premium choice for gutters, copper develops a distinctive patina over time and can last for decades with minimal maintenance. The high cost of materials and specialized installation requirements typically make copper gutters less suitable for DIY projects.
Tools and Materials Needed
Before starting your gutter installation project, gather these essential tools and materials:
Tools:
- Ladder (extension ladder for two-story homes)
- Drill with bits
- Tape measure
- Chalk line
- Hacksaw or power saw with metal-cutting blade
- Level (2-foot minimum)
- Rivet gun
- Screwdrivers
- Hammer
- Hole saw (for downspout outlet)
- Plumb bob
- Carpenter’s square
Materials:
- Gutter sections in your chosen material
- Downspouts
- End caps
- Gutter hangers (one every 24-36 inches)
- Corner pieces (inside and outside as needed)
- Downspout elbows
- Downspout brackets
- Gutter sealant or caulk
- Rivets
- Gutter screws
- Splash blocks or downspout extensions
Planning Your Gutter System
Proper planning is crucial for a successful gutter installation. Follow these steps to create an effective gutter system design:
Measure Your Roofline
Carefully measure the length of each roofline where gutters will be installed. Add 5-10% extra material to account for mistakes and adjustments. For homes with complex rooflines, sketch a diagram to help visualize the complete system.
Determine Downspout Locations
Plan at least one downspout for every 40 feet of gutter, with optimal placement at corners or low points. Consider your landscape and drainage patterns when deciding where downspouts will direct water. Proper downspout placement is critical for effective water management.
Calculate the Proper Slope
Gutters must be installed with a slight downward slope toward downspouts to ensure proper water flow. The standard recommendation is a ¼-inch slope for every 10 feet of gutter. This subtle slope is barely noticeable visually but crucial for functionality.
Step-by-Step Installation Guide
Step 1: Prepare the Fascia Board
Inspect your fascia board (the vertical finishing board attached to the end of your roof rafters) for rot or damage. Replace or repair any compromised sections before installing gutters. Clean the fascia board thoroughly to ensure proper adhesion of gutter components.
Step 2: Mark the Gutter Slope
Begin by marking the highest point of the gutter line on your fascia board. This is typically the point furthest from the planned downspout location. From this high point, mark a downward slope toward each downspout at a rate of ¼ inch per 10 feet. Use a chalk line to connect these marks, creating a reference line for installation.
Step 3: Install End Caps
Attach end caps to the ends of your gutter sections. Apply a bead of gutter sealant around the inside edge of each end cap before securing it to the gutter. Crimp the edges with pliers if needed and secure with rivets for a watertight seal.
Step 4: Cut and Prepare Outlet Holes
Determine where downspouts will connect to your gutters and mark these locations. Use a hole saw to cut outlet holes in the bottom of the gutter sections. Attach outlet tubes with rivets and sealant to create a secure connection for downspouts.
Step 5: Assemble Gutter Sections
For gutters longer than the standard section length (typically 10 feet), you’ll need to join multiple pieces. Apply gutter sealant to the inside of a connector piece and slide the gutter sections together. Secure the joint with rivets on both the front and back of the gutter, then apply additional sealant over the seam for extra protection.
Step 6: Install Corner Pieces
For corners, use pre-formed corner pieces designed for your specific gutter profile. Apply a generous bead of sealant inside the corner piece before joining it to the gutter sections. Secure with rivets and apply additional sealant over the seams to ensure they’re watertight.
Step 7: Attach Hangers
Before lifting the gutter into place, attach hangers to the back of the gutter at 24-36 inch intervals. Different hanger styles may have varying installation methods, so follow the specific instructions for your chosen type. Spacing hangers properly ensures your gutters can support the weight of heavy rainfall and potential debris.
Step 8: Mount the Gutters
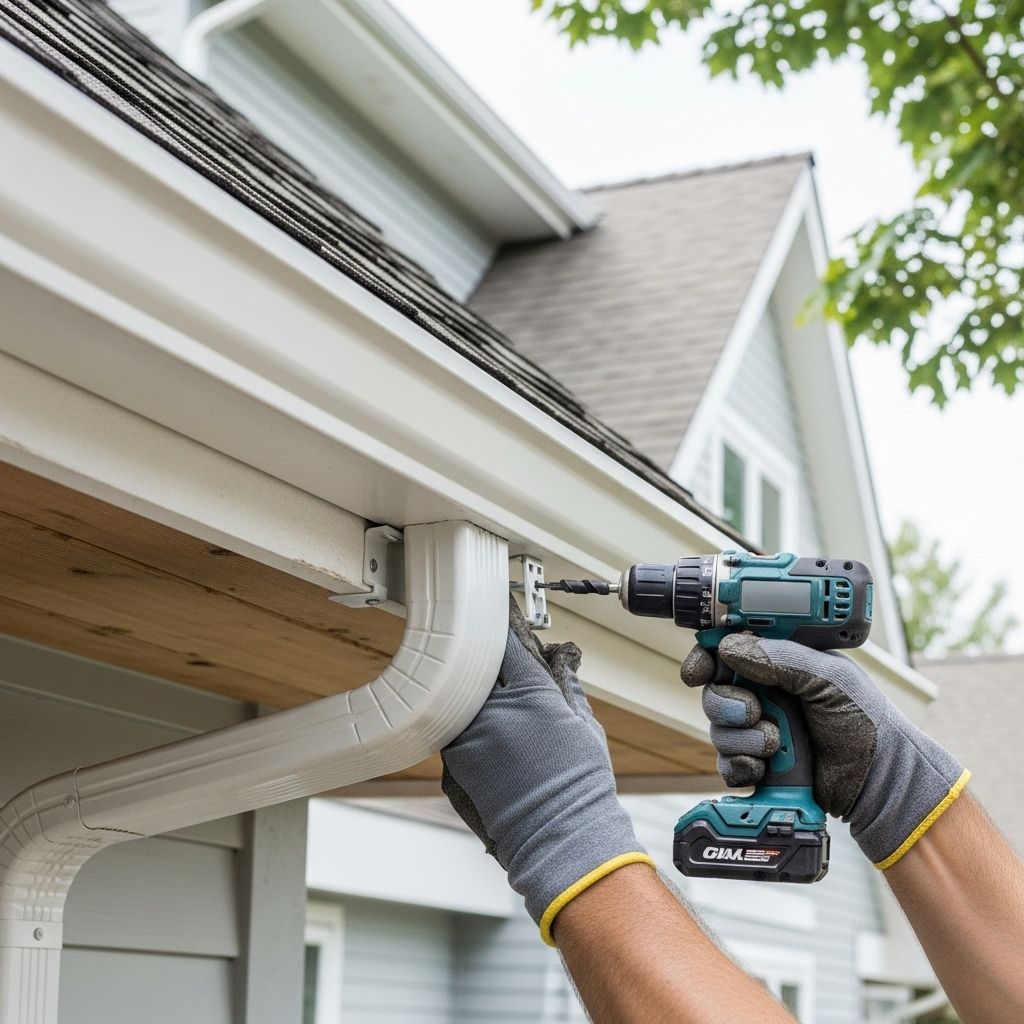
With help from an assistant, lift the assembled gutter section into position along the chalk line on your fascia board. Ensure the gutter aligns with your marked slope. Attach the hangers to the fascia board using appropriate screws or fasteners, checking the level and slope periodically during installation.
Step 9: Install Downspouts
Measure and cut downspout sections to reach from the outlet tube to the ground. Assemble elbows and straight sections as needed to route the downspout away from your foundation. Attach the downspout to the house using downspout brackets every 6-8 feet, and install a splash block or extension at the bottom to direct water away from your foundation.
Step 10: Final Checks and Adjustments
Once the entire system is installed, test it by running water through the gutters with a garden hose. Check for proper flow toward downspouts and inspect all joints for leaks. Make any necessary adjustments to the slope or seal any leaky connections before considering the project complete.
Maintenance Tips for Long-Lasting Gutters
To keep your newly installed gutters functioning properly:
- Clean gutters at least twice a year, more often if you have many nearby trees
- Check for and repair any leaks or sagging sections promptly
- Consider installing gutter guards to reduce debris accumulation
- Ensure downspouts remain clear and direct water at least 5 feet from your foundation
- Inspect gutters after severe storms for damage or displacement
Regular maintenance extends the life of your gutter system and ensures it continues to protect your home effectively.
Frequently Asked Questions (FAQs)
Q: How much does it cost to install gutters myself?
A: DIY gutter installation typically costs between $3 to $8 per linear foot for materials, depending on the type of gutters and materials chosen. For an average home requiring about 200 linear feet of gutters, expect to spend $600-$1,600 on materials, compared to $1,500-$3,000 for professional installation.
Q: Can I install gutters on my own?
A: Yes, gutter installation is a manageable DIY project for homeowners comfortable with ladder work and basic tools. However, two-story homes or complex rooflines may present safety challenges that make professional installation worth considering.
Q: How long does it take to install gutters?
A: For an average single-story home, expect to spend a full weekend on installation. More complex projects or larger homes may require additional time. Working methodically and having all materials prepared in advance will help streamline the process.
Q: What size gutters do I need?
A: For most residential applications, 5-inch K-style gutters are sufficient. Homes with steep roofs, large roof areas, or in areas with heavy rainfall may benefit from 6-inch gutters. Downspouts typically should be 2×3 inches for 5-inch gutters or 3×4 inches for 6-inch gutters.
Q: How do I know if my gutters are properly sloped?
A: After installation, pour water into the end of the gutter furthest from the downspout. The water should flow smoothly toward the downspout without pooling. If water stands in any section, adjust the slope for proper drainage.
Installing your own rain gutters is a rewarding project that provides immediate benefits to your home’s water management system. With careful planning, proper materials, and attention to detail, you can create a professional-quality gutter system that protects your home for years to come. Remember that the key to successful gutter performance lies not just in proper installation but also in regular maintenance and upkeep.
References
Read full bio of Srija Burman


