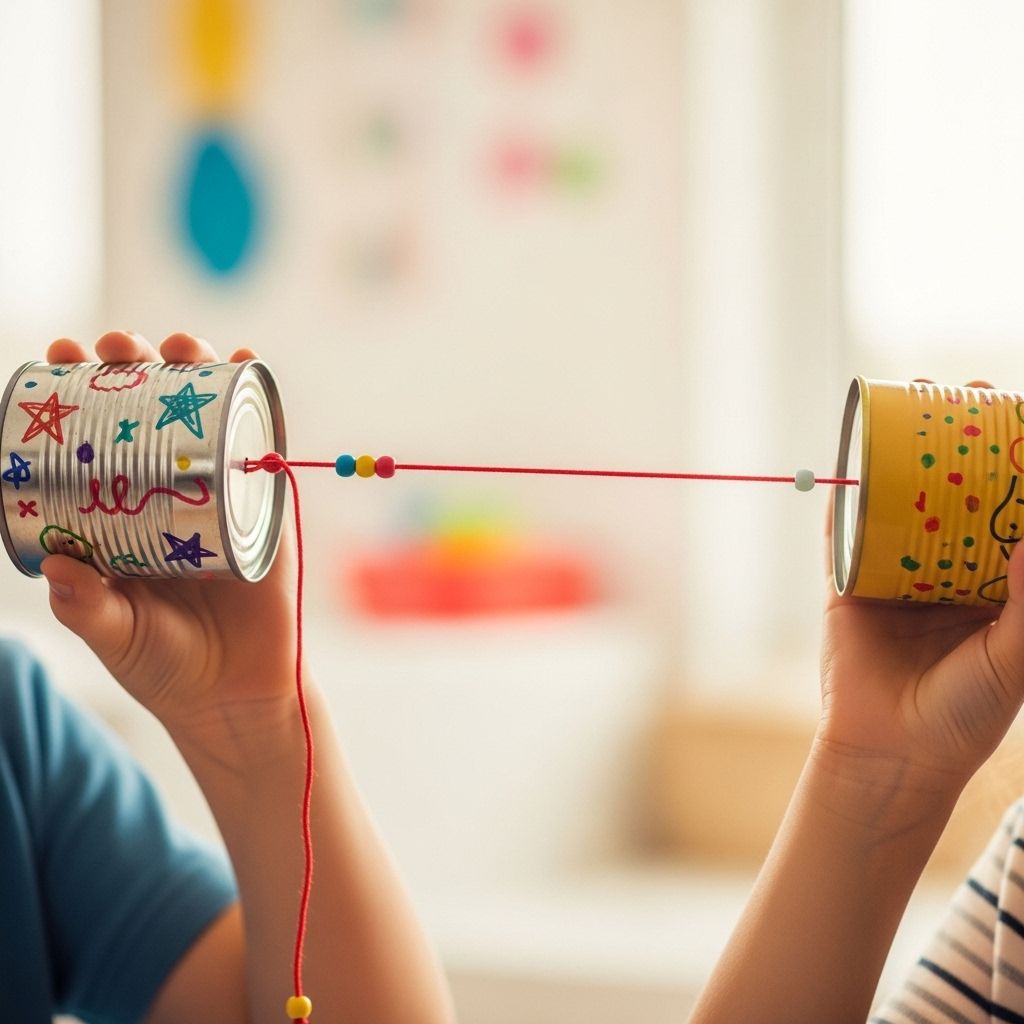
How to Make a Tin Can Telephone: A Classic DIY Sound Science Craft
A hands-on activity that brings physics to life with playful, screen-free connection.

How to Make a Tin Can Telephone
Ever wondered how kids communicated before smartphones, texting, and video calls? The tin can telephone is a timeless DIY project that doubles as a playful sound experiment and a fun nod to old-school communication. This simple activity not only entertains, but also teaches the fascinating basics of how sound waves travel. Whether you’re looking to engage children in science, reconnect with nostalgia, or simply try a hands-on craft, here’s an in-depth guide to creating and understanding your own tin can telephone.
Why Try a Tin Can Telephone?
In today’s world, where smart devices often dominate, retro-inspired projects are making a comeback for good reason. The tin can telephone encourages children to use their imagination, engage in purposeful play, and learn basic principles of sound, all while giving parents and teachers an easy and enjoyable activity to introduce science in a tactile way. Plus, it’s a wonderful way to foster real conversation and presence, away from digital distractions.
- Stimulates curiosity in science and engineering
- Promotes hands-on learning
- Encourages teamwork and cooperative play
- Perfect for rainy days, classrooms, and family gatherings
Materials You’ll Need
- Two tin cans or paper cups: Clean, empty food cans work great for a classic feel, but sturdy paper cups will do the job just as well and may even improve sound transmission slightly.
- String: Baker’s twine, sewing thread, kite string, or similar strong, non-stretchy string. Aim for at least 10-30 feet, depending on your setup.
- Safety pin, sewing needle, or pushpin: Essential for piercing holes in the bottom centers of the cans or cups.
- Scissors and tape (optional): For securing the string inside the vessel and trimming excess materials.
Pro Tip: If you’re working with very young kids, opt for paper cups to avoid sharp can edges, or carefully tape over any exposed metal for safety.
Step-by-Step Instructions to Make Your Tin Can Telephone
Gather Your Materials
Double-check that your cans or cups are clean and free from sharp edges. Collect your choice of string, and find a sharp pin or needle for puncturing holes.
Enhance your crafting repertoire by exploring our DIY Baseball Mason Jar project. This creative craft is perfect for sports lovers and serves as a great way to celebrate your favorite teams while making something memorable with your children.Pierce a Hole in Each Can or Cup
Carefully use a safety pin, sewing needle, or pushpin to create a tiny hole in the bottom center of each can or cup. This hole should be just large enough for your string to pass through.
Thread the String
Cut your string to the desired length (usually 10-30 feet). Thread one end of the string through the bottom of the first can or cup, tying a sturdy knot inside to prevent it from slipping out. Repeat for the other end and the second can or cup. You can also use a small washer or piece of tape inside as a stopper if you want extra security.
Test and Play
Stretch the telephone out so the string is taut (not droopy or slack) and have two people each take an end. One person speaks clearly into a can or cup while the other listens at the opposite end. Switch speakers and repeat!
Note: Keep the string straight for best results—if it touches or drapes over objects, the sound may weaken or stop.
The Science Behind the Tin Can Telephone
The tin can telephone is not just a novelty; it perfectly demonstrates how sound waves travel through different mediums. Here’s what’s happening at each step:
- When someone speaks into the first can or cup, their voice creates vibrations in the air inside the vessel.
- These vibrations cause the can’s bottom to vibrate, transferring the energy to the taut string.
- The string transmits the vibrations directly to the second can’s base, where the process reverses, creating sound in the air for the listener to hear.
This project gives a tangible example of how sound can move not only through air but also through solids (the string) and then back into air, much like how old-fashioned landline telephones worked with wires and magnetic coils.
Factors That Affect Sound Quality
| Factor | Effect on Sound |
|---|---|
| Type of can/cup | Stiffer walls (tin vs. paper) vibrate differently, affecting clarity and volume. |
| Length of string | Shorter, tauter strings transmit vibrations better; long or loose strings can weaken the signal. |
| Type of string | Nylon or cotton string works well. Stretchy or overly thick string dampens sound. |
| Tension | A fully stretched (taut) string is vital—slack string presents major sound loss. |
Troubleshooting and Pro Tips
- If sound is faint or unclear: Check that the string is pulled tightly, is not knotted, and isn’t dampened by touching surfaces or objects between users.
- If string slips out: Double knot the end or use a small piece of tape or a washer inside the can/cup for extra hold.
- Mix and match materials: Try using different cup sizes, string types, or even lengths and compare the sound.
- Experiment with distance: Test how sound quality changes as you move farther apart. How does distance affect the vibration travel?
Educational Extensions: Connecting Science and Play
The tin can telephone can be more than a one-off craft. Use it as a launching point for science lessons or creative projects:
- Sound Experiments: Have kids hypothesize which string type or can material will work best, record results, and draw conclusions.
- History Link: Share fascinating facts about the evolution of telecommunication, from tin can telephones to rotary landlines to today’s wireless devices.
- Creative Play: Create a pretend ‘call center,’ enact secret spy messages, or design artistic cup exteriors for extra fun.
- Math Skills: Measure string lengths, time how long messages take to transmit, or count how many words are clear at different distances.
Modern Take: From Nostalgic Toy to Screen-Free Family Tool
While the classic tin can telephone is a DIY craft, modern companies are reimagining retro technology for today’s needs. For example, kid-friendly devices like the ‘Tin Can’ WiFi phone take cues from the playful look and function of old landlines, offering a safe, distraction-free way for children to communicate without the risks and overwhelm of modern smartphones.
- No apps or social media—just real conversation.
- Parent-approved contacts only for safety.
- Safe introduction to technology and communication skills.
- Simple, tactile interaction encourages being present and playful.
This approach to communication echoes the philosophy behind the tin can telephone: sometimes, less really is more. Giving children tools for connection—without digital overload—helps build confidence, curiosity, and stronger bonds in families or classrooms.
Fun Variations to Try
- Decorate your cups or cans: Use paints, stickers, or markers to personalize each end of the telephone.
- Build a network: Connect more than two cans using a Y-shaped or star-shaped string structure for a group communication challenge.
- Whisper challenge: Try whispering messages and see which words make it through—an entertaining twist on the ‘telephone game’!
- Outdoor adventures: Use longer string and test how far you can send a message in a backyard, park, or even between treehouses.
- Use as a science fair project: Compare materials, string types, and distances. Present your findings on how sound travels through solids versus air.
Frequently Asked Questions (FAQs)
Q: How does a tin can telephone work?
A: When you talk into one can, sound vibrations travel down the tight string to the other can, where they’re turned back into sound for the listener.
Q: Does it work better with tin cans or paper cups?
A: Both work well! Paper cups can sometimes transmit vibrations more clearly, but tin cans have nostalgic charm and durability. Try both and compare.
Q: How far apart can users stand?
A: For best results, keep the string taut and under 30 feet. Longer strings will diminish sound quality, but experimentation is part of the fun!
Q: Is a tin can telephone safe for young children?
A: Yes, especially when using paper cups and supervision. Always ensure string is not a choking hazard and cans have safe, smooth edges.
Q: Can you connect more than two cans?
A: Yes! By tying strings in various shapes, you can create multiple lines and try group conversations or play communication games with several friends.
Extend the Learning: Related Activities
- Fall crafts: Use leftover cans or cups for seasonal art projects.
- Birthday party themes: Set up a ‘retro communication booth’ for children to play and learn at gatherings.
- Storytelling: Deliver secret messages or clues in treasure hunts using your homemade phones.
- STEM night: Pair the tin can telephone with other classic sound experiments (e.g., tuning forks, water xylophones) for a family science night.
Conclusion: Rediscovering the Joy of Simple Communication
In a world of constant notifications and screen overload, the tin can telephone invites us to slow down, experiment, and connect in tactile, imaginative ways. Whether you’re making memories with family, sparking curiosity in a classroom, or just enjoying a slice of nostalgia, this easy DIY project blends creativity, learning, and the pure fun of conversation. Gather your materials, invite a friend or child, and see how far your words can travel—no charger required.
References
- https://mossandfog.com/tin-can-is-making-the-landline-phone-cool-again/
- https://www.geekwire.com/2025/well-hello-from-landlines-to-dumb-phones-these-startups-are-dialing-up-new-options-for-kids/
- https://www.youtube.com/watch?v=U4afTO3tl_M
- https://www.countryliving.com/life/kids-pets/a60969031/tin-can-telephone/
- https://www.countryliving.com/author/6476/country-living-staff/
- https://tincan.kids
Read full bio of Sneha Tete


