How to Poach an Egg: Mastering the Perfect Technique Every Time
Elevate home brunch with creamy centers, tender whites, and picture-perfect presentation.

How to Poach an Egg: The Complete Guide for Beginners and Home Cooks
Poached eggs, famed for their delicate texture and elegant appearance, are a culinary staple in breakfasts, salads, and light meals. While they’ve earned a reputation for being tricky, mastering poached eggs is surprisingly easy with the right approach, timing, and a few pro kitchen tricks. This guide explores every aspect of poaching eggs—from choosing the freshest eggs to step-by-step instructions, troubleshooting common problems, and creative serving ideas.
Why Learn to Poach Eggs?
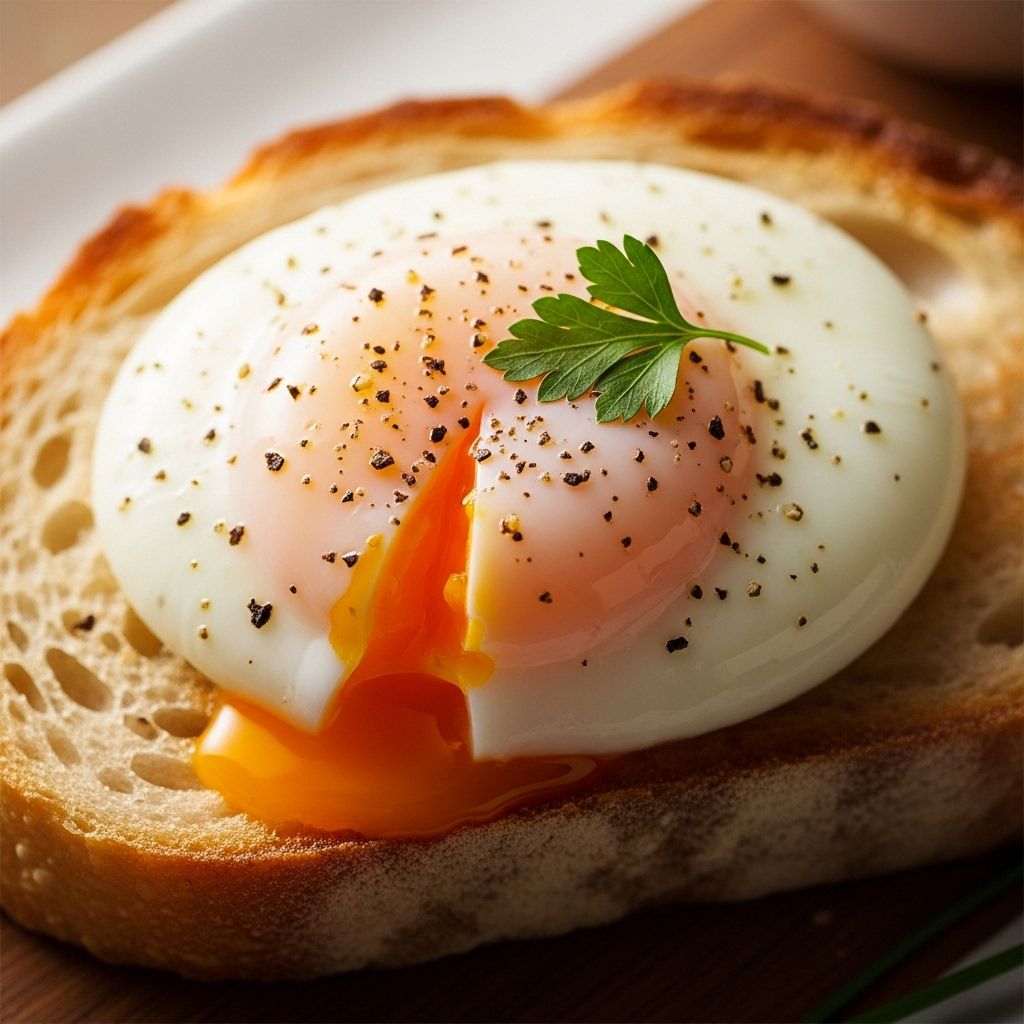
Poached eggs elevate everyday meals into memorable occasions. Their creamy yolks and tender whites are essential for classic recipes like Eggs Benedict and add a healthy dose of protein to salads or veggies. Learning to poach eggs consistently means you’ll always have a simple, satisfying option for breakfast, brunch, or a quick snack.
Essential Equipment for Poaching Eggs
- Pot or Saucepan: Large enough to hold a few inches of water with ample space to maneuver the eggs.
- Slotted Spoon: For gently transferring eggs in and out of the water while draining excess liquid.
- Small Bowls or Ramekins: Ideal for prepping individual eggs and sliding them smoothly into the water.
- Vinegar (optional): Helps coagulate whites quickly for neater poached eggs.
- Clean Dish Towel or Paper Towels: To blot excess water after cooking.
- Mesh Sieve (optional): Removes liquidy whites for especially neat results.
Ingredients You’ll Need
- Fresh eggs (the fresher, the better for shape and flavor)
- Water (cold tap water)
- Vinegar (white or light-colored, 1-2 tablespoons per quart of water; optional but recommended for beginners)
- Salt and pepper (for seasoning after poaching)
Step-by-Step Instructions: Poaching the Perfect Egg
- Heat the Water:
- Fill your pot with at least 1.5–2 inches of water.
- Bring the water to a gentle simmer, not a strong boil. Small bubbles should rise but the surface stays mostly calm.
- Add vinegar if using—it helps the whites set quickly and keeps eggs tidy.
- Prepare the Egg:
- Crack the egg into a small ramekin or bowl. This ensures the yolk stays intact and lets you add it to the water gently.
- Optional: Swirl the egg gently in a fine mesh sieve to remove liquidy whites for smoother results.
- Poach the Egg:
- Stir the water with a spoon to create a gentle vortex—especially helpful for one or two eggs. The swirling motion wraps the whites around the yolk for a neat, oval shape.
- Carefully slip the egg into the center of the vortex (or close to the surface if not swirling). Repeat for each egg, keeping them spaced out.
- Cook for 3 minutes for a soft, runny yolk; up to 5 minutes for a firmer yolk.
- Keep the water gently moving and watch the clock for perfect timing.
- Remove, Drain and Serve:
- Use a slotted spoon to lift each egg from the water.
- Blot the egg gently on a folded clean towel or paper towel to remove excess water.
- Season with salt and pepper, then serve immediately over toast, salad, or on its own.
Timing Table: Yolks to Your Preference
| Cooking Time | Yolk Texture |
|---|---|
| 3 minutes | Soft, runny center |
| 4 minutes | Creamy, partially set |
| 5 minutes | Firm, barely molten center |
Expert Tips for Foolproof Poached Eggs
- Use the freshest eggs possible: Fresh eggs hold their shape better, so ask for those with recent pack dates or from a local farm.
- Don’t skip the vinegar: Even a small amount (1 tablespoon per quart) makes a noticeable difference, especially for new cooks.
- No vigorous boiling: Gentle simmering prevents the whites from being pulled apart and becoming wispy.
- Add eggs close to the surface: This minimizes risk of yolk breakage and helps keep the whites together.
- Poach multiple eggs sequentially: Crack and slip each egg into the pan one at a time, keeping track of their order if you want consistent doneness for each serving.
- Trim ragged edges: Use your slotted spoon or a knife to neaten up whites before serving for a restaurant-style look.
- Soak poached eggs in ice water if prepping ahead. Reheat quickly in simmering water (about 45 seconds) for serving to a crowd.
Troubleshooting: Common Poached Egg Problems
- Wispy whites: Water too hot, no vinegar, or using old eggs are typical causes. Control water temperature and use vinegar for best results.
- Spread-out eggs: Eggs need to be fresher, water should only be gently simmering, and adding them from a ramekin helps.
- Yolk breaks on entry: Crack eggs into ramekins for safe transfer and add close to the surface. Handle gently.
- Eggs stick together: When poaching several at once, space eggs apart and introduce them into the water one by one.
Creative Ways to Serve Poached Eggs
- Classic Eggs Benedict: Layer poached eggs on English muffins with smoked ham and velvety hollandaise sauce.
- Salads: Top spinach, arugula, or kale salads with a poached egg for creamy richness and extra protein.
- Breakfast Toast: Stack eggs on crusty sourdough or whole grain bread, with avocado, sautéed greens, or smoked salmon.
- Vegetable Bowls: Add eggs to roasted veggies, grain bowls, or sweet potato toast for healthy flavors.
- Turkish-style Eggs: Serve poached eggs with garlicky yogurt and chili butter sauce (Cilbir), sprinkled with fresh herbs.
Can You Make Poached Eggs Ahead?
Yes! Poached eggs are great for meal prep. Place just-cooked eggs in an ice water bath to stop cooking, then store in the refrigerator for up to 48 hours. When ready to serve, warm in simmering water for 20–45 seconds, then blot and serve. This technique is ideal for hosting brunches or prepping quick weekday meals.
Poached Egg Variations: Recipes to Try
- Poached Eggs with Grilled Asparagus and Prosciutto
- Avocado and Smoked Salmon Toast, topped with poached eggs
- Poached Eggs on Sweet Potato Toast
- Truffle Salt Zucchini and Poached Egg
- Cilbir (Turkish-style yogurty poached eggs with chili butter)
Frequently Asked Questions (FAQs)
Q: Do I need vinegar for poaching eggs?
A: Vinegar is optional, but helps the egg whites set quickly and prevents them from spreading out. You only need about a tablespoon per quart of water.
Q: Can I poach eggs without a special poacher?
A: Absolutely. All you need is a pot or skillet, water, and a slotted spoon. The right water temperature and a gentle touch are more important than tools.
Q: What’s the best way to make eggs look restaurant-perfect?
A: Use the freshest eggs, add vinegar, skim whites with a mesh sieve for extra neatness, gently swirl the water, and trim any ragged edges before serving.
Q: How can I prevent my egg whites from getting stringy?
A: Make sure your water is only simmering (not boiling), use vinegar, and add eggs gently to the water. Skim liquidy whites with a sieve if desired.
Q: Can I flavor poached eggs in the water?
A: Don’t add salt to poaching water—it breaks the whites. Instead, season eggs after draining, or use dressings and sauces for extra flavor.
Q: How do restaurants prep poached eggs for a crowd?
A: They poach in batches, chill eggs in ice water, and reheat just before serving—keeping quality high and timing precise.
Expert Secrets for Consistent Success
- Store eggs in the main refrigerator compartment for a steady, cool temp.
- Keep water at a gentle simmer—avoid boiling, which breaks eggs apart.
- Add eggs in sequence if poaching several; remove in the same order for even cooking.
- Blot eggs before serving to prevent watery plates or soggy toast.
- Finish with sauces—try hollandaise, yogurt, or crack black pepper for extra flavor.
Quick Reference: Poaching at a Glance
- Simmer water—never boil!
- Vinegar optional, but recommended for best results
- Use ramekins for gentle addition
- Poach for 3–5 minutes depending on desired yolk texture
- Blot before serving
Practical Tips for Easy Poached Eggs
- Practice with two eggs at a time to get comfortable before hosting brunches
- Work close to the water’s surface for less risk of yolk breaks
- Add eggs clockwise and remove in the same order for multiple servings
- Customize toppings: Avocado, greens, brisket, truffle oil, salsa, or a dollop of yogurt
Nutrition and Health Benefits
Poached eggs are naturally low-calorie and high-protein, with no added fats from frying or oils. They offer a quick, nutrient-dense breakfast or lunch, packed with vitamins, minerals, and healthy fats (especially when using local or pasture-raised eggs).
Summary: Make Poached Eggs Part of Your Routine
Once you’ve mastered the basics, poached eggs become a versatile, reliable ingredient that brings restaurant style and wholesome nutrition to everyday meals. Experiment with different toppings, serve for breakfast, or add to savory salads and grain bowls.
Related Links and Resources
- Eggs.ca: Detailed poaching techniques for home cooks
- Food52: Insider tools and tips for foolproof poached eggs
- Downshiftology: Step-by-step recipes and video guides
Common Questions Answered
- Q: Can I poach eggs in advance?
A: Yes. Chill in ice water, store for up to 2 days, and reheat in hot water before serving. - Q: What eggs are best for poaching?
A: Fresh, high-quality eggs have firmer whites and brighter yolks—ideal for poaching. - Q: Is vinegar absolutely necessary?
A: No, but it helps the whites set. Try without for practice, then add vinegar for even neater results.
References
- https://eggs.ca/eggs101/how-to-poach-an-egg-like-a-pro/
- https://food52.com/story/22023-how-to-make-simple-poached-eggs-you-don-t-need-vinegar
- https://downshiftology.com/recipes/poached-eggs/
- https://www.prevention.com/food-nutrition/recipes/a20504730/perfectly-poached-eggs/
- https://www.walderwellness.com/how-to-poach-an-egg/
- https://whatscookingamerica.net/eggs/poachegg.htm
Read full bio of medha deb


