How to Tile a Heat Shield for a Wood Stove: A Complete DIY Guide
A tiled barrier that cuts clearances and creates a stylish, heat-resistant focal point.
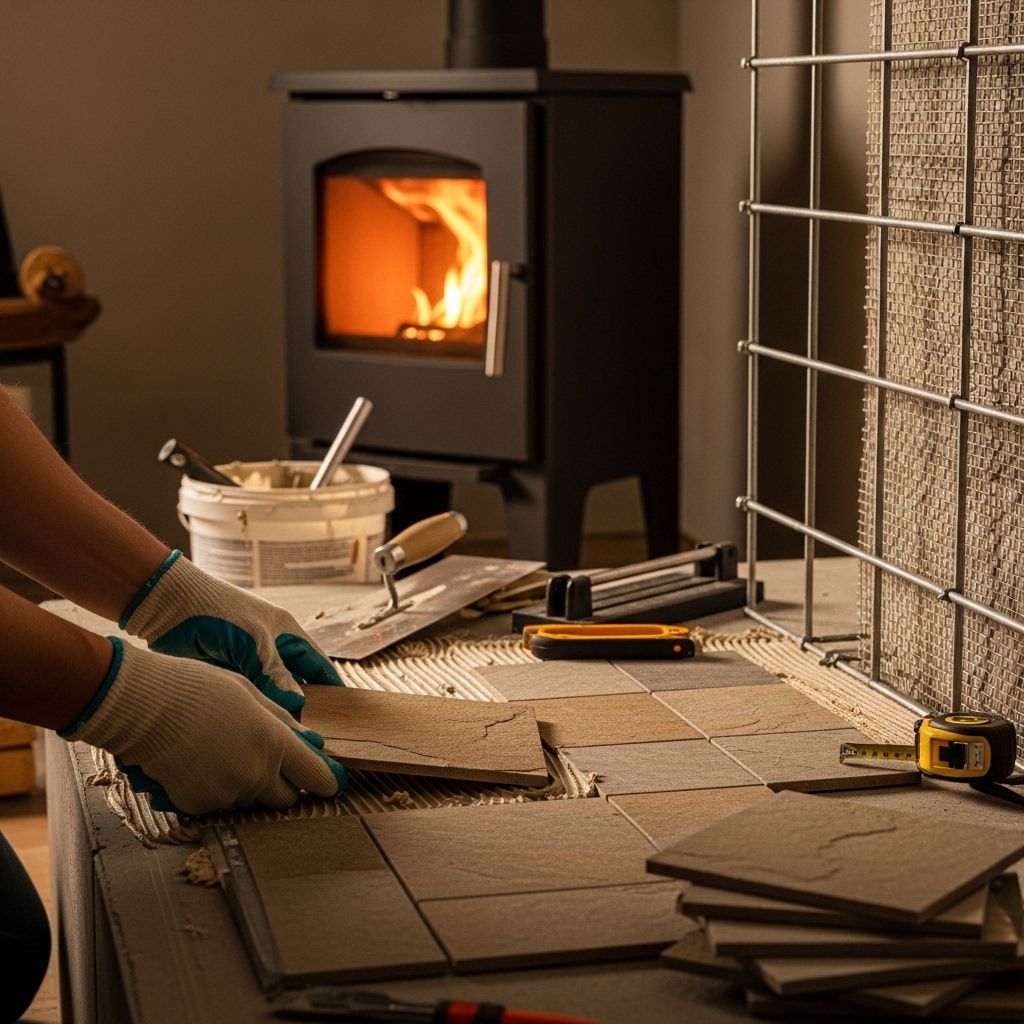
Adding a heat shield behind a wood stove is an essential step in protecting your home from excess heat and potential fire hazards. Properly installed, a tiled heat shield can reduce clearance requirements, create an attractive focal point, and enhance overall comfort and safety. This comprehensive guide walks you through every stage of tiling a heat shield—from understanding codes and choosing materials to cutting, laying, and finishing tiles with professional results.
Why You Need a Heat Shield
Wood stoves generate significant radiant heat, which poses risks to nearby walls, floors, and furnishings. A heat shield:
- Reduces the clearance required between the stove and combustible surfaces
- Protects walls and floors from damage or fire
- Creates a durable, easy-to-clean surface around the stove
- Provides an opportunity to add style to your hearth area
Whether modernizing your wood stove setup or installing a new one, a correctly built heat shield is a crucial investment in your family’s safety and your home’s value.
Understanding Heat Shield Codes and Requirements
Building codes and safety standards dictate how heat shields must be constructed. Always consult local building authorities and your stove manufacturer’s instructions. In North America, NFPA 211 and CSA B365 are key references. Some important standards include:
- Minimum air space (gap) between shield and combustible material: 1 inch (25 mm)
- Minimum extension of shield beyond the sides of appliances: 18 inches (450 mm)
- Minimum clearance along the bottom: 1 inch (25 mm); maximum 3 inches (75 mm)
- Minimum shield extension above appliance: 20 inches (500 mm)
- Materials: Non-combustible, such as tile over cement board, sheet metal, or brick
- Proper ventilation behind the shield to allow air flow
Heat shields can reduce clearance requirements by up to 67%, but you must verify manufacturer guidelines and local codes before proceeding.
Materials and Tools Needed
Gathering proper materials and tools ensures the quality and longevity of your heat shield. Recommended supplies include:
- Cement backer board (1/2 inch or thicker, non-combustible)
- Ceramic or porcelain tiles (fireproof, durable, easy to clean)
- Thinset mortar (rated for high heat applications)
- Tile spacers (for consistent joint size)
- Heat-resistant grout
- 1-inch non-combustible spacers or ceramic/metal standoffs
- Non-combustible screws and anchors
- Masonry drill bits
- Tile cutter or wet saw
- Level, measuring tape, pencil
- Notched trowel, grout float, sponge
- Protective gear: gloves, safety glasses, dust mask
Step 1: Plan Your Heat Shield Layout
Careful planning delivers safety and aesthetic appeal:
- Measure the area behind and around the wood stove, factoring in required extensions above, below, and to both sides
- Mark the outline of your heat shield on the wall using a level and pencil
- Plan tile layout to minimize awkward cuts and maximize symmetry
- Determine ideal tile orientation (horizontal, vertical, diagonal) for style and functionality
Table: Sample Heat Shield Dimensions
| Area | Minimum Extension |
|---|---|
| Sides of Appliance | 18 inches (450 mm) |
| Above Appliance | 20 inches (500 mm) |
| Bottom Clearance | 1-3 inches (25-75 mm) |
Step 2: Prepare the Wall Surface
- Remove any existing wall hangings, trim, or flammable materials in the marked area
- If current wall is combustible (wood paneling, drywall), install cement backer board spaced 1 inch away from the wall using metal or ceramic spacers
- Ensure the entire shield is surrounded by open air gaps on the bottom and top for ventilation
- Use only non-combustible mounting hardware, and anchor securely to studs or masonry
Tip: Never use plywood or drywall as backer behind a stove heat shield—even under tile—as these are flammable and unsafe under high heat.
Step 3: Install the Cement Board Heat Shield
- Precut cement backer board to fit your marked outline, including all required extensions
- Drill pilot holes and anchor 1-inch ceramic or metal spacers to the wall (avoid placing spacers directly behind hottest stove areas—placing them near corners/edges is safer)
- Fasten the cement board over spacers, ensuring a consistent 1-inch gap from the wall and openness at the bottom and top edges for airflow
- Verify the board is level and stable
Step 4: Dry Lay Tiles and Finalize Design
- Lay out tiles on the floor in your chosen pattern within the heat shield dimensions
- Use tile spacers to check joint spacing and alignment
- Make any necessary cuts on a tile cutter or wet saw for clean edges around the border and obstacles like pipes or outlets
- Transfer tile layout onto the mounted cement board with a pencil or chalk for guidance
Step 5: Apply Thinset and Set Tiles
- Mix high-heat thinset mortar according to manufacturer instructions
- Spread a small section onto the cement board using a notched trowel
- Set tiles one at a time, pressing firmly with slight twisting motion for good adhesion
- Insert spacers between tiles as you go for uniform grout lines
- Work in small sections to prevent thinset from drying before tiles are set
- Periodically check level and alignment, adjusting as needed
Step 6: Cut and Fit Border or Edge Tiles
- Carefully measure and cut edge pieces to maintain a consistent perimeter
- Smooth cut edges with a rubbing stone if needed
- Install border tiles following the same mortar technique
Step 7: Let Tiles Cure and Prepare for Grouting
- Allow tiles to set undisturbed for at least 24 hours (check thinset packaging for exact curing times)
- Remove tile spacers after initial curing
- Prepare heat-resistant grout according to instructions
Step 8: Grout and Finish the Heat Shield
- Press grout into joints with a rubber float, working diagonally to lines
- Wipe off excess grout with a damp sponge, rinsing frequently
- Smooth grout joints and neaten edges
- Allow grout to dry thoroughly (24–48 hours recommended)
- Polish tile surfaces as needed to remove haze
- (Optional) Apply a heat-safe grout sealer for added durability and stain protection
Step 9: Inspect, Restore Area, and Position Stove
- Inspect heat shield for solid installation, proper air gap, and surface completeness
- Reinstall trim or baseboard with appropriate clearance if necessary (only use non-combustible materials nearby)
- Position your wood stove according to code-specified or manufacturer-recommended clearances
- If needed, add a non-combustible hearth pad under and in front of the stove, adhering to safety guidelines on extension in all directions
Heat Shield Safety and Maintenance Tips
- Periodically inspect the shield for cracks or loose tiles and repair as necessary
- Clean with a non-abrasive, non-flammable cleaner
- Never hang combustible objects (e.g., curtains, décor) within clearance space around the shield or above the stove
- Maintain unobstructed airflow at the top and bottom of the shield
- Check local regulations whenever making changes to stove or shield design
Popular Design Ideas
- Patterned tile layouts (herringbone, subway, mosaic) for visual interest
- Contrasting grout colors for definition
- Natural stone or slate for a rustic effect
- Metal or stone border trim for durability at the edge
- Coordinating hearth pad and wall shield for a seamless look
Common Mistakes to Avoid
- Skipping the air gap between shield and wall, which negates heat reduction
- Using any combustible materials (wood, regular drywall) anywhere in the shield assembly
- Neglecting to follow tile manufacturer recommendations for high-temperature areas
- Blocking airflow with trim, baseboard, or furniture placed too close
- Failing to confirm compliance with local codes or stove manufacturer guidelines
Frequently Asked Questions (FAQs)
Q1: Can I use regular drywall or plywood behind heat shield tiles?
A: No. Only non-combustible cement board or metal is permitted behind tiles in a heat shield assembly. Avoid flammable materials even as a substrate.
Q2: Do I need to leave gaps around the edges of the heat shield?
A: Yes, code typically requires a 1-inch (25 mm) air gap between the shield and wall with clear openings at the top and bottom to allow air circulation. This cooling airflow is what reduces wall temperatures.
Q3: How much clearance do I need between my wood stove and the shield?
A: Check both local code and your stove manual. Properly ventilated heat shields can often reduce clearance by up to two-thirds, but always verify specifics for your system.
Q4: What type of tile is best for heat shields?
A: Ceramic and porcelain tiles are ideal due to fire resistance and easy cleaning. Natural stone and certain glass tiles are acceptable with proper backing and adhesives.
Q5: Can I install the heat shield in a corner or on a curved wall?
A: Yes, as long as minimum air gap, ventilation, and extension requirements are maintained. Custom-cut cement board and tile can be used for corners and curved surfaces.
Summary Table: Heat Shield Installation Checklist
| Step | Details |
|---|---|
| Planning | Measure, mark, choose materials, verify codes |
| Wall Prep | Remove combustibles, install 1” spacers |
| Backer Board | Mount non-combustible board with air gap |
| Tiling | Lay out, cut, and adhere tile |
| Grouting | Apply heat-resistant grout, seal if desired |
| Finishing | Inspect, restore area, maintain airflow |
Conclusion
Tiling a heat shield for your wood stove is a rewarding DIY project that combines safety with custom design. Careful planning, strict adherence to fire codes, and quality materials are the keys to a successful installation that will protect your home and enhance the beauty of your living space for years to come. Before starting, always check local regulations and consult your stove’s manual for specific requirements.
References
- https://www.tinywoodstove.com/clearance-requirements-shields/
- https://wett-inspection.com/building-heat-shield/
- https://www.youtube.com/watch?v=iI5zhftI13k
- https://www.hearth.com/talk/threads/heat-shield-behind-wood-stove-tiling-advice.48204/
- https://vlaze.co/setting-clearances-installing-heat-shields-for-your-fireplace/
- https://forum.nasaspaceflight.com/index.php?topic=50748.1980
Read full bio of Sneha Tete

