How To Texture A Wall: 7 DIY Texturing Methods For Pro Results
Transform your space effortlessly with simple techniques that conceal imperfections perfectly.
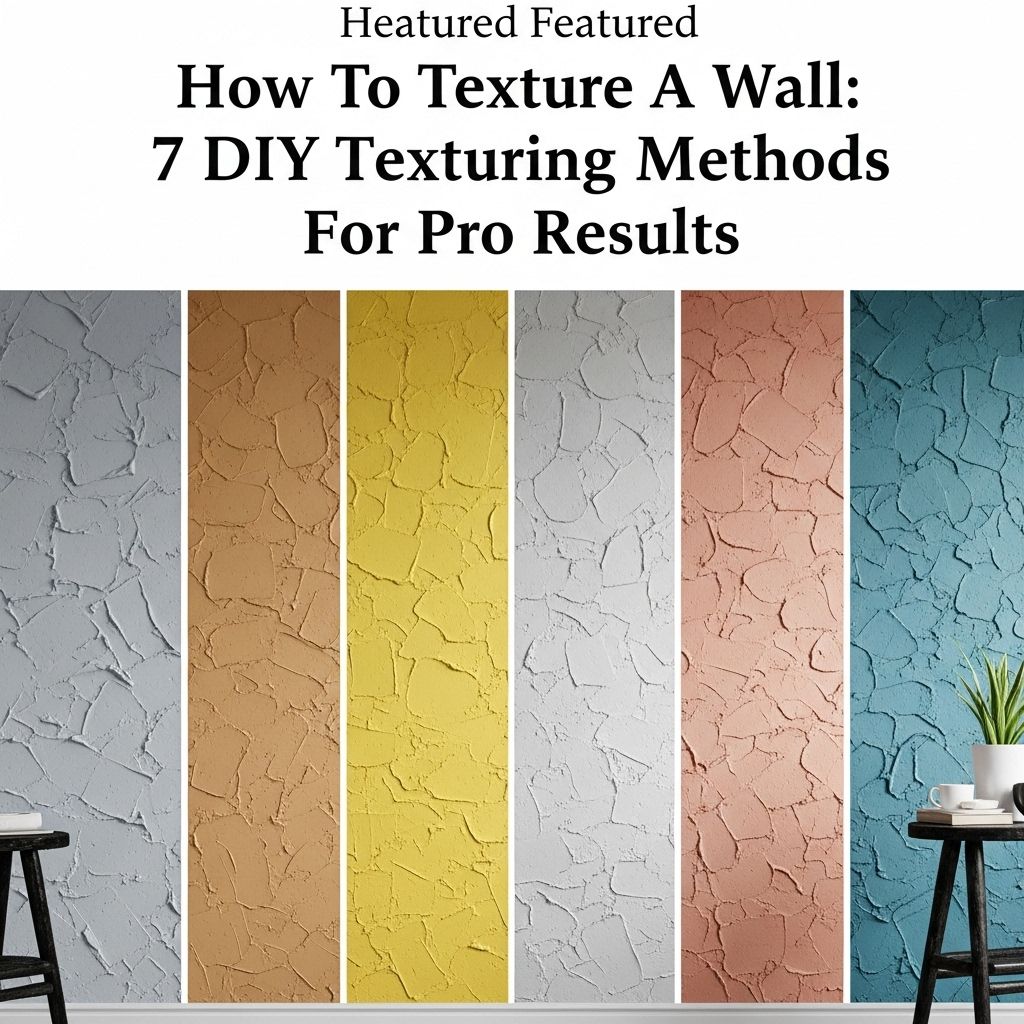
Image: HearthJunction Design Team
Texturing walls is one of the most effective ways to hide flaws from imperfect drywall work, create a rustic aesthetic, or simply add unique character to a room. Whether you’re dealing with visible seams, minor bulges, or small depressions in your walls, applying texture can be the perfect solution. The good news is that learning how to texture a wall isn’t complicated—the techniques closely resemble those used in painting, making this an accessible DIY project for homeowners of all skill levels.
This comprehensive guide walks you through how to texture a wall using either a paint roller with drywall compound or a texture machine for larger applications. We’ll explore different texturing styles, necessary materials, and step-by-step instructions to help you achieve professional-looking results.
Understanding Wall Texture and Its Benefits
Wall texture is a paste-like substance with a consistency thicker than paint but thinner than standard drywall compound. When applied to walls and ceilings, texture creates subtle shadows due to its natural peaks and valleys. This shadowing effect effectively conceals surface imperfections that might otherwise be noticeable under direct light.
Beyond hiding flaws, texturing offers several advantages:
- Adds visual interest and dimension to otherwise plain walls
- Creates a custom look that can complement your interior design style
- Provides sound dampening qualities in some cases
- Can be more forgiving for DIY enthusiasts than perfectly smooth walls
- Offers a cost-effective alternative to replacing damaged drywall
Types of Wall Texture
There are numerous wall texturing techniques available, each with its own unique appearance and level of difficulty. The right choice depends on your aesthetic preferences, the severity of wall imperfections, and your DIY comfort level.
Popcorn Texture
Popcorn texture features prominent peaks and a dramatic, dimensional appearance. This heavily textured finish is particularly effective for hiding major wall imperfections and was especially popular for ceilings from the 1950s through the 1980s. While it has fallen somewhat out of fashion in modern homes, it remains one of the most effective textures for concealing serious flaws.
Popcorn texture requires special equipment to apply properly and can be more challenging to clean and maintain than smoother textures. However, its superior concealing properties make it worth considering for significantly damaged surfaces.
Knockdown Texture
Knockdown texture offers a smoother, flattened, marbled appearance that many homeowners prefer for its sophisticated look. The application process involves spraying texture onto the wall then “knocking down” the peaks with a knockdown knife or trowel before they fully dry. This creates a distinctive pattern with subtle depth.
One significant advantage of knockdown texture is that it’s easier to paint than popcorn texture while still effectively hiding imperfections. It’s become increasingly popular in modern homes for its balance of practicality and visual appeal.
Orange Peel Texture
Orange peel texture features a lightly splattered look that, as the name suggests, resembles the surface of an orange. This subtle texture provides the most relaxed textured appearance while still effectively concealing minor wall flaws. It’s particularly popular in contemporary homes where a less dramatic texture is desired.
The orange peel finish is relatively easy to paint and clean, making it practical for everyday living spaces. It’s also one of the textures that looks closest to a flat wall surface while still offering imperfection-hiding benefits.
Comb Texture
Comb texture creates distinctive patterns of lines, waves, or swirls in wet compound using specialized comb tools. This decorative technique offers endless creative possibilities through different combing patterns and techniques. The finished look can range from subtle to dramatic depending on the tool used and the application method.
While comb texturing requires some practice to master, it allows for highly customized walls that can become a striking design feature in any room. The linear patterns can also help draw attention away from underlying wall imperfections.
Sand Swirl Texture
Sand swirl texture incorporates sand into the compound to create a rough texture with swirled details. The result is decorative half-circles that add movement and visual interest to walls. This technique combines the concealing benefits of texture with artistic patterns that can complement various interior design styles.
The addition of sand provides excellent coverage for imperfections while the swirled pattern adds a distinctive decorative element. This texture works particularly well in spaces where you want to create visual movement or a sense of flow.
Slap Brush Texture
Slap brush texture (sometimes called stomp brush) uses drywall compound and a specialized brush to create fan-like patterns on the wall. The technique involves “slapping” or “stomping” the brush against wet compound to create distinctive impressions. The resulting texture has excellent hiding properties while adding significant visual interest.
This technique allows for creative expression through different brush patterns and application pressure. The final appearance can range from subtle to dramatic depending on your application technique and the specific brush used.
Slap Brush Knockdown Texture
As the name suggests, slap brush knockdown combines both slap brush and knockdown techniques. First, the stomp-like effect of slap brush is applied, creating peaks and patterns in the compound. Then, before the compound fully dries, a knockdown knife is used to flatten the peaks slightly, creating a marbled effect while maintaining the distinctive pattern.
This hybrid technique offers excellent coverage for wall flaws while providing a sophisticated, multi-dimensional appearance. It’s particularly effective in spaces where you want significant textural interest without the maintenance challenges of more pronounced textures.
Materials and Tools Needed for Wall Texturing
Before beginning any wall texturing project, gather all necessary supplies to ensure a smooth workflow. The specific tools required may vary slightly depending on your chosen texture technique, but most projects will need:
Basic Supplies
- Drywall joint compound (pre-mixed or powder)
- Clean 5-gallon bucket (for mixing, if using powder compound)
- Drill with mixing paddle attachment
- Painter’s plastic or drop cloths
- Painter’s tape
- Clean water source
Application Tools
Depending on your chosen texture technique, you’ll need specific application tools:
- For roller textures: Texture roller with appropriate nap length
- For knockdown textures: Knockdown knife or trowel
- For popcorn textures: Hopper gun or texture sprayer
- For slap brush textures: Stipple brush (also called a stomp brush)
- For comb textures: Texturing comb or notched trowel
Safety Equipment
- Safety goggles or glasses
- Dust mask or respirator
- Work gloves
- Old clothing or coveralls
Preparing Walls for Texturing
Proper preparation is crucial for achieving professional-looking textured walls. Even though texturing helps hide imperfections, starting with the best possible surface will ensure optimal results.
Surface Cleaning and Repair
Begin by thoroughly cleaning the walls to remove dust, dirt, and grease. Repair any significant damage by filling holes with spackling compound and sanding smooth once dry. For larger repairs, patch with drywall and joint compound as needed. Allow all repairs to dry completely before proceeding.
Priming the Surface
Apply a coat of primer to the entire surface to be textured. Primer provides better adhesion for the texture material and helps ensure even absorption. Allow the primer to dry completely according to the manufacturer’s instructions before moving to the texturing phase.
Room Preparation
Texturing can be messy, so proper room preparation is essential:
- Remove furniture from the room or move it to the center and cover completely
- Cover floors with plastic sheeting or drop cloths
- Use painter’s tape to protect trim, windows, outlets, and switches
- Remove or cover light fixtures and ceiling fans
- Ensure good ventilation by opening windows if possible
Step-by-Step Wall Texturing Techniques
While each texturing method has its own specific application process, here are general guidelines for applying the most popular wall textures:
Roller Texture Application
For orange peel or light textures:
- Mix joint compound with water to achieve a thick paint-like consistency
- Pour the mixture into a paint tray
- Load a texture roller (with appropriate nap for desired texture depth)
- Apply the compound to the wall in sections, using even pressure
- Work in manageable areas, maintaining a wet edge
- Allow to dry completely before painting
Knockdown Texture Application
- Apply texture using a spray gun or roller for base layer
- Allow the texture to set slightly (15-30 minutes depending on humidity)
- Gently drag a knockdown knife or trowel across the surface to flatten peaks
- Work in sections, cleaning the knife frequently
- Maintain consistent pressure for even results
- Allow to dry completely before painting
Slap Brush Texture Application
- Apply a layer of thinned joint compound to the wall with a roller
- While the compound is still wet, press a stipple brush against the surface
- Twist or rotate the brush slightly between applications for varied patterns
- Continue across the wall, maintaining consistent coverage
- For slap brush knockdown, wait until partially set, then lightly flatten with a knockdown knife
- Allow to dry completely before painting
Comb Texture Application
- Apply a smooth layer of joint compound to the wall
- While still wet, drag the texturing comb through the compound
- Create patterns by moving the comb in straight lines, arcs, or swirls
- Work in sections to ensure compound remains workable
- Allow to dry completely before painting
Tips for Professional-Looking Results
Achieving professional-quality textured walls requires attention to detail and proper technique. Here are some expert tips to help you succeed:
- Practice your chosen texture technique on a scrap piece of drywall or inconspicuous area first
- Maintain consistent compound thickness for even texture throughout
- Work in manageable sections, especially in hot or dry conditions when compound dries quickly
- Clean tools frequently during application to prevent dried compound from affecting texture patterns
- For multi-person projects, assign specific roles to ensure consistency in application technique
- Apply texture in good lighting conditions to better see coverage and pattern development
Painting Textured Walls
Once your texture has completely dried (typically 24-48 hours depending on texture thickness and humidity), you can paint the surface. Textured walls require special painting considerations:
- Use a high-quality primer specifically designed for textured surfaces
- Select a paint roller with a nap appropriate for your texture depth (deeper textures require longer nap)
- Apply paint in multiple directions to ensure complete coverage of all texture surfaces
- Plan for increased paint consumption—textured walls require 15-30% more paint than smooth surfaces
- Consider using a paint sprayer for very heavy textures like popcorn
Maintaining Textured Walls
Proper maintenance will keep your textured walls looking their best for years to come:
- Dust textured walls regularly using a vacuum with brush attachment or microfiber duster
- Clean stains promptly using a damp cloth and mild detergent
- Avoid scrubbing heavily textured surfaces, which can damage the texture
- Touch up damaged areas by matching the original texture technique in small sections
- Repaint as needed, following the same painting guidelines used initially
Frequently Asked Questions (FAQs)
Q: Can I texture over painted walls?
A: Yes, you can texture over painted walls, but proper preparation is essential. Clean the surface thoroughly, repair any damage, and apply a bonding primer before texturing to ensure proper adhesion.
Q: How much does wall texturing cost compared to smooth walls?
A: DIY wall texturing typically costs less than achieving perfectly smooth walls, as texturing requires less precision and can hide imperfections. Professional texturing services usually range from $1-3 per square foot depending on the complexity of the chosen texture.
Q: Can wall texture be removed if I change my mind later?
A: Yes, wall texture can be removed, though it requires significant effort. Methods include scraping, sanding, applying a skim coat, or in some cases, covering with new drywall. The difficulty depends on the texture type and depth.
Q: What’s the best texture for a bathroom or kitchen?
A: For moisture-prone areas like bathrooms and kitchens, choose a smoother texture like orange peel or light knockdown that’s easier to clean and less likely to trap moisture. Always use mildew-resistant paint on textured surfaces in these rooms.
Q: How do I repair damaged textured walls?
A: For small repairs, scrape away damaged texture, apply joint compound, and recreate the texture using the same technique as the original. For larger areas, you may need to retexture the entire wall section to ensure consistent appearance.
References
- https://www.thespruce.com/hide-flaws-with-stipple-texture-4121027
- https://westlakehardware.com/resources/tips-tricks/hide-your-homes-wall-flaws-with-beautiful-texturing-techniques/
- https://www.youtube.com/watch?v=CKeXQRSjk_M
- https://timothystoolbox.com/blogs/blog/the-ultimate-guide-to-concealing-drywall-imperfections
Read full bio of Shinta


