How To Clean Coffee Maker With Vinegar: Step-By-Step Guide
Refresh your brew machine effortlessly using natural tricks for a spotless, tasty cup daily.

Image: HearthJunction Design Team
How to Clean a Coffee Maker with Vinegar: A Complete Guide
Your morning coffee is a sacred ritual, but have you noticed a change in the taste lately? That bitter flavor might not be the coffee beans—it could be your coffee maker begging for a deep clean. Over time, mineral deposits, coffee oils, and even mold can build up inside your machine, affecting both the flavor of your brew and the efficiency of your coffee maker. The good news? Cleaning your coffee maker is a simple process that can be done with basic household ingredients, primarily white vinegar.
Regular cleaning not only improves the taste of your coffee but also extends the life of your machine and ensures you’re not consuming any unwanted bacteria with your morning cup. In this comprehensive guide, we’ll walk you through everything you need to know about cleaning your coffee maker with vinegar—from why it’s necessary to step-by-step instructions for different types of machines.
Why You Should Clean Your Coffee Maker Regularly
Before diving into the cleaning process, it’s important to understand why regular maintenance is crucial for your coffee maker. Here are the main reasons you shouldn’t skip this household chore:
- Better-tasting coffee: Old coffee residue and mineral buildup can give your coffee a bitter, unpleasant taste.
- Improved machine performance: Mineral deposits can clog the water flow, making your machine less efficient and potentially shortening its lifespan.
- Elimination of bacteria and mold: The warm, moist environment inside your coffee maker is the perfect breeding ground for bacteria and mold, which can be harmful to your health.
- Energy efficiency: A clean machine operates more efficiently, potentially saving you money on electricity.
How Often Should You Clean Your Coffee Maker?
The frequency of cleaning depends on how often you use your coffee maker and the hardness of your water. As a general rule:
- Daily use: Deep clean with vinegar once a month
- Weekly use: Deep clean every three months
- Hard water areas: Clean more frequently, possibly every two weeks if you use it daily
Regardless of frequency, you should rinse the removable parts of your coffee maker after each use to prevent immediate buildup of coffee oils and residue.
Signs Your Coffee Maker Needs Cleaning
Not sure if it’s time to clean your coffee maker? Watch for these telltale signs:
- Your coffee tastes bitter or unusual
- Brewing takes longer than normal
- Your coffee isn’t as hot as it should be
- You can see mineral buildup (white, chalky substance) inside the machine
- The coffee maker makes more noise during brewing
- The machine stops working before completing a brew cycle
What You’ll Need
Cleaning your coffee maker with vinegar is straightforward and requires just a few basic items:
- White vinegar (distilled)
- Water
- Fresh coffee filters (if your machine uses them)
- Warm, soapy water (for cleaning the carafe and filter basket)
- Soft cleaning cloth or sponge
- Small brush (optional, for hard-to-reach areas)
Step-by-Step Guide to Cleaning a Drip Coffee Maker with Vinegar
Follow these simple steps to get your drip coffee maker sparkling clean and producing delicious coffee again:
Step 1: Empty and Rinse the Coffee Maker
Begin by emptying any old coffee and used grounds from the machine. Remove the carafe and filter basket, and give them a quick rinse with warm water.
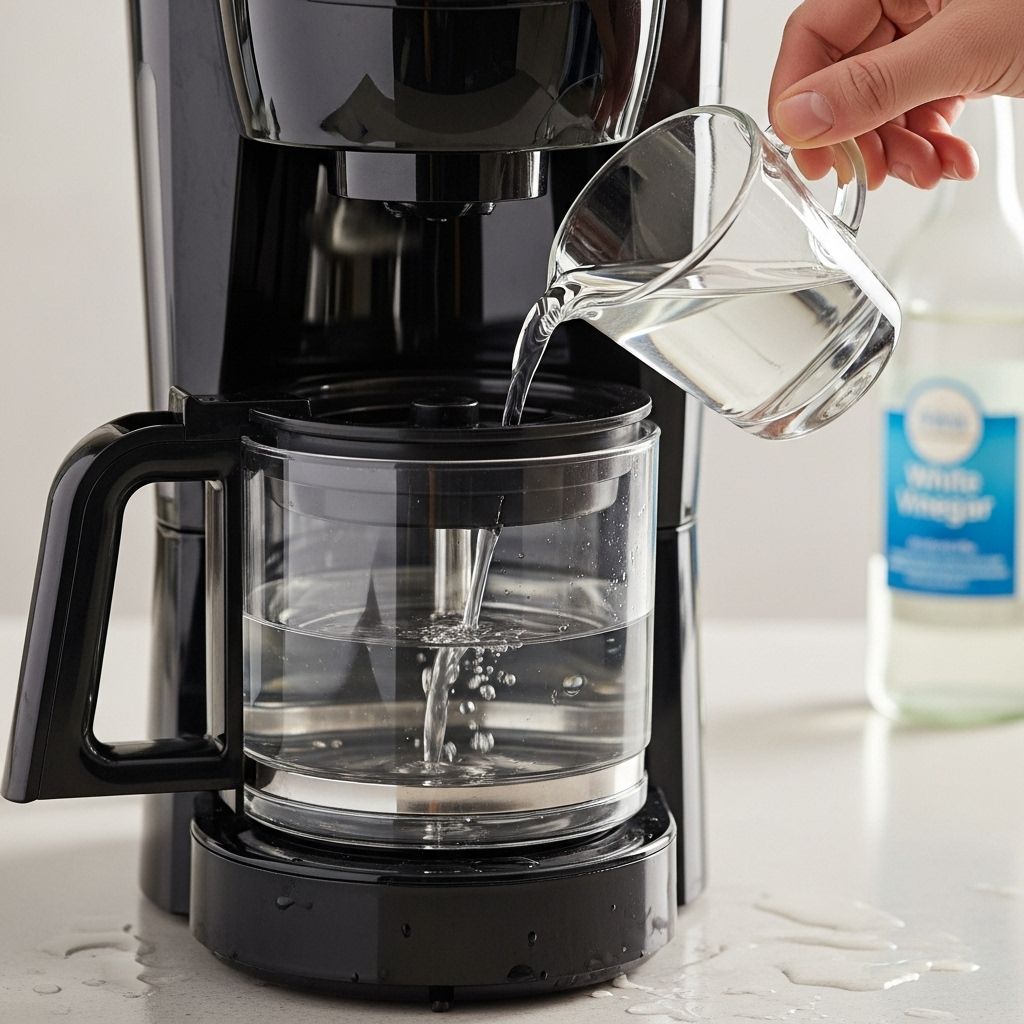
Step 2: Prepare the Vinegar Solution
Fill the water reservoir halfway with white vinegar, then fill the rest with water. The ideal ratio is 1:1, but if your coffee maker has significant mineral buildup, you might want to use a stronger solution with a bit more vinegar.
Step 3: Start a Brew Cycle
Place a clean filter in the basket (if your machine uses one) and position the carafe on the warming plate. Start a brew cycle and let it run until the carafe is approximately half full.
Step 4: Let It Sit
Turn off the coffee maker and let the vinegar solution sit in both the carafe and the reservoir for about 30-60 minutes. This extended contact time allows the vinegar to dissolve mineral deposits and break down any buildup inside the machine.
Step 5: Complete the Brew Cycle
After the resting period, turn the coffee maker back on and let it complete the brewing cycle. The vinegar solution will finish passing through the machine, cleaning as it goes.
Step 6: Discard the Vinegar Solution
Once the cycle is complete, discard the vinegar solution from the carafe. Remove and discard the used filter if applicable.
Step 7: Run Water Cycles
To remove any lingering vinegar taste or smell, fill the water reservoir with fresh, clean water and run a complete brew cycle. Discard this water, then repeat the process at least once more. Some experts recommend running three water cycles to ensure all vinegar residue is removed.
Step 8: Clean Removable Parts
While the water cycles are running, take the opportunity to clean the removable parts of your coffee maker. Wash the carafe, filter basket, and lid in warm, soapy water. For stubborn stains in the carafe, try a mixture of baking soda and water.
Step 9: Wipe Down the Exterior
Use a damp cloth to wipe down the exterior of the coffee maker, including the warming plate (once it’s cool). Pay special attention to the area under the filter basket, which can collect coffee splatter.
Cleaning Other Types of Coffee Makers
Single-Serve Coffee Makers (Keurig, Nespresso, etc.)
Single-serve machines require a slightly different approach:
- Remove any pods and empty the water reservoir
- If your machine has a descale mode, use it with the vinegar solution
- If not, fill the reservoir with the vinegar solution and run several brewing cycles without a pod
- Let the machine sit for 30 minutes, then run several water-only cycles to rinse
- Clean removable parts like the drip tray and pod holder separately
French Press
For French press coffee makers:
- Disassemble all parts
- Wash with warm, soapy water
- For stubborn residue, soak in a vinegar solution for 15 minutes
- Rinse thoroughly and allow to dry completely before reassembling
Espresso Machines
Espresso machines often have manufacturer-specific cleaning instructions, but generally:
- Follow the manufacturer’s descaling instructions, often using a vinegar solution or commercial descaler
- Clean the portafilter, basket, and steam wand after each use
- Wipe down the group head regularly
- Run clean water through the system after descaling
Alternative Cleaning Solutions
If you’re out of vinegar or prefer a different cleaning method, try these alternatives:
Lemon Juice
Lemon juice contains citric acid, making it an effective natural descaler. Use the same ratio as vinegar (1:1 with water) and follow the same process.
Baking Soda
Baking soda is excellent for cleaning the carafe and removing coffee stains:
- Fill the reservoir with warm water and add ¼ cup of baking soda
- Run a brew cycle and discard the solution
- Run several water-only cycles to rinse
- For the carafe, make a paste with baking soda and water to scrub away stains
Commercial Descaling Solutions
Many manufacturers sell descaling solutions specifically formulated for coffee makers. These are particularly useful for machines with special requirements or where warranties specify using only approved cleaners.
Maintaining Your Coffee Maker Between Deep Cleanings
To keep your coffee maker in top condition between deep cleanings:
- Rinse the carafe and filter basket after each use
- Leave the reservoir lid open after use to allow moisture to evaporate
- Use filtered water to reduce mineral buildup
- Wipe down the exterior weekly to prevent dust accumulation
- Replace water filters (if your machine has them) according to the manufacturer’s recommendations
Troubleshooting Common Issues
Coffee Maker Still Brewing Slowly After Cleaning
If your coffee maker is still slow after cleaning, try:
- Repeating the vinegar cleaning process with a stronger solution
- Checking for clogs in the water intake valve
- Ensuring the heating element is functioning properly
Vinegar Smell or Taste Persists
If your coffee still tastes or smells like vinegar:
- Run additional water-only cycles until the smell disappears
- Try using a baking soda solution (2 tablespoons in a full reservoir) to neutralize the acid
Coffee Maker Leaking After Cleaning
Leaking issues might be due to:
- Improper reassembly of parts
- Damaged seals that need replacement
- Overfilling the water reservoir
Frequently Asked Questions (FAQs)
Q: Can I use apple cider vinegar instead of white vinegar?
A: Yes, you can use apple cider vinegar, but keep in mind it has a stronger smell and taste that might be harder to remove. White vinegar is generally preferred for its milder properties.
Q: How much vinegar should I use to clean my coffee maker?
A: A 1:1 ratio of vinegar to water is standard for regular cleaning. For machines with heavy mineral buildup, you can increase to a 2:1 ratio (two parts vinegar to one part water).
Q: Is it safe to clean a coffee maker with vinegar?
A: Yes, vinegar is a safe, natural cleaning agent that effectively removes mineral deposits and kills bacteria without leaving harmful chemical residues.
Q: Can I put my coffee maker parts in the dishwasher?
A: This depends on your specific model. Many glass carafes and plastic filter baskets are dishwasher-safe, but always check your manufacturer’s instructions to be sure.
Q: How do I know if my coffee maker has mineral buildup?
A: Signs include white, chalky residue inside the water reservoir or on heating elements, slower brewing times, and unusual noises during the brewing process.
Conclusion
Regular cleaning of your coffee maker with vinegar is a simple yet effective way to maintain the quality of your daily brew while extending the life of your machine. By following the steps outlined in this guide, you can remove mineral deposits, eliminate bacteria, and ensure your coffee always tastes its best.
Remember that prevention is key—rinsing parts after each use and performing regular maintenance will reduce the need for deep cleaning and keep your coffee maker running smoothly. Whether you’re using a basic drip machine or a high-end espresso maker, the principles of regular cleaning remain the same: remove buildup, sanitize components, and rinse thoroughly.
Now that you know how to properly clean your coffee maker, you can look forward to better-tasting coffee and a longer-lasting machine. The next time your morning brew tastes a bit off, you’ll know exactly what to do!
References
- https://www.youtube.com/watch?v=6sljxGhBsmU
- https://www.mrcoffee.com/blog/how-to-clean-your-coffee-maker-the-easy-way.html
- https://www.youtube.com/shorts/6tBt8sD1cs0
- https://www.mollymaid.com/practically-spotless/2019/september/coffee-pot-maintenance-vinegar-vs-descaler/
- https://garden.home.narkive.com/mZepz374/how-to-clean-out-my-coffee-machine
Read full bio of medha deb


