Complete Guide to Skin Graft and Flap Post-Surgery Care
Clear steps to speed healing, ease discomfort, and support lasting scar improvement.

Table of Contents
- Understanding Skin Grafts and Flaps
- Immediate Post-Operative Care
- Dressing Management and Changes
- Proper Positioning and Elevation
- Wound Care Protocol by Timeline
- Typical Post-Operative Symptoms
- Warning Signs Requiring Immediate Medical Attention
- Activity Restrictions and Exercise Guidelines
- Long-Term Scar Management
- Donor Site Care Instructions
- Frequently Asked Questions
Understanding Skin Grafts and Flaps
Skin grafts and flaps are reconstructive surgical procedures used to repair damaged, diseased, or missing skin tissue. A skin graft involves transplanting skin from one area of the body (donor site) to another area that needs coverage. A skin flap involves moving skin along with its underlying blood supply from an adjacent area to cover a defect while maintaining its original blood circulation.
Both procedures require meticulous post-operative care to ensure proper healing, minimize complications, and achieve optimal cosmetic and functional outcomes. The success of these procedures largely depends on following specific care instructions during the healing process.
Immediate Post-Operative Care
First 24-48 Hours
The initial post-operative period is critical for graft and flap survival. During this time, the newly transplanted or repositioned tissue must establish adequate blood supply and nutrition from the recipient site. Immobilization and protection are paramount during this phase.
Pain and discomfort are normal during the first few days following surgery. Your surgeon will prescribe appropriate pain medication to help manage discomfort while allowing you to rest and heal properly. It is important to take medications as directed and not exceed recommended dosages.
Temperature and Environmental Control
Maintain a comfortable room temperature and avoid exposure to extreme heat or cold, which can affect circulation to the graft or flap area. Smoking and exposure to secondhand smoke should be completely avoided, as nicotine significantly impairs blood circulation and healing.
Dressing Management and Changes
Pressure Dressings for Large Grafts
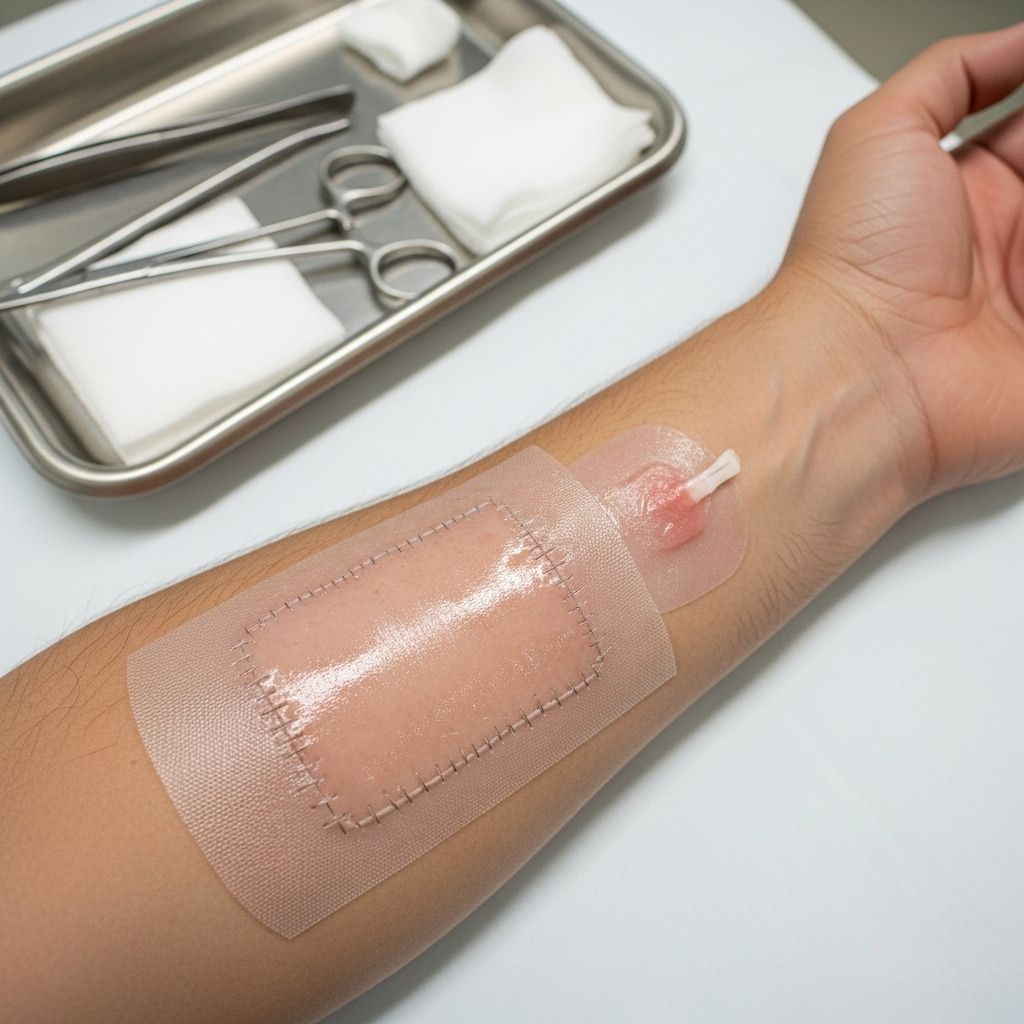
Larger skin grafts typically require pressure dressings to ensure proper contact between the graft and the recipient site. These specialized dressings help the graft receive essential nutrients from the underlying tissue and prevent fluid accumulation that could compromise graft survival.
Important: Any dressing that is sewn onto the skin must not be tampered with prior to removal by your doctor. The edges of the dressing may be kept moist using petroleum jelly (Vaseline), which helps prevent crusting of old blood that may accumulate around the edges.
Small Graft Dressings
Small skin grafts may not require pressure dressings. In these cases, follow the standard wound care protocol outlined by your surgeon. Keep the area clean and moist using prescribed ointments or petroleum jelly.
Showering and Bathing Guidelines
You may shower or bathe the day following your operation, but you must ensure the dressings stay dry and in place until your first post-operative appointment. Use waterproof coverings or avoid direct water contact with the surgical site. Your incisions may seep some fluid and blood for a short time following surgery; you may gently clean around the area to remove dried drainage using sterile saline or prescribed cleaning solutions.
Proper Positioning and Elevation
Position Based on Surgery Location
Proper positioning is crucial for optimal healing and reducing swelling:
Face and Upper Body Surgeries: A reclined position is best for grafts or flaps on the face or upper body. Keep your head elevated on multiple pillows when resting or sleeping to reduce swelling and promote drainage.
Lower Body Surgeries: If your surgical site is on the lower body, keep your legs elevated above heart level when possible. Use pillows or a reclining chair to maintain proper elevation during rest periods.
Duration of Elevation
For the first week following your procedure, the affected limb should be elevated during the day and when sleeping. This helps reduce swelling, improves circulation, and promotes faster healing. Consistent elevation is particularly important during the first 72 hours post-surgery.
Wound Care Protocol by Timeline
Days 1-7: Initial Healing Phase
During the first week, apply antibiotic ointment OR petroleum jelly (Vaseline) multiple times daily. The surgical site should be protected from drying out at ALL TIMES. This maintains a moist healing environment that promotes faster tissue repair and reduces scarring.
Clean the area gently with prescribed solutions and avoid scrubbing or aggressive cleaning that could disturb the healing tissue. Pat the area dry with a clean, soft towel and immediately apply the recommended moisturizing agent.
Days 7-21: Early Healing and Scar Formation
Continue applying petroleum jelly 3-4 times daily along with gentle massage to the developing scar. Massage helps improve circulation, reduces scar tissue formation, and maintains skin flexibility. Use light, circular motions with clean hands.
During this period, the scar may appear raised and red, which is completely normal. The tissue is rebuilding and establishing new blood supply patterns.
3 Weeks to 3 Months: Scar Maturation
Apply silicone gel or silicone sheets to the scar for a minimum of 12 hours daily. Initially, silicone products may make the scar appear slightly more red; however, silicone is proven to soften and fade scars with regular use up to 3 months after the operation.
Silicone creates an optimal healing environment by maintaining proper moisture levels and providing gentle pressure that helps remodel scar tissue.
Typical Post-Operative Symptoms
Normal Healing Responses
The following symptoms are normal and expected during the healing process:
Tingling and Burning: These sensations occur as sensory nerves regenerate and heal. This process can continue for several weeks to months as nerve function gradually returns.
Redness and Tightness: The surgical and donor sites will appear red and feel tight as tissues heal and adapt to their new position. This is part of the normal inflammatory response to surgery.
Shiny Skin: Swelling can cause the skin to appear shiny and stretched. This typically resolves as swelling subsides over the first few weeks.
Itching: Mild to severe itching at wound sites is common as healing progresses. An antihistamine like Benadryl can help alleviate severe, constant itchiness that interferes with sleep or daily activities.
Warning Signs Requiring Immediate Medical Attention
Contact your surgeon’s office immediately if you experience any of the following symptoms:
- High fever over 101°F (38.3°C), severe nausea and vomiting, continued dizziness, or incoherent behavior such as hallucinations
- Uncontrolled pain that cannot be managed with prescribed pain medication
- Bright red skin that is hot to the touch, indicating possible infection
- Excessive bleeding or fluid seeping through the incisions that saturates dressings
- Severely misshapen or swollen appearance at the wound site that worsens rather than improves
- Signs of infection: Pus discharge with odor, increased redness spreading beyond the surgical site, or red streaking from the wound
Activity Restrictions and Exercise Guidelines
First Week Restrictions
Avoid bending, straining, and heavy lifting for the first week following surgery. These activities can aggravate swelling and may elevate blood pressure, potentially causing bleeding at the surgical site.
Driving: You are not permitted to drive or operate machinery for 24 hours post-surgery. You may resume driving when your wound and pain medication no longer impede your functionality and reaction times.
Medications: Do not take aspirin for at least 10 days following surgery, as this can increase the risk of bleeding. Use alternative pain relievers as recommended by your surgeon.
Gradual Return to Activities
After approximately one week, you may resume light exercise, lifting of moderate weights (such as children), and household duties such as cleaning. Listen to your body and avoid activities that cause pain or excessive swelling.
Vigorous exercise and intense physical activity can usually be resumed after 2 weeks, but always confirm with your surgeon before returning to strenuous activities.
Long-Term Scar Management
Scar Evolution Timeline
Skin graft and flap scars will generally be slightly red and raised for a few months and then begin to fade. The healing process follows a predictable pattern: scars are often raised and red at 2-3 weeks, then soften and fade over the course of a year.
It can take up to 18 months for a scar to fully mature, usually leaving a pale, soft, flat, and supple surface. During your second post-operative visit, you will receive advice on the most effective scar management options to ensure the best possible outcome.
Sun Protection
Scars are extremely sensitive to sun exposure and sunburn. Follow these critical sun protection guidelines:
- Ensure the wound is not exposed to direct sunlight for the first month
- After the first month, always use sunscreen with minimum SPF 30+ and wear protective hats
- Continue sun protection for the full first year following surgery
- If scars are exposed to sun without protection, they may turn dark permanently – this process is irreversible
Advanced Scar Treatment Options
If abnormal scarring develops (usually evident from the 4th week), discuss with your surgeon the use of injectable medications such as steroids that may improve scar appearance. Other treatment options may include laser therapy, dermabrasion, or revision surgery in severe cases.
Donor Site Care Instructions
Immediate Donor Site Care
If you received a skin graft, you will have a donor site that requires specific care:
- Remove dressing 24 hours after surgery
- Apply adhesive remover (such as Detachol) on any tape remaining on the skin
- Allow to soak for 1-2 minutes, then gently peel the tape off like a bandage
- Cleanse the area with a solution of half hydrogen peroxide and half water
- Apply petroleum jelly (Vaseline) to keep the area moist
Long-term Donor Site Management
Donor sites typically heal faster than graft sites but require ongoing care to minimize scarring. Follow the same scar management protocols outlined for the primary surgical site, including sun protection and moisturization.
Frequently Asked Questions
Q: How long does it take for a skin graft to fully heal?
A: Initial healing occurs within 2-3 weeks, but complete maturation of the graft and surrounding tissue can take 12-18 months. The graft will continue to improve in appearance and function during this time.
Q: Can I get the surgical site wet during healing?
A: You may shower the day after surgery, but keep dressings dry until your first follow-up appointment. After dressing removal, gentle washing with mild soap and water is usually permitted.
Q: When can I return to work after skin graft surgery?
A: Return to work depends on your job requirements and the location of your surgery. Office work may be possible within a few days to a week, while physical labor may require 2-4 weeks of recovery.
Q: Is it normal for the graft to look different from surrounding skin?
A: Yes, initially the graft may appear different in color and texture. Surgeons select donor sites with the closest possible match, but some differences may persist. The appearance typically improves significantly over 12-18 months.
Q: What should I do if I notice signs of infection?
A: Contact your surgeon immediately if you notice pus discharge, increasing redness, red streaking, fever, or worsening pain. Early intervention is crucial for treating infections effectively.
Q: How can I minimize scarring at both the graft and donor sites?
A: Follow your surgeon’s wound care instructions precisely, use silicone products as recommended, protect from sun exposure, maintain proper nutrition, avoid smoking, and attend all follow-up appointments for optimal scar management.
References
- https://sydneycentreent.com.au/wp-content/uploads/2020/06/Wound-Care-of-Skin-Grafts-flaps-and-scars.pdf
- https://surekplasticsurgery.com/wp-content/uploads/2016/09/Skin-Grafts-and-Flaps-Post-Op.pdf
- http://www.randwickplasticsurgery.com.au/wp-content/uploads/2018/10/Skin-Flaps-Grafts-Surgery-Post-operative-instructions.pdf
- https://www.med.umich.edu/1libr/OTO/ForheadFlap.pdf
- https://myhealth.alberta.ca/Health/aftercareinformation/pages/conditions.aspx?hwid=zc2700
- https://iowaprotocols.medicine.uiowa.edu/protocols/post-operative-care-flap-patient-nursing-protocol
- https://www.ncbi.nlm.nih.gov/books/NBK551561/
- https://www.southtees.nhs.uk/resources/skin-grafting-and-donor-site-care/
- https://mydoctor.kaiserpermanente.org/ncal/article/wound-care-instructions-after-mohs-surgery-with-flap-dsa-plastic-surgery-1556156
Read full bio of medha deb


