Prepping Skin for Sheet Mask Absorption: Complete Guide to Maximum Benefits
A gentle routine clears barriers and primes your complexion for optimal nutrient delivery.

Table of Contents
- Introduction to Sheet Mask Preparation
- Why Proper Skin Prep Matters
- Step 1: Deep Cleansing for Clean Canvas
- Step 2: Gentle Exfoliation
- Step 3: Steam Treatment for Open Pores
- Step 4: pH Balancing with Toner
- Proper Sheet Mask Application
- Optimal Timing and Duration
- Post-Mask Care
- Common Mistakes to Avoid
- Frequently Asked Questions
Introduction to Sheet Mask Preparation
Sheet masks have revolutionized the skincare industry, offering a convenient way to deliver concentrated nutrients directly to your skin. However, many people fail to realize that the secret to maximizing sheet mask benefits lies not just in the mask itself, but in how you prepare your skin beforehand. Proper skin preparation can significantly enhance absorption rates, ensuring that every drop of serum penetrates deeply into your skin layers for optimal results.
Unlike traditional face masks, sheet masks are designed to create a barrier that prevents evaporation while allowing active ingredients to infuse into your skin. This unique delivery system requires a clean, receptive canvas to work effectively. When your skin is properly prepped, it becomes more permeable and ready to absorb the beneficial ingredients contained in the mask’s essence.
Why Proper Skin Prep Matters
The effectiveness of any sheet mask depends heavily on your skin’s ability to absorb its active ingredients. Several factors can impede this absorption process, making proper preparation crucial for achieving desired results.
Barriers to Absorption
Your skin naturally contains barriers that can prevent optimal sheet mask absorption. Dead skin cells, excess oil, makeup residue, and environmental pollutants create a layer that blocks ingredients from penetrating deeply. Additionally, closed pores limit the pathways through which nutrients can enter your skin.
Enhanced Penetration Benefits
When you properly prepare your skin, you remove these barriers and create optimal conditions for ingredient absorption. This enhanced penetration leads to more visible results, including improved hydration, reduced fine lines, enhanced elasticity, and a more radiant complexion. The time and effort invested in preparation directly correlates with the effectiveness of your sheet mask treatment.
Step 1: Deep Cleansing for Clean Canvas
The foundation of effective sheet mask preparation begins with thorough cleansing. This step removes surface impurities that could interfere with ingredient absorption.
Double Cleansing Method
Professional estheticians recommend the double cleansing method for optimal results. Start with an oil-based cleanser to dissolve makeup, sunscreen, and sebum. Oil-based products are particularly effective at breaking down waterproof cosmetics and deeply embedded impurities that water-based cleansers might miss.
Apply the oil cleanser to dry skin using gentle, circular motions. Focus on areas where makeup tends to accumulate, such as around the eyes and nose. Rinse thoroughly with lukewarm water to remove the oil and dissolved impurities.
Aqueous Cleansing
Follow the oil cleanse with a water-based cleanser such as a gel, foam, or milk cleanser. This second step removes any remaining residue from the first cleanse while addressing specific skin concerns. For acne-prone skin, choose a salicylic acid cleanser. For sensitive skin, opt for a gentle, fragrance-free formula.
Use light, circular motions to work the cleanser across your entire face, including the hairline and jawline. These often-neglected areas can harbor bacteria and product buildup that might interfere with mask effectiveness.
Step 2: Gentle Exfoliation
Exfoliation removes dead skin cells that can prevent sheet mask ingredients from penetrating effectively. However, it’s crucial to use gentle methods that won’t irritate or damage your skin barrier.
Physical Exfoliation
Choose a scrub with fine, smooth particles rather than harsh, jagged ones that could create micro-tears in your skin. Natural options include finely ground rice, oatmeal, or sugar. Apply the scrub to damp skin and use gentle, circular motions, working from the center of your face outward.
Pay special attention to areas prone to dead skin buildup, such as the T-zone, but avoid the delicate eye area. Limit physical exfoliation to once or twice per week to prevent over-exfoliation.
Chemical Exfoliation Alternative
For sensitive skin types, chemical exfoliants like alpha-hydroxy acids (AHAs) or beta-hydroxy acids (BHAs) provide gentler alternatives to physical scrubs. Apply a mild AHA or BHA toner 15-20 minutes before your sheet mask to allow time for the acids to work without causing irritation when combined with mask ingredients.
Step 3: Steam Treatment for Open Pores
Steam treatment is a professional technique that significantly enhances sheet mask absorption by opening your pores and increasing skin temperature, which improves circulation and ingredient penetration.
At-Home Steaming Methods
The most accessible method involves filling a large bowl with hot water and creating a tent over your head with a clean towel. Lean over the bowl, keeping your face 12-18 inches from the water to avoid burns. Steam for 5-10 minutes, taking breaks if you feel overheated.
Alternatively, you can achieve similar results by taking a warm shower before your sheet mask routine. The steam from the shower naturally opens your pores while the warm water increases blood flow to your face.
Quick Steam Alternative
If you’re short on time, soak a clean washcloth in very warm water and place it over your face for 3-5 minutes. This method provides localized steam that opens pores without requiring a full steam setup.
Step 4: pH Balancing with Toner
Toning is perhaps the most crucial yet overlooked step in sheet mask preparation. A quality toner balances your skin’s pH level and creates optimal conditions for ingredient absorption.
Post-Cleansing pH Balance
Cleansing, especially with alkaline products, can disrupt your skin’s natural pH balance. Your skin’s optimal pH ranges from 4.5 to 6.5, slightly acidic conditions that support the skin barrier and beneficial bacteria. Toner restores this balance, creating an environment where sheet mask ingredients can penetrate more effectively.
Hydrating Preparation
Choose a hydrating toner rather than an astringent formula that might strip your skin. Look for ingredients like hyaluronic acid, glycerin, or botanical extracts that provide moisture while preparing your skin for the sheet mask. Apply the toner with a cotton pad or pat it directly onto your skin with clean hands.
Toner Application Technique
Apply toner in upward motions, starting from your chin and working toward your forehead. Don’t forget your neck and décolletage, as these areas can also benefit from sheet mask treatment. Allow the toner to fully absorb before proceeding to the next step.
Proper Sheet Mask Application
Once your skin is properly prepared, the application technique becomes crucial for maximizing the mask’s effectiveness.
Pre-Application Tips
For an enhanced experience, refrigerate your sheet mask for 10-15 minutes before use. The cool temperature provides a soothing sensation while temporarily tightening pores, which can help seal in the mask’s benefits. This technique is particularly beneficial for sensitive or inflamed skin.
Application Process
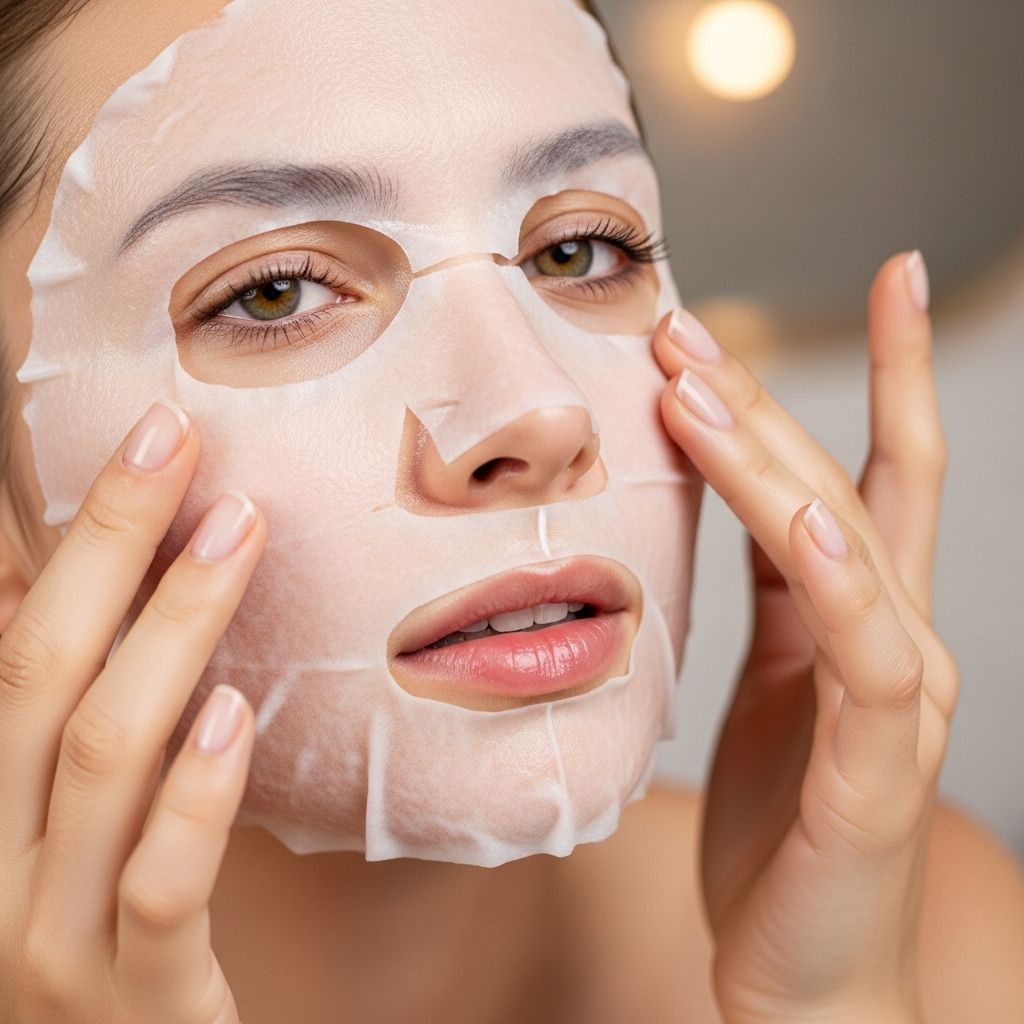
Carefully unfold the sheet mask, taking care not to tear the delicate material. Most masks are designed with a protective backing that should be removed before application. Start by aligning the mask with your forehead, then work your way down, adjusting the eye and mouth openings as needed.
Press the mask gently but firmly against your skin, smoothing out air bubbles and ensuring complete contact. The mask should adhere closely to your facial contours for optimal ingredient transfer. Don’t forget to extend the mask to your jawline and, if the mask is large enough, your upper neck area.
Optimal Timing and Duration
Timing plays a crucial role in sheet mask effectiveness, and proper preparation can influence how long you should leave your mask on for optimal results.
Duration Guidelines
Most sheet masks are designed for 15-20 minute applications. However, well-prepared skin may absorb ingredients more quickly, so monitor your skin’s response. If the mask begins to dry out, remove it immediately, as a drying mask can actually draw moisture from your skin.
Position and Comfort
Lie down during your mask treatment to prevent the serum-soaked mask from sliding down your face. Keep your head slightly elevated and avoid talking or making facial expressions that might disturb the mask’s position. This relaxed position also enhances circulation, further supporting ingredient absorption.
Post-Mask Care
What you do immediately after removing your sheet mask is just as important as the preparation steps for locking in benefits and maintaining results.
Serum Absorption
Don’t rinse your face after removing the sheet mask. Instead, gently pat any remaining serum into your skin using upward motions. This excess serum contains concentrated active ingredients that continue working even after mask removal.
Moisturizer Application
While your skin is still slightly damp from the mask’s serum, apply a lightweight moisturizer to seal in the hydration and nutrients. Choose a moisturizer that complements your mask’s intended benefits – for example, use a niacinamide moisturizer after a brightening mask or a ceramide-rich cream after a hydrating treatment.
Sun Protection Consideration
If you’re doing your sheet mask routine during the day, always follow with broad-spectrum SPF protection. Some mask ingredients, particularly those containing acids or vitamin C, can increase photosensitivity temporarily.
Common Mistakes to Avoid
Even with proper preparation knowledge, several common mistakes can undermine your sheet mask’s effectiveness.
Over-Preparation Pitfalls
While preparation is crucial, over-cleansing or excessive exfoliation can damage your skin barrier, making it less receptive to beneficial ingredients. Stick to gentle methods and avoid combining multiple active ingredients in your prep routine.
Timing and Frequency Errors
Using sheet masks too frequently can overwhelm your skin, leading to irritation or breakouts. Limit usage to 2-3 times per week, and always allow your skin to rest between treatments. Additionally, leaving masks on too long can cause irritation as the mask material may begin to pull moisture from your skin.
Application Mistakes
Poor mask placement, air bubbles, or inadequate skin contact can significantly reduce effectiveness. Take time to properly smooth and adjust your mask for complete coverage and contact with your skin.
Frequently Asked Questions
Q: How long before applying a sheet mask should I start my prep routine?
A: Allow 15-30 minutes for your complete prep routine. This includes double cleansing (5-10 minutes), optional exfoliation (2-3 minutes), steaming (5-10 minutes), and toning (2-3 minutes). The key is not to rush through these steps.
Q: Can I use multiple sheet masks in one session if I prep properly?
A: It’s not recommended to use multiple sheet masks in one session, even with proper preparation. This can overwhelm your skin with too many active ingredients and may lead to irritation or breakouts.
Q: Should I prep differently for different types of sheet masks?
A: The basic preparation steps remain the same, but you may adjust intensity based on your mask type. For hydrating masks, focus more on gentle cleansing and toning. For treatment masks with active ingredients, ensure thorough but gentle exfoliation.
Q: Is it necessary to steam before every sheet mask?
A: While steaming enhances absorption, it’s not mandatory for every sheet mask session. However, incorporating steaming 1-2 times per week can significantly improve your results, especially for deeply nourishing or treatment masks.
Q: What should I do if my skin feels irritated after the prep routine?
A: If you experience irritation, skip the sheet mask and apply a gentle, fragrance-free moisturizer instead. Wait until your skin calms down before attempting another mask session, and consider reducing the intensity of your prep routine.
Q: Can I prep my skin and then save the sheet mask for later?
A: It’s best to use your sheet mask immediately after preparation while your pores are still open and your skin is primed for absorption. Waiting too long allows your pores to close and reduces the effectiveness of your prep work.
References
- https://www.siobeauty.com/blogs/resource-center/sheet-masks
- https://ernolaszlo.com/blogs/news/what-to-do-before-during-and-after-masking
- https://www.lorealparis.co.in/beauty-magazine/skin-care-blogs/helpful-hints–prepare-the-skin-before-applying-a-mask
- https://drsabrina.com/blogs/skin-care/how-to-apply-a-face-mask
- https://knesko.com/blogs/facial-masks/what-should-i-do-before-and-after-a-face-mask
- https://gotoskincare.com/blogs/the-go-to-guide/sheet-masks-makeup-essential
- https://www.net-a-porter.com/en-us/porter/article-337ae87bc349ce44/beauty/skin/skin-prep-tips
- https://www.maskeraide.com/blogs/blog/how-to-get-the-most-out-of-your-sheet-mask
- https://us.gotoskincare.com/blogs/the-go-to-guide/six-sheet-mask-hacks-that-will-quickly-improve-your-skin-care-routine
Read full bio of Sneha Tete


