Facial Cupping & Microcurrent Routine Order: The Ultimate Guide to Skin Sculpting and Rejuvenation
This sequence boosts circulation and tones muscles for a smoother, radiant complexion.

The modern skincare world is buzzing with advanced, yet non-invasive skincare rituals such as facial cupping and microcurrent facials. These two methods have soared in popularity due to their profound ability to sculpt, tone, and rejuvenate the skin without dramatic interventions. But what is the optimal protocol for combining these energizing treatments? This in-depth guide answers that question, laying out the science, sequence, and nuances that help you maximize your results safely and effectively.
Table of Contents
- What Are Facial Cupping & Microcurrent Facials?
- Should You Do Facial Cupping or Microcurrent First?
- Benefits of Combining Facial Cupping and Microcurrent
- Step-by-Step Guide: The Ideal Routine Order
- Skin Preparation: Cleansing, Oils & Precautions
- How to Perform Facial Cupping
- How to Perform a Microcurrent Facial
- Professional vs. At-Home Treatments
- Aftercare and Skin Maintenance
- Routine Frequency and Timelines
- Frequently Asked Questions
What Are Facial Cupping & Microcurrent Facials?
Facial Cupping: The Ancient Lifting Technique
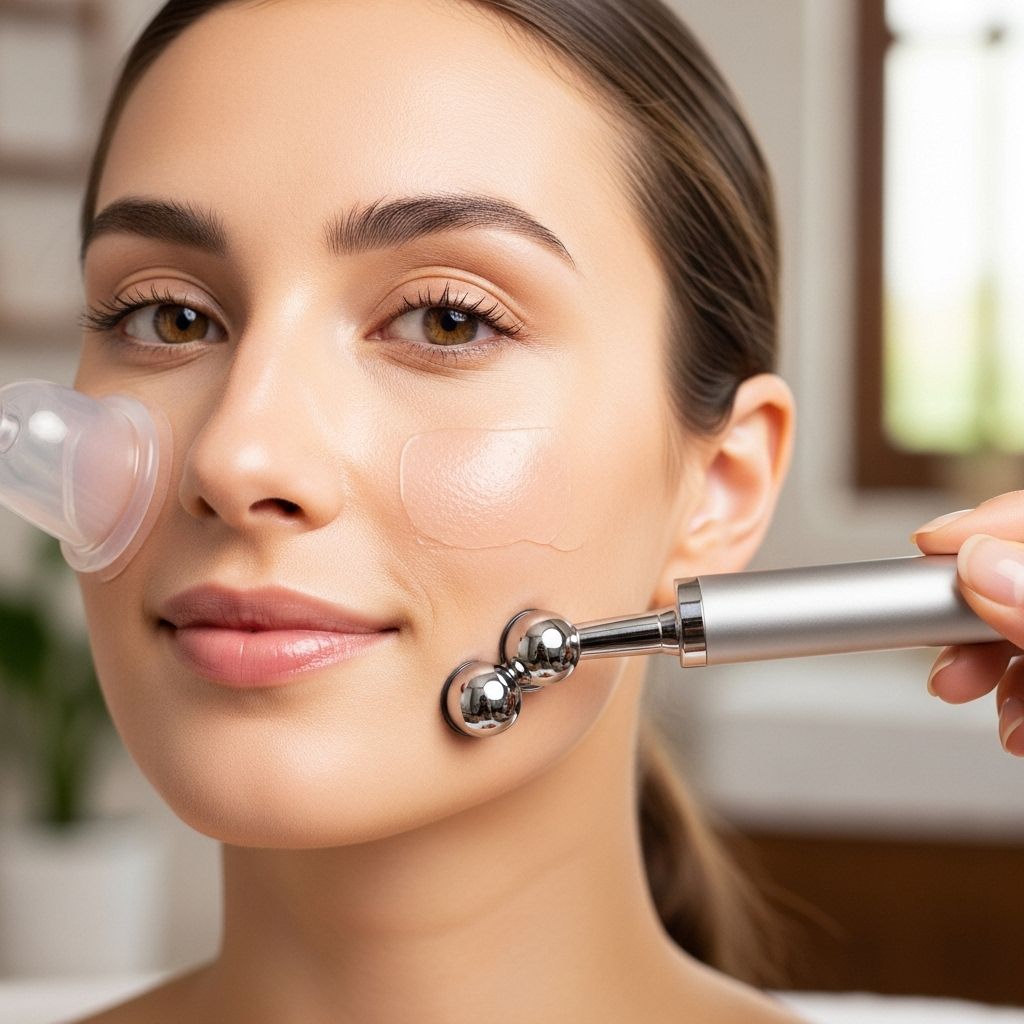
Facial cupping is a modern adaptation of the ancient technique of body cupping. Using specially designed small silicone or glass cups, gentle suction is applied to the skin. This process increases blood flow, encourages lymphatic drainage, helps reduce puffiness, and creates a subtle lifting effect. Unlike traditional body cupping, which may leave marks, facial cupping uses milder suction for a sculpting benefit without bruising.
- Improves circulation and skin glow
- Promotes lymphatic drainage, helping to detoxify
- Relieves muscle tension, particularly along the jaw and brow
- Can soften the look of fine lines and enhance product absorption
Microcurrent Facials: The Low-Voltage Lift
Microcurrent facials use gentle, low-level electrical currents to stimulate facial muscles. This technology mimics the body’s natural bioelectricity to tone and firm facial contours, encouraging ATP (adenosine triphosphate) production and increasing collagen and elastin synthesis. Clients often notice subtle lifting and firming results immediately.
- Firms and tones facial muscles
- Lifts sagging skin and defines jawline and cheekbones
- Boosts cellular repair and healing
- Helps products penetrate deeper into the skin
Should You Do Facial Cupping or Microcurrent First?
The ideal protocol is to start with facial cupping, followed by microcurrent treatment in your routine. Here’s why:
- Facial cupping stimulates circulation and opens lymphatic pathways, creating an optimal environment for subsequent microcurrent stimulation.
- Microcurrent devices require a clean, residue-free surface for optimal conductivity. Using facial oils (required for cupping) after microcurrent can inhibit the device’s efficacy, since most microcurrent activators are water-based and incompatible with oils.
“You can use oil-free serums before applying the microcurrent activator and lifting, but save any oil-based formulas for after your lift or on off days, as oil will impede the flow of microcurrent.” - After cupping and microcurrent, finish with your favorite moisturizer or nourishing serum.
| Step | Rationale |
|---|---|
| 1. Cleanse | Removes makeup, sunscreen, impurities |
| 2. Facial cupping (using facial oil) | Stimulates lymphatics, preps skin, needs slip for cups |
| 3. Remove excess oil | Prepares skin for water-based microcurrent gel |
| 4. Apply microcurrent gel/activator | Ensures full conductivity and device effectiveness |
| 5. Microcurrent facial | Lifts, sculpts, tones muscles |
| 6. Moisturizer or serum | Soothes, hydrates, locks in benefits |
Benefits of Combining Facial Cupping and Microcurrent
- Amplified lymphatic drainage: Cupping clears excess fluids, preparing the face for microcurrent’s sculpting power.
- Enhanced muscle toning: Microcurrent works best on tissue that is already warmed and detoxified by cupping.
- Improved product absorption: Post-microcurrent, the skin is more receptive to serums and moisturizers.
- Reduced puffiness & increased clarity: Lymphatic stimulation from both modalities aids in detoxifying and illuminating the skin.
- Visible & immediate results: Most people notice lifted, refreshed, and less puffy skin after a combined routine.
Step-by-Step Guide: The Ideal Routine Order
Step 1: Cleanse Thoroughly
Start with a gentle cleanser to remove all traces of makeup, sunscreen, and oils. This ensures that your skin is prepared and prevents product build-up, which could impair suction or conductivity.
Step 2: Facial Cupping
- Apply a light layer of nourishing facial oil to act as a slip agent for the cups.
- Use upward and outward movements with the cup, starting from the center line of the face toward the ears.
- Focus on cheeks, jawline, under-eye area, and forehead.
- Use gentle pressure—never pull or tug, especially around the eyes.
- Repeat each motion a few times on both sides for optimal lymph drainage.
Step 3: Remove Oil and Prep for Microcurrent
- Remove excess facial oil with a warm, damp cloth or gentle micellar water.
- Pat the skin dry gently.
Step 4: Microcurrent Facial
- Apply the microcurrent activator or gel (must be water-based for conductivity).
- Choose your device’s intensity setting: Low for beginners, medium for daily use, high for experienced users.
- Follow your device’s guided protocol, gliding and holding the device along jawline, cheekbones, forehead, and neck.
- Work slowly and use upward, lifting motions. Move to the next area only when prompted or after the device’s beep (if applicable).
- Repeat each area 3 times for best results.
Step 5: Final Touches
- Remove leftover activator gel and pat your skin dry.
- Apply a soothing moisturizer or hydrating serum to lock in the treatment benefits.
Skin Preparation: Cleansing, Oils & Precautions
- Always cleanse the skin before starting any treatment. Remove dirt, makeup, and sunscreen to prevent clogged pores or bacteria transfer.
- Use a clean cup and device every session. Sanitize cups with gentle cleanser or micellar water.
- Patch test new oils, gels, or devices—especially if you have sensitive skin.
- Check for contraindications. Avoid both procedures if you have broken skin, eczema, psoriasis, severe active acne, rosacea, or highly reactive skin.
How to Perform Facial Cupping: Detailed Protocol
Supplies Needed
- Silicone/glass facial cups (small and medium sizes preferred)
- A gentle, nourishing facial oil
- Cleanser
- Towel or cloth
Techniques and Tips
- Jawline and Cheeks:
Begin at the chin and glide the cup upward along the jaw toward the ear. Repeat along the cheeks, always moving upward and outward. - Under-Eyes:
Use a miniature cup near the nose and glide out to the temple. Use the lightest pressure. - Forehead:
Start in the middle of the forehead and move out to the temples. This helps address frown lines and brow tension.
- Repeat 3 times per area.
- Never leave the cup stationary—always keep it moving to avoid suction marks.
- Complete the session in about 5-10 minutes.
How to Perform a Microcurrent Facial: Detailed Protocol
Supplies Needed
- Microcurrent device (such as NuFACE or similar)
- Conductive water-based gel or activator
- Cleanser, towel
Techniques and Tips
- Apply Gel: You need a generous layer over each treatment area before starting.
- Device Use: Turn on and select intensity.
- For beginners, use the lowest setting until your skin adjusts.
- Hold the device with both spheres touching the skin, and glide slowly upward along the muscles.
- Wait for each “beep” signal or follow timing guidance before moving to the next spot.
- Targeted Holds: In some areas, hold the device in place gently to allow deeper stimulation (e.g., along cheekbones or jawline).
- Repeat: Each motion should be repeated 3 times per area for effective toning.
- Total treatment time: roughly 10-20 minutes.
- Remove excess gel after completing the session.
Professional vs. At-Home Treatments
| Aspect | Professional Session | At-Home Routine |
|---|---|---|
| Skin assessment | Personalized, expert-led | Self-assessed |
| Technique | Precise, consistent, customized | Dependent on user’s skill |
| Product Choice | High-grade, tailored | Consumer devices and products |
| Results | Often more dramatic | Noticeable if protocols followed |
| Frequency | Less frequent but more intensive | Frequent maintenance possible |
While professional sessions allow for expert assessment and more advanced techniques, at-home routines can deliver impressive, cumulative results when performed regularly with proper attention to detail.
Aftercare and Skin Maintenance
- Redness or slight irritation after cupping may occur; this is normal and usually fades quickly.
- Apply soothing moisturizer or calming treatments such as hyaluronic acid or cooling masks.
- Use sunscreen daily, as treatments may leave skin more sensitive to sun exposure.
- Stay hydrated and avoid heavy makeup directly after treatment to let skin breathe.
Routine Frequency and Timelines
- Facial cupping: Start with 1-2 times weekly. Once skin adjusts, you may increase frequency. For best results, maintain a consistent schedule.
- Microcurrent facials: 2-3 sessions per week for a month if you want to see rapid improvement, then reduce to weekly or bi-weekly for ongoing maintenance.
Consistency is key—cumulative benefits build over time, unveiling more sculpted, radiant, and healthy-looking skin.
Frequently Asked Questions (FAQs)
Q: Can I do facial cupping and microcurrent on the same day?
A: Yes, and it can be highly effective. Always start with cupping (using facial oil), clean your skin to remove all oil residue, then follow with microcurrent (using a water-based gel). Never use facial oil with microcurrent as it will block the current.
Q: Who should avoid facial cupping or microcurrent facials?
A: Avoid both methods if you have open sores, broken skin, active eczema, psoriasis, cystic acne, severe rosacea, or are undergoing dermatological treatments that compromise skin.
Q: How soon will I see results?
A: Many people notice a lifted and refreshed appearance immediately after each session, especially when both treatments are combined, but optimal effects come with consistent use over weeks.
Q: Do I need to use a special serum or gel?
A: For microcurrent, only water-based gels or activators ensure conductivity and safety. Oil-based serums interfere with the current and should only be used after your session.
Q: How do I clean my tools?
A: Wash facial cups and device attachments with mild soap and warm water after every treatment. Avoid harsh chemicals that could degrade the devices or irritate skin.
Summary: Your Stepwise Path to Radiant Skin
Combining facial cupping and microcurrent facials amplifies each method’s benefits: improved lymphatic drainage, visible lifting, enhanced clarity, and an overall contouring effect. By following the recommended routine order—cupping with oil, cleansing, then microcurrent with gel—you create a synergistic ritual that transforms your skin.
With diligence, proper aftercare, and consistency, this at-home or professional protocol reveals your healthiest, most vibrant complexion yet.
References
- https://skinthusiast.com/skin/howtouseamicrocurrentdevice
- https://coveteur.com/2020/11/12/facial-cupping-guide/
- https://grandvalleylaseraesthetics.com/how-to-incorporate-facial-cupping/
- https://thelafacialist.com/blogs/news/coveteur-facial-cupping-is-my-best-kept-secret-to-brighter-more-sculpted-skin
- https://ildipekar.com/amplify-your-skincare-routine-with-aprils-must-have-the-microcurrent-treatment/
- https://whitelotusbeauty.com/blogs/ukblogs/why-you-should-be-using-facial-cupping-in-your-skin-care-regime
- https://www.skinspaasheville.com/our-blog/2024/7/10/the-microcurrent-facial-our-secret-for-radiant-skin
- https://www.youtube.com/watch?v=GxslslBuMqw
Read full bio of medha deb


