Cleaning & Sanitizing Dermarollers Safely: Definitive Guide for Hygienic Microneedling
A thorough upkeep deters bacteria buildup and enhances every microneedling session.

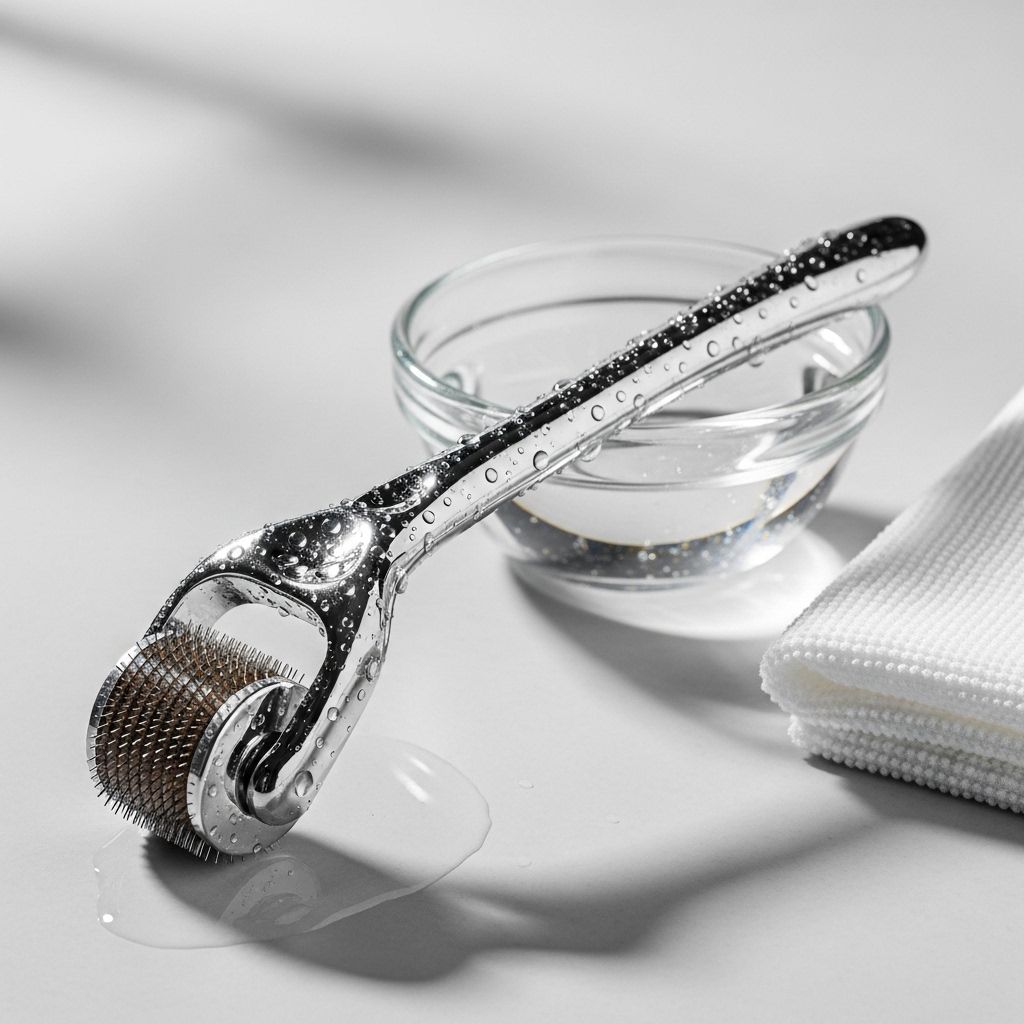
Dermarollers—used in microneedling—have transformed modern skincare by stimulating collagen and maximizing the absorption of topical treatments. However, the benefits of dermarolling come with the utmost need for rigorous hygiene. Improper cleaning or disinfection can lead to bacterial contamination, infections, or even long-term skin damage. This comprehensive guide explores everything you need to know about safely cleaning and sanitizing dermarollers, ensuring you safeguard your skin while optimizing results.
Table of Contents
- Introduction: Why Cleanliness Matters
- Understanding Dermarollers and Risk Factors
- Step-by-Step: Cleaning and Sanitizing Protocol
- Recommended Cleaning Products & Solutions
- Common Mistakes to Avoid
- Extra Tips for Dermaroller Hygiene
- Proper Storage & Handling
- Frequently Asked Questions (FAQs)
- Troubleshooting: Signs Your Dermaroller Isn’t Clean
Introduction: Why Cleanliness Matters
Microneedling with dermarollers involves creating hundreds of micro-channels in the skin, making hygiene crucial to prevent infections and maximize treatment safety. A clean tool minimizes microbial risks and ensures the efficacy of the entire procedure. Inadequately cleaned dermarollers may introduce bacteria, fungi, or viruses through compromised skin barriers, leading to complications ranging from minor irritation to severe skin infections .
Understanding Dermarollers and Risk Factors
Dermarollers consist of dozens to hundreds of tiny medical-grade needles mounted on a rolling device. They are designed to induce controlled micro-injuries, triggering healing responses and collagen synthesis. The repeated skin penetration means any contaminant on the needles comes into direct contact with the underlying skin layers, heightening the risk of infection if not properly sanitized .
- Potential risks from unsanitized dermarollers:
- Spread of bacteria, leading to acne, abscesses, or cellulitis
- Introduction of viruses (e.g., herpes simplex) causing outbreaks
- Longer healing time, inflammation, allergic reactions
- Permanent damage from improper cleansers or handling
Understanding these risks emphasizes why following thorough cleaning and sanitization steps is essential every time you use your dermaroller.
Step-by-Step: Cleaning and Sanitizing Protocol
The process of cleaning and sanitizing dermarollers can be broken down into interconnected steps, each designed to remove residue and eradicate pathogenic microbes:
1. Gathering Necessary Supplies
- Clean towel or paper towel
- 70% isopropyl alcohol
- Mild unscented soap or cleanser
- Small sterile container for soaking
- Sterile or distilled water (never just tap water)
- Soft brush for stubborn debris
- Clean storage case
2. Rinsing Off Debris
Immediately after use:
- Hold dermaroller with needles facing downward under warm running water for 30-60 seconds .
- Gently rotate to ensure all needle surfaces are rinsed.
3. Washing With Soap
- Prepare a basin of warm sterile/distilled water and add mild soap (preferably baby or sensitive skin soap) .
- Dip a soft brush or cloth in soapy water and gently clean all surfaces, focusing on the handles and non-removable parts as well as the roller head.
- Avoid scrubbing hard; needles bend or damage easily .
4. Disinfection
- Fill a sterile container with enough 70% isopropyl alcohol to fully submerge roller head and handle .
- Soak for at least 10 615 minutes (some recommend up to 20 minutes for maximum effect) .
- For hard-to-reach areas, consider an ultrasonic cleaner for deeper penetration (optional) .
- You can substitute isopropyl alcohol with 3% hydrogen peroxide if alcohol is unavailable .
5. Drying
- Remove dermaroller from disinfectant solution and gently shake off excess fluid.
- Place on a clean, dry paper towel or in a designated air-drying rack with needles pointed upwards .
- Allow it to air dry thoroughly. Never use regular cloth towels, which can introduce fibers and bacteria .
6. Storage
- Once fully dry, return to original case or another clean, dry storage container.
- Store in a cool, dry place away from direct sunlight and humidity .
7. Pre-Use Disinfection
- Repeat the alcohol or hydrogen peroxide soak for 10 615 minutes before every new use, even if stored properly .
Recommended Cleaning Products & Solutions
The safety of your skin depends on using the proper cleaning solutions. Here’s a quick breakdown:
| Solution | Effectiveness | Notes |
|---|---|---|
| 70% Isopropyl Alcohol | High | Gold standard for disinfection; kills most bacteria and viruses. Avoid higher percentages as they evaporate too fast . |
| 3% Hydrogen Peroxide | Moderate | Good disinfectant; best for those allergic to alcohol . |
| Mild Unscented Soap | Low | Removes debris but does not fully disinfect . |
| Ultrasonic Cleaners | Very High | Penetrates minute spaces, great for thorough cleaning . |
Avoid: Bleach, strong detergents, boiling water, scented or oily alcohols, and tap water for final rinse as they may damage the device and leave residues that harm the skin .
Common Mistakes to Avoid
- Skipping disinfection before and after use
- Using concentrations of alcohol less than 70%
- Boiling or microwaving dermarollers (causes warping/bending of needles)
- Wiping with towels or cloths that shed fibers
- Not letting device dry completely before storing (risk of mold or bacteria growth)
- Cleaning only the needle head and forgetting the handle
Extra Tips for Dermaroller Hygiene
- Frequency: Clean and disinfect before and after every session, regardless of how recently it was last used .
- Replacement: Regularly replace dermarollers after 10 615 uses, or according to manufacturer recommendation, as repeated cleaning dulls needles and reduces efficacy .
- Don’t Share: Dermarollers are personal tools, never share them, even with family, to avoid spreading microorganisms.
- Handle Carefully: Needles are delicate; avoid dropping or scraping the dermaroller on hard surfaces .
- Check for Damage: Inspect rollers before each use for bent, broken, or rusted needles. Discard and replace if damaged.
Proper Storage & Handling
- Always store dermarollers in a clean, dry case that keeps them protected from dust and moisture.
- Avoid storage in humid environments (bathrooms, near windows) to prevent bacteria or fungal growth.
- Label storage containers for dermarollers to avoid accidental mix-ups or contamination.
- Periodically wipe storage boxes or containers with alcohol wipes.
Frequently Asked Questions (FAQs)
Q: Why is 70% isopropyl alcohol recommended and not higher concentrations?
A: 70% isopropyl alcohol provides a balance between water content and alcohol; the water slows evaporation, ensuring microbes are killed effectively. Stronger concentrations evaporate quickly and can miss deeper pathogens .
Q: Can I use hydrogen peroxide instead of isopropyl alcohol?
A: Yes, 3% hydrogen peroxide can disinfect dermarollers though isopropyl alcohol remains the gold standard .
Q: Is soap alone enough to clean dermarollers?
A: No. Soap removes visible debris but does not eliminate bacteria and viruses; a separate disinfection step is mandatory .
Q: Can I boil my dermaroller for sterilization?
A: Absolutely not. Boiling can warp, blunt, or destroy the fine needles and plastic casing, rendering the device useless and unsafe .
Q: How often should I replace my dermaroller?
A: Replace after 10 615 uses or immediately if you notice dull, bent, or rusty needles .
Q: Can I share my dermaroller with someone else?
A: No. Sharing dermarollers increases the risk of transmitting bacteria, viruses, and even bloodborne pathogens.
Q: How long should I soak my dermaroller in alcohol?
A: Soak for at least 10 615 minutes; longer soaks ensure deeper disinfection, especially for longer-needle rollers .
Troubleshooting: Signs Your Dermaroller Isn’t Clean
- Lingering residue on needles or handle after cleaning
- Strange odors (e.g., musty, moldy) from roller or storage case
- Visible discoloration, oxidation, or rust on needle heads
- Redness, irritation, or unusual skin reactions post-treatment
- Needles appearing bent, blunt, or otherwise damaged
If you observe any of these signs, stop using the device, perform a thorough cleaning and replace if necessary.
Quick Reference Table: Dermaroller Care
| Step | Purpose | Frequency |
|---|---|---|
| Rinse with warm sterile/distilled water | Remove visible debris | Before and after each use |
| Wash with mild soap | Clear remaining residue | Before and after each use |
| Disinfect in 70% alcohol/hydrogen peroxide | Kill bacteria, viruses | Before and after every use |
| Dry on paper towel | Prevent bacteria/fiber transfer | After each use |
| Store in clean case | Protect from dust, moisture | Always |
Conclusion
Neglecting dermaroller hygiene can lead to serious skin complications. By following the step-by-step guide and expert tips outlined above, you can ensure your dermarolling routine remains safe, effective, and enjoyable—preserving your skin’s health while achieving the best possible results. Practice consistent, meticulous cleaning and replace your device regularly to minimize risks and maximize beauty benefits.
References
- https://www.phonesoap.com/blogs/news/how-to-sanitize-dermaroller
- https://qureskincare.com/blogs/all/how-to-clean-derma-roller
- https://ginamber.com/blogs/news/how-to-clean-your-dermaroller
- https://diaminyaesthetics.com/blogs/news/how-to-clean-derma-roller
- https://essentialderma.com/blogs/learn/how-to-clean-derma-roller
- https://www.youtube.com/watch?v=-PrhtIMiIUg
- https://www.healthline.com/health/beauty-skin-care/dermarolling-how-it-works-before-and-after
Read full bio of Sneha Tete


