Insulin Injection Sites: Where and How to Inject Safely
Explore safe insulin injection techniques, proper site rotation, and best practices to improve diabetes management and comfort.

Insulin therapy is a cornerstone of diabetes management for millions of people worldwide. Whether you live with type 1 diabetes or require insulin supplementation for type 2 diabetes, learning how and where to inject insulin correctly is essential for effective blood glucose control and sustaining overall health. This comprehensive guide covers the preferred injection sites, proper techniques, rotation guidelines, precautions, and practical tips for safe self-injection.
Understanding Why Insulin Injections Are Important
Insulin is a vital hormone that helps your body unlock glucose from your bloodstream and deliver it to cells for energy. In people with type 1 diabetes, the immune system destroys insulin-producing cells in the pancreas, making daily insulin injections an absolute necessity. Type 2 diabetes often starts with insulin resistance, but over time, the pancreas may not produce enough insulin, requiring supplemental injections to keep blood sugar in a healthy range.
- Proper insulin administration prevents dangerously high or low blood glucose.
- Correct technique minimizes discomfort and reduces complications.
- Rotating sites promotes even insulin absorption and healthy skin.
Common Methods for Injecting Insulin
Several devices allow people to administer insulin efficiently and safely. Your healthcare provider will discuss the most suitable option for your lifestyle, comfort, and insurance coverage.
- Syringes: Traditional, widely available, and generally the least expensive method. Made from plastic and intended for single use.
- Insulin pens: Can be prefilled or allow cartridges. These are often more discreet, have smaller needles, and can be easier to use. However, not all types of insulin are compatible with pens.
- Insulin pumps: Deliver insulin continuously through a thin tube under the skin, often in the abdomen or upper arm. Pumps are highly accurate but can be costly and require training. They deliver ongoing basal insulin and allow for additional bolus doses.
- Jet injectors: Use high-pressure air instead of a needle to deliver insulin through the skin. Less commonly used.
- Insulin inhalers: Offer ultra-rapid-acting insulin for use prior to meals, always paired with injectable longer-acting insulin. May cause coughing and require lung function monitoring.
Choosing the Right Injection Method
- Discuss the pros and cons of each device with your healthcare provider.
- Consider factors like lifestyle, dexterity, cost, and insurance coverage.
- Your clinician or diabetes educator will coach you on using your chosen device effectively.
Preferred Sites for Insulin Injection
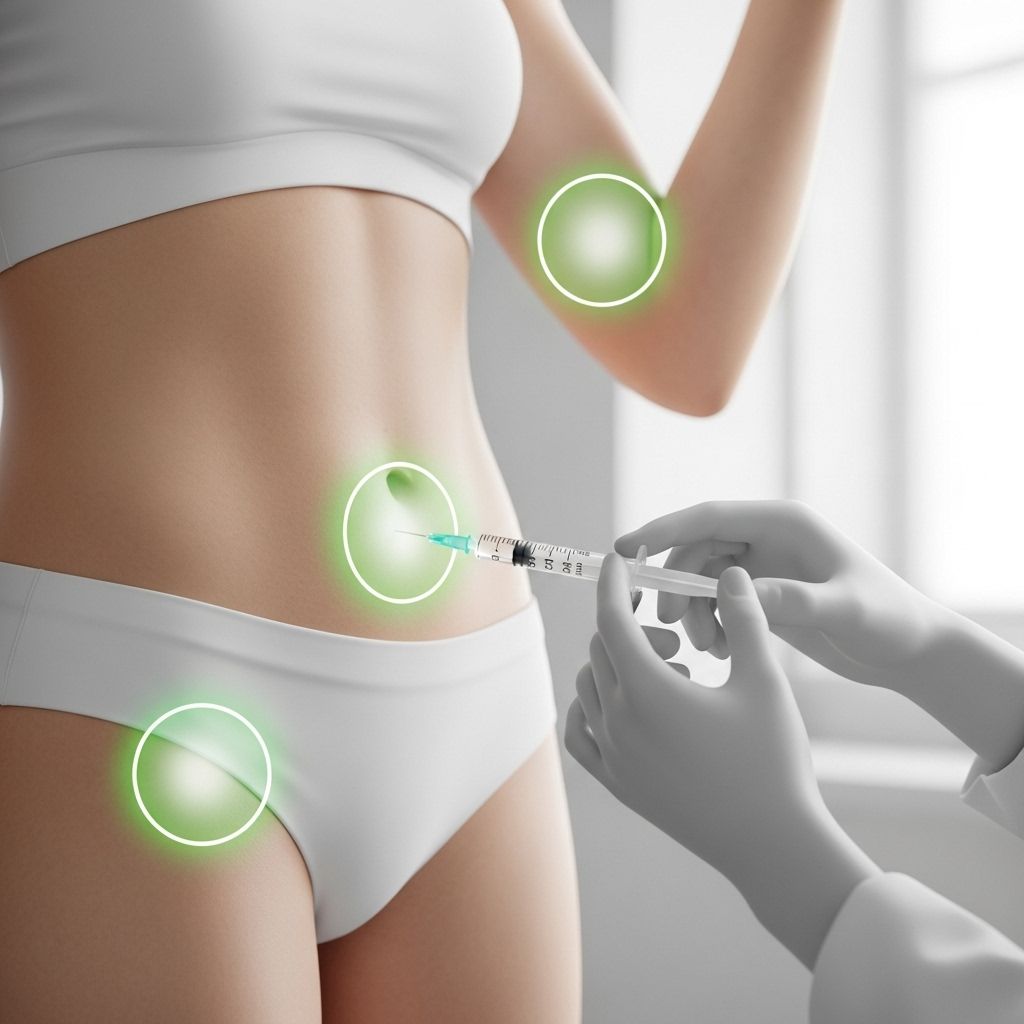
Insulin should be injected subcutaneously—into the layer of fatty tissue just beneath the skin, not into muscle or vein. Choosing the right area is crucial for steady, predictable absorption and minimizing discomfort.
| Injection Site | Absorption Speed | Notes |
|---|---|---|
| Abdomen | Fastest and most predictable | Avoid 2-inch area around navel; select site between lower ribs and pubic area |
| Thighs | Moderate speed | Use the outer/top area, 4 inches down from the top of leg, 4 inches up from knee |
| Upper arms | Moderate speed | Inject into fatty area on the back between shoulder and elbow |
| Buttocks | Slowest | Consider using for longer-acting insulin formulations |
Abdomen: The Preferred Site
The abdomen is the most recommended site because insulin is absorbed quickly and predictably here, and the area is easy to access for self-injection. Choose a spot between your lower ribs and your pubic area, but avoid the zone within two inches of your belly button. Do not inject directly into scar tissue, moles, blemishes, broken vessels, or varicose veins as these can interfere with insulin delivery.
Thighs
The outer and top part of your thigh is another commonly used site. Avoid injecting too close to the inner thigh to reduce the risk of hitting a blood vessel or nerve. Inject about four inches down from the top of your leg and four inches above the knee for optimal absorption. This site is often selected for long-acting insulins.
Upper Arm
The fatty area on the back of the upper arm, between the shoulder and elbow, is another suitable choice. Some people may find it easier to reach this area with assistance. Make sure to inject into the subcutaneous fat—not the muscle.
Buttocks
The upper outer quadrant of your buttocks is also safe for insulin injections. It is commonly used in infants, children, or for longer-acting insulin formulations because the absorption here is slower.
How to Inject Insulin: Step-by-Step Guide
Proper technique ensures the delivery of insulin into the right layer of tissue while minimizing pain and complications. Each method may have slight differences, but the core steps are similar for syringes and pens.
- Gather Supplies: Clean syringe or pen, insulin vial or cartridge, alcohol swab, and sharps disposal container.
- Wash Hands: Use soap and water for a full 20 seconds, then dry thoroughly.
- Prepare Insulin:
- For cloudy insulin (e.g., NPH), gently roll the vial between your hands to mix. Do not shake vigorously.
- Check the insulin for color or particles—never use if it looks abnormal.
- Draw Up Dose:
- Use a new needle for each injection. For syringes, draw air into the syringe equal to your insulin dose. Inject this air into the vial, then draw out the prescribed amount of insulin.
- For pens, dial your prescribed dose.
- Choose & Clean Site: Select your injection site. Clean the area with an alcohol swab and let it dry completely.
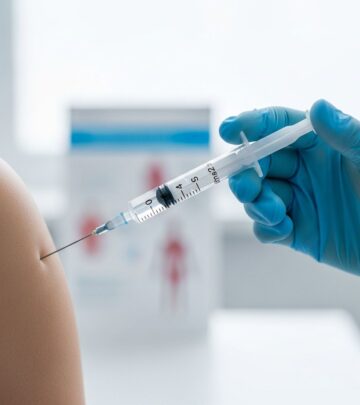
- Insert Needle: Pinch up a fold of skin (especially for areas with less fatty tissue), insert the needle quickly and at a 90-degree angle. For very thin individuals, a 45-degree angle may be safer to avoid muscle tissue.
- Inject Insulin: Push the plunger down steadily and completely. Wait a few seconds before removing the needle to ensure full administration.
- Withdraw Needle: Quickly remove the needle, then release the skin fold.
- Dispose Safely: Place the used needle and syringe or pen tip in an approved sharps container.
Tips for Easier, Safer Injections
- Rotate injection sites to avoid using the same spot more than once every 2-4 weeks.
- Keep injection sites about one inch apart in a given area.
- Pinch up skin for better accuracy, especially in areas with little fat.
- Don’t inject through clothing.
- Don’t reuse needles or syringes—they can become dull and increase infection risk.
Understanding Site Rotation: Why Is It Important?
Frequent use of the same injection site can cause lipohypertrophy—a buildup of fat that appears as lumps or hard spots under the skin—or sometimes fat breakdown, leading to indentations. These areas reduce insulin absorption and can make glucose control harder.
- Rotate between big areas (abdomen, thigh, arm, buttocks) each time you inject.
- Within a specific area, move the injection site at least an inch apart from previous spots.
- Track your rotation pattern using a site map or injection log. This helps prevent complications and ensures consistent insulin uptake.
Disposal of Used Needles and Syringes
Safe disposal of sharp medical waste prevents accidental injury and infection. Never throw used needles, syringes, or pen tips directly in household trash or recycling.
- Use an FDA-cleared sharps disposal container, or a sturdy, puncture-resistant household container with a secure lid.
- Dispose of your full container according to local guidelines—ask your pharmacy or local health department for the safest options.
- Never reuse or share needles or syringes, even with family members.
Risks and Safety Precautions When Injecting Insulin
Although insulin injections are generally safe and routine, there are some risks and precautions to be aware of:
- Avoid injecting into muscle (can speed up insulin action unpredictably and increase pain).
- Do not inject near scars, moles, bruises, infections, or damaged skin.
- If you notice lumps, tenderness, or thickened skin at an injection site, notify your healthcare provider—it may be a sign of lipohypertrophy or infection.
- Injection should be relatively pain-free—if you routinely have pain, review your technique or site with a professional.
- Monitor for low blood sugar (hypoglycemia), especially if new to insulin or changing doses or sites.
Insulin Injection Methods: Pros and Cons Table
| Delivery Method | Advantages | Disadvantages |
|---|---|---|
| Syringe | Low cost, covered by most insurances, available in various sizes, no device needed | Less discreet, larger needle, more steps, manual dosing |
| Insulin pen | Discreet, prefilled options, easier to use, smaller needle | More expensive, not all insulins compatible, not always covered by insurance |
| Pump | Very precise doses, continuous delivery, adjust bolus for meals | Can be costly, requires training and maintenance, possible infection risk at site |
| Jet injector | No needle, rapid delivery | Expensive, not widespread, may cause bruising |
| Inhaler | Ultra-rapid action, no needle, less weight gain | Not for all, less precise dose, may cause coughing, needs lung monitoring |
Frequently Asked Questions (FAQs)
Where on my body should I never inject insulin?
Avoid injecting into scars, moles, birthmarks, bruised or infected skin, and regions with visible blood vessels or varicose veins. These areas can prevent proper insulin absorption or lead to other complications.
How often should I change my insulin injection site?
Ideally, you should rotate injection sites within the same general region for about a week, ensuring each site is at least an inch apart, then move to a different region for the following week. This rotation helps prevent lipohypertrophy and ensures even absorption.
Why is my doctor recommending the abdomen over other sites?
The abdomen offers the fastest and most predictable absorption rate of insulin, is easy to access, and allows for consistent delivery, making it the preferred site for most injections.
What should I do if I hit a blood vessel while injecting?
If you notice blood entering the syringe or see bleeding at the needle site, withdraw and discard the needle. Choose a new location and use a fresh needle. Light bleeding or bruising is not uncommon but let your doctor know if it happens frequently.
What can I do to make injections less painful?
- Let alcohol dry completely before injecting.
- Insert the needle smoothly, quickly, and at the correct angle.
- Do not reuse dull needles.
- Inject at room temperature (cold insulin can sting).
Is it safe to inject insulin through clothing?
This is not recommended. Injecting through clothing can increase the risk of infection and compromise accuracy.
What are signs of lipohypertrophy?
- Fatty lumps, firm or uneven texture, or indentations at former injection sites.
- Reduced insulin effectiveness or erratic blood glucose levels.
- Prevent by rotating sites and avoiding repeated use of the same location.
Key Points to Remember
- Inject insulin into the fatty layer just below the skin (subcutaneous tissue).
- Always rotate sites and use a fresh needle each time.
- Abdomen is preferred for consistent absorption, but the thigh, upper arm, and buttocks are additional options.
- Mastering technique and site rotation can improve comfort and optimize blood glucose control.
- Seek help from your healthcare team for hands-on guidance and troubleshooting.
Additional Resources
- Healthcare team: Ask your diabetes educator, nurse, or pharmacist for a hands-on demonstration.
- Support groups: Many diabetes communities offer extra guidance and moral support.
- Educational materials: Reliable sources such as the American Diabetes Association and certified diabetes education programs offer high-quality information and videos for further learning.
With practice, support, and the right techniques, injecting insulin can become a straightforward part of your routine, ensuring the best possible outcomes for your diabetes health.
References
- https://www.healthline.com/health/diabetes/insulin-injection
- https://www.healthline.com/health/type-2-diabetes/insulin
- https://www.healthlinemedia.com/insights/qa-are-people-with-type-2-diabetes-receiving-the-best-medicine-and-tools-for-their-care
- https://www.healthline.com/health/video/the-complete-guide-to-insulin-and-how-to-use-it
- https://my.clevelandclinic.org/health/diseases/7104-diabetes
- https://www.healthline.com/health/video/better-living-with-type-1-diabetes
- https://www.healthlinedme.com/Resource-Center/Medical-Health-Issues?issue=Diabetes
- https://diabetes.jmir.org/2023/1/e38592
Read full bio of Sneha Tete


