Transplant Lavender Plants: 6 Simple Steps For Thriving Growth
Proper timing and soil care ensure lavender establishes strong roots and abundant blooms.
How and When to Transplant Lavender Plants
Lavender (Lavandula spp.) delights gardeners with its aromatic foliage, vibrant purple blooms, and resilience in the landscape. Whether you’re moving a lavender from pot to ground, splitting an old shrub, or establishing new plants, timing and technique are key to ensuring healthy root establishment and lush growth. Understanding how and when to transplant lavender equips gardeners to create aromatic borders, productive herb beds, and pollinator havens that thrive year after year.
Why Transplant Lavender?
- To rejuvenate plants outgrowing their current container or space.
- To reproduce and propagate new lavender from cuttings or seedlings.
- To move established plants to better-suited locations for optimal sunlight and drainage.
- To rescue unhealthy lavender from poor soil, crowded areas, or suboptimal growing conditions.
Best Time for Transplanting Lavender
Spring is universally recommended as the ideal time to transplant lavender. Wait until the last frost is past, soil is workable, and daytime temperatures are consistently mild. Early spring offers new growth and gives transplants the entire growing season to establish strong roots. In regions with mild winters, fall is also suitable for mature plants, provided they have time to settle before cold sets in.
Key Factors for Lavender Transplant Success
- Gentle handling: Lavender roots are delicate—avoid tearing or rough treatment.
- Watering: Ensure consistent moisture post-transplant, especially for the first month.
- Well-drained, nutrient-poor soil: Lavender thrives in sandy, rocky soil, not rich loam.
- Full sun exposure: Select a planting location that receives at least 6–8 hours of sunlight daily.
Step-by-Step: How to Transplant Lavender
Transplanting lavender is straightforward with preparation, care, and attention to environmental needs. The following step-by-step guide ensures your lavender survives and flourishes in its new home.
Step 1: Select a Quality Plant or Cutting
- Choose the right variety for your region (e.g., English, Spanish, French lavender).
- Source from a reputable nursery, garden store, or reliable propagation.
- Look for plants or cuttings that are:
- Fully rooted in containers
- At least 6–8 inches tall
- Free from visible disease or pests
- Growing actively with vibrant foliage
- Fresh cuttings should be up-potted before being planted out; use containers of at least 5 inches diameter for optimal root development.
Step 2: Prepare the New Planting Site
- Soil type: Lavender demands very well-drained, gritty soil with low nutrient content.
- Site selection: Pick a site with full sun exposure—at least 6–8 hours daily.
- Spacing: Allow 18–24 inches between plants for good air flow and root spread.
- Soil amendments: Consider mixing in sand, gravel, or perlite to improve drainage. Avoid adding compost or fertilizers.
- Test drainage: Dig a small hole and fill it with water; soil should drain completely in under an hour.
Step 3: Prune and Prepare Plant for Transplant
- Remove any existing blooms and cut back the leaves until only 4–6 inches of foliage remains above soil level. This redirects the plant’s energy toward root growth rather than flowering.
- Inspect the roots before removing from the original pot—healthy roots are firm and light-colored, not brown or mushy.
- Water the lavender thoroughly the day before moving.
Step 4: Removing and Transplanting
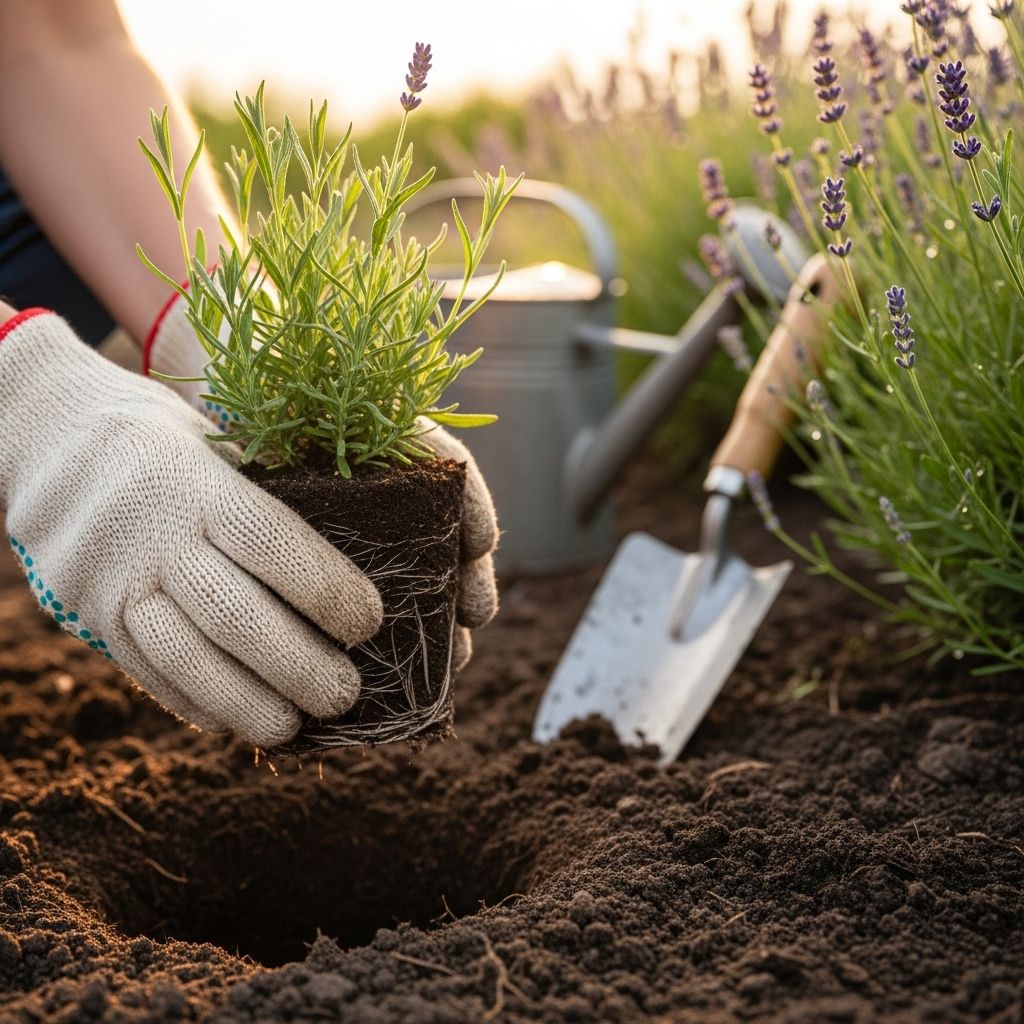
- Loosen soil around the root ball carefully and lift with minimal disturbance—avoid shaking or pulling on the stems.
- Dig a planting hole slightly larger and deeper than the root ball.
- Set the plant so the crown sits just above soil level to prevent crown rot.
- Fill the hole with soil, gently pressing to remove air pockets. Water generously to settle soil around the roots.
Step 5: Water and Monitor
- Water thoroughly at planting. For the first 2–4 weeks, keep soil lightly moist but never soggy.
- Once established, reduce watering frequency. Mature lavender thrives in dry conditions and is drought-tolerant.
- Monitor regularly for transplant shock (wilting, leaf drop, slow growth) and adjust care if needed.
Step 6: Ongoing Care for Newly Transplanted Lavender
- Mulch with gravel or small stones—never organic mulches like wood chips, which retain too much moisture.
- Support stems if tall varieties become droopy after transplant.
- Protect young transplants from strong wind or intense midday sun during their first week.
- Prune annually after flowering to encourage bushiness and prevent woody stems.
Transplanting Lavender: From Pot to Ground, Ground to Pot
Lavender’s versatility allows it to flourish in ground beds, raised beds, and pots. The principles remain the same—ensure good roots, well-drained soil, and full sun.
| Transplant Type | Special Tips |
|---|---|
| Pot to Ground | Water well before transplanting. Loosen pot edges and slide out gently. Plant in a hole no deeper than root ball. |
| Ground to Pot | Choose a pot at least 12” deep with drainage holes. Use soilless mix amended with sand. |
| Pot to Pot | Repot only when root-bound or if roots escape drainage holes. Avoid rich potting soils. |
Varieties: English vs. Spanish Lavender
Different lavender varieties have slightly different cultivation needs. English lavender (L. angustifolia) is cold-hardy and preferred for drier climates, while Spanish lavender (L. stoechas) suits Mediterranean gardening and tolerates warmer conditions.
- English Lavender: ‘Super Blue’, ‘Munstead’—prefers cool winters, moderate summers, tolerates frost, best for northern gardens.
- Spanish Lavender: ‘Primavera’—best in warm regions, needs protection in winter, prefers sandy, gritty soils.
Propagation: Starting Lavender for Transplant
Transplanting is just one aspect of lavender’s lifecycle in the garden. Propagation by seed or cutting sets the stage for healthy transplants.
Propagating by Cuttings
- Take softwood cuttings during warm seasons.
- Snip healthy stem tips of 4–6 inches, remove blooms and lower leaves (up to 2 inches from the bottom).
- Use rooting hormone on cut stem.
- Insert into sandy soil or soil-less mix, or place in water to root.
- Roots develop in 2–4 weeks under bright light and mild warmth.
- Transplant rooted cuttings into pots for further development before moving to garden beds.
Propagating by Seed
- Collect seeds from mature, spent flowers in late summer.
- Sow seeds in a seed starting mix in a shallow tray or small pot.
- Chill seeds for 4–6 weeks (cold stratification)—either outside in fall or inside in refrigerator for spring sowing.
- Keep mix damp, not soggy. Cover with plastic to retain humidity.
- Provide abundant light for germination (2–3 weeks typical, but may take up to 90 days).
- Transplant seedlings when 1 inch tall, spacing 18–24 inches apart.
Pest, Disease, and Maintenance Tips for Transplanted Lavender
Mediterranean herbs like lavender are generally low-maintenance, but a few precautions help ensure healthy establishment.
- Prevent fungal diseases: Treat foliage with fungicide when transplanting if previous issues like Botrytis have occurred.
- Avoid wet foliage: Water only at the base, preferably in morning.
- Monitor for root rot: Ensure soil dries out between waterings.
- Check for pest infestations: Remove affected leaves and consider gentle organic sprays if needed.
Common Mistakes to Avoid When Transplanting Lavender
- Overwatering or planting in soggy soil.
- Using rich compost or fertilizer—causes leggy growth, fewer blooms.
- Planting in shade or partial sun.
- Ignoring spacing—crowding increases disease risk.
- Transplanting too early (risk of frost) or too late (heat stress).
Lavender Transplanting Aftercare
- Water sparingly: After 2–4 weeks, reduce watering and let soil dry between waterings.
- Annual pruning: After bloom, remove one-third of foliage to maintain shape and promote new growth.
- Mulching: Mulch with pebbles instead of organic matter to avoid excess moisture.
- Winter protection: In colder climates, apply frost cloth or straw loosely if extreme cold threatens.
- Check for regrowth: Lavender may appear dormant; look for new leaves and shoots after transplant shock passes.
Frequently Asked Questions (FAQs)
Q: When is the best season to transplant lavender?
A: Spring is optimal, after last frost, to ensure full-season root establishment and minimal cold stress.
Q: Can mature lavender plants be transplanted?
A: Yes. Larger plants may need more care—prune back foliage, water deeply, and avoid root damage during movement.
Q: Should lavender be fertilized after transplanting?
A: No. Lavender prefers poor, lean soils—fertilization can lead to rampant growth and weak, floppy stems.
Q: How long does it take transplanted lavender to settle and bloom?
A: With proper care, most lavender establishes within 2–4 weeks; first full flowering typically in the next growing season.
Q: Can lavender be transplanted in summer or fall?
A: Summer transplant is possible for well-established plants with careful watering; fall transplant works in mild climates without harsh winters.
Final Thoughts: Thriving Lavender, Year After Year
The transplanting process for lavender is much like moving vegetable seedlings, with extra attention to soil drainage, minimal nutrients, and gentle handling. By following best practices—from variety selection, site preparation, and pruning, to aftercare and pest prevention—gardeners can create lush beds filled with fragrant, thriving lavender. Remember: patience and proper technique reward you with years of blooms, pollinator visits, and aromatic beauty.
Further Resources
- Lavender care and harvesting guides
- Propagation and cuttings tutorials
- Expert videos on growing English and Spanish lavender
References
Read full bio of Anjali Sayee

