How To Propagate Petunias From Cuttings In 7 Easy Steps
Enjoy a lush flower display year after year with home-rooted, uniform blossoms.
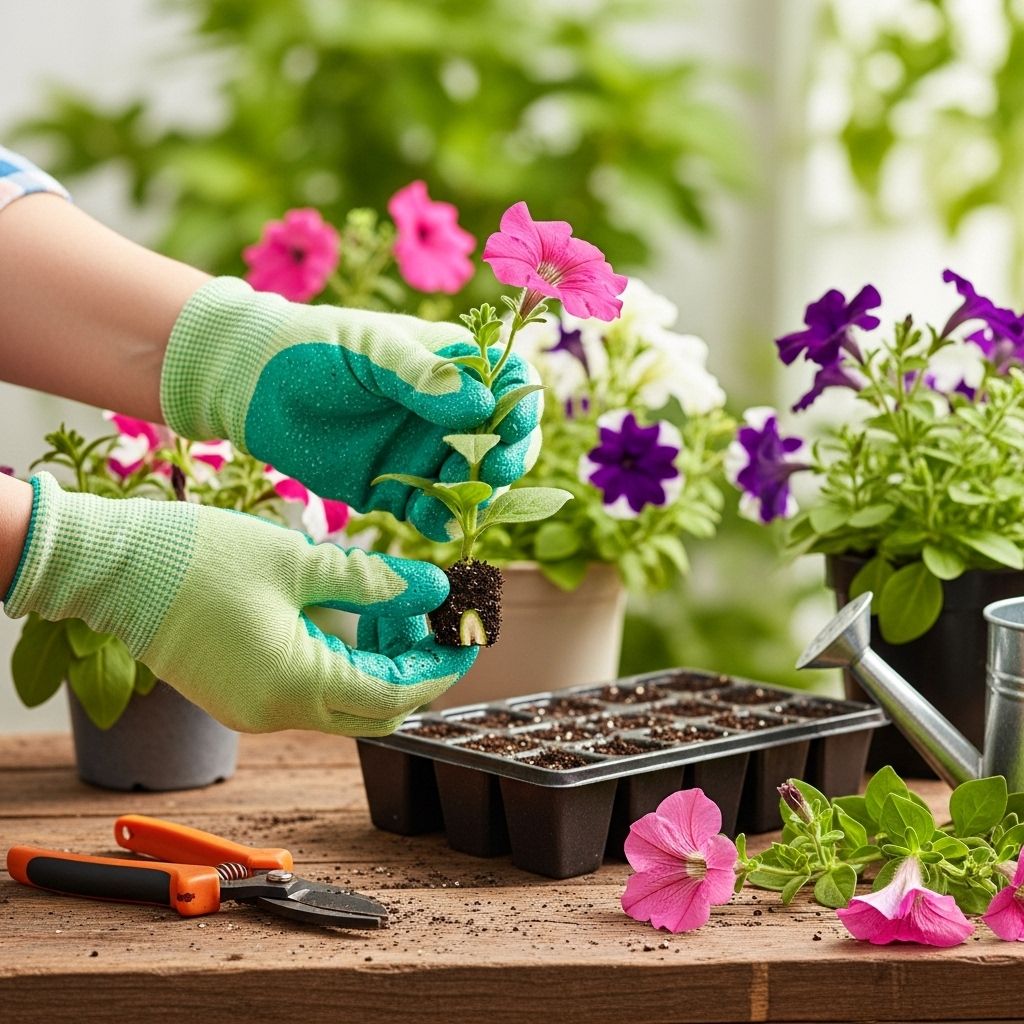
How to Propagate Petunias from Cuttings in 7 Simple Steps
Petunias are vibrant, low-maintenance annuals prized for their abundant blooms and versatility in containers and garden beds. Propagating petunias from cuttings allows home gardeners to multiply their favorite varieties and enjoy a season-long display of flowers. This guide demystifies the process, offering a step-by-step approach for beginners and experienced growers alike.
Table of Contents
- Why Propagate Petunias?
- What You Need to Propagate Petunias
- 1. Prepare and Take Your Cuttings
- 2. Remove Lower Leaves
- 3. Apply Rooting Hormone
- 4. Plant Cuttings in Medium
- 5. Place in a Proper Location
- 6. Transplanting and Hardening Off
- Ongoing Care Tips for Propagated Petunias
- Troubleshooting Propagation Problems
- Frequently Asked Questions (FAQs)
Why Propagate Petunias?
Petunias are often propagated vegetatively—through cuttings—rather than by seed. This method ensures the new plants are identical to the parent, preserving attractive traits such as flower color or growth habit. Propagation by cuttings is rapid, reliable, and can be performed indoors or outdoors, allowing gardeners to expand their displays without purchasing additional plants.
- Clonal uniformity: Propagated plants retain desired features.
- Cost-effective: Boosts garden stock at minimal expense.
- Year-round potential: Cuttings can be started indoors for early blooms or to overwinter favorite varieties.
What You Need to Propagate Petunias
Gather the following tools and materials before starting the propagation process:
- Healthy petunia parent plant
- Sharp, clean scissors or pruning shears
- Rooting hormone (optional, but boosts success rates)
- Small pots or seedling trays
- Seed starting mix or a blend of peat and perlite
- Plastic dome, clear bag, or plastic wrap for humidity
- Spray bottle with clean water
1. Prepare and Take Your Cuttings
Start with a robust, non-flowering shoot from a healthy petunia plant. Early morning cutting reduces wilt and stress. Here’s how:
- Select 3–5 inch stem tips with at least two sets of leaves.
- Make a clean cut just below a leaf node using sanitized scissors.
- Place cuttings immediately in clean water if not planting right away to prevent dehydration.
2. Remove Lower Leaves
Gently remove the lower set of leaves, leaving only the top two or three. This reduces moisture loss and prevents rot below the soil surface.
- Tip: Removing flowers or buds encourages the cutting to focus energy on root development rather than blooming.
3. Apply Rooting Hormone
Dip the cut end of each stem into rooting hormone powder or gel, shaking off excess. This step is optional but dramatically improves rooting speed and success, particularly for new gardeners.
- Commercial rooting products are available at garden centers or online.
- Softwood stem cuttings root easily, but rooting hormone increases your odds of success.
4. Plant Cuttings in Medium
Fill a small pot or seed tray with a well-draining soilless mix—peat mixed with perlite or vermiculite works well. Avoid regular garden soil, which can retain too much moisture or harbor pathogens.
- Poke a planting hole with a pencil or finger.
- Insert the cutting until at least one node (where the leaves were removed) is below the soil level.
- Firm gently around each stem to secure it upright.
- Lightly water the medium to settle it around the cuttings.
5. Place in a Proper Location
Petunia cuttings require high humidity and bright but indirect light to root successfully.
- Cover with a plastic dome, zip-lock bag, or clear plastic wrap to create a mini-greenhouse effect. The cover should not touch the foliage—use stakes or hoops for support if necessary.
- Ventilate daily to prevent fungal diseases by lifting the cover or poking small holes.
- Keep the temperature between 65–75°F (18–24°C). Avoid locations that are too warm, which can cause rapid drying and stress.
- Supply at least six hours of bright, indirect sunlight or supplement with grow lights if indoors.
- Monitor regularly, misting the medium as needed to keep it damp but never soggy or waterlogged.
6. Transplanting and Hardening Off
Roots should develop within three to four weeks. Check by gently tugging a cutting or tipping the root ball from its container. Visible roots around the perimeter signal readiness for transplant.
- Gradual acclimation: Before planting outdoors, harden off your rooted cuttings by exposing them to outdoor conditions for increasing periods each day over a week.
- Begin with a couple of hours in a shaded spot, gradually increasing sunlight and exposure time to prevent shock.
- Once acclimated, transplant the rooted cuttings into garden beds, containers, or hanging baskets, observing correct spacing and watering them well after planting.
Transplanting Table: Spacing and Depth by Petunia Type
| Petunia Type | Recommended Spacing | Expected Mature Width | Planting Depth |
|---|---|---|---|
| Grandiflora | 12-18 inches | 12-24 inches | Soil level of root ball |
| Multiflora | 10-15 inches | 10-15 inches | Soil level of root ball |
| Milliflora | 6-8 inches | Up to 8 inches | Soil level of root ball |
| Wave/Spreading | 18-24 inches | Up to 5 feet | Soil level of root ball |
Ongoing Care Tips for Propagated Petunias
Once your new petunias are established, they benefit from routine care to maximize flowers and vigor:
- Light: At least 6 hours of direct sun daily; partial afternoon shade in hot climates extends bloom.
- Water: Maintain evenly moist but never waterlogged soil. Containers may require daily watering in summer.
- Fertilizer: Feed with a balanced, slow-release or liquid fertilizer every 2-4 weeks. Petunias are heavy feeders and benefit from consistent nutrition.
- Deadheading: Remove spent blooms to encourage more flowering except on self-cleaning varieties (such as some Wave petunias).
- Pest management: Watch for aphids, whiteflies, and fungal diseases. Treat early with appropriate organic or chemical controls.
Troubleshooting Propagation Problems
Even with care, you may encounter challenges. Here are common issues and solutions:
- Cuttings wilt or die: Likely due to excessive heat, drought, or direct sun. Move to a cooler, shadier spot and maintain humidity.
- Yellowing leaves: Indicates overwatering or insufficient nutrients. Ensure drainage and fertilize as needed.
- Mold or rot: Caused by stagnant air and wet conditions. Ventilate domes, reduce watering, and remove affected cuttings promptly.
Frequently Asked Questions (FAQs)
Q: When is the best time to take petunia cuttings?
A: Take cuttings in spring or early summer when plants are actively growing and not in flower for best results.
Q: Can I propagate petunias in water only?
A: Some gardeners root petunias in water, but soil-less or seed starting mixes produce stronger roots and higher success rates.
Q: How long does it take for petunia cuttings to root?
A: Cuttings typically root in 3–4 weeks in warm, humid conditions.
Q: Do all petunia varieties root equally well from cuttings?
A: Most varieties propagate readily, though newer hybrids and specialty types may be patented and not suitable for home propagation.
Q: Is rooting hormone necessary?
A: Rooting hormone isn’t required, but it improves rooting percentage and speed, especially for beginners.
Summary
Propagating petunias from cuttings is a rewarding, cost-effective way to ensure a long-lasting and vibrant floral display. By following the outlined steps—taking cuttings, preparing them properly, rooting, and transplanting—you’ll enjoy a steady supply of healthy plants. With a little care and attention to detail, even novice gardeners can master this propagation method and fill containers, baskets, or garden beds with stunning petunia blooms every season.
References
Read full bio of Shinta


