What To Do With Potted Mums After Blooming: Complete Post-Bloom Guide
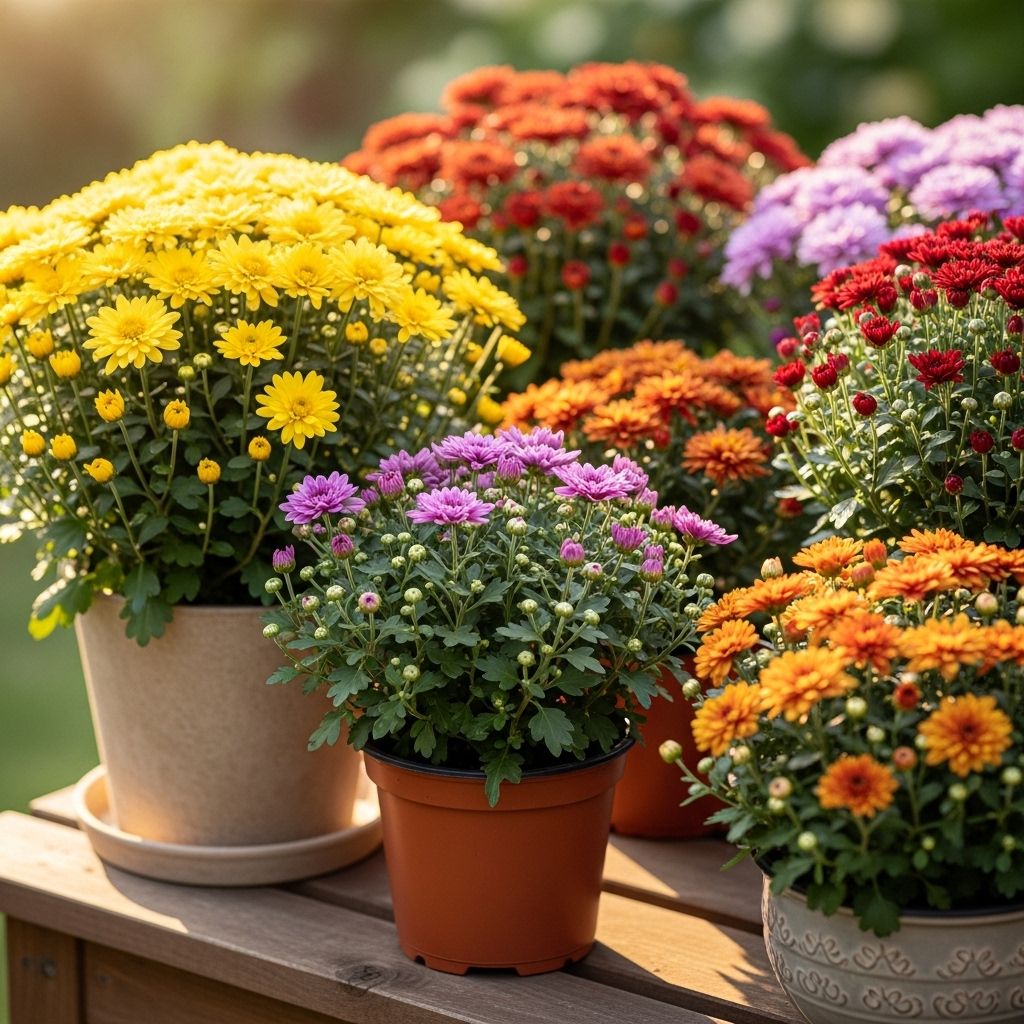
Chrysanthemums bring extra autumn color to gardens through a handful of easy care steps.

What To Do With Potted Mums After Blooming
Chrysanthemums, or mums, are fall decorating classics, but what happens once those vibrant autumn blooms fade? Many gardeners purchase potted mums every year for seasonal color, only to wonder what steps to take when flowers dry up and leaves wilt. Should you toss them out, try for a second bloom, or replant them in your garden? This comprehensive guide explores the best options for your potted mums post-blooming, offering care instructions, overwintering advice, and key strategies to get the most enjoyment from your plants—year after year.
Understanding Your Potted Mums
Mums are available in a dazzling array of colors and forms. They are often sold as annual container plants in the fall, but many cultivars are actually hardy perennials that can return each year under the right conditions. Knowing your variety and care options is crucial:
- Hardy garden mums (Chrysanthemum morifolium): Can survive winter outdoors in USDA hardiness zones 5-9 and be perennialized in gardens.
- Florist mums or more tender hybrids: Usually treated as annuals but can be overwintered indoors with effort.
Regardless of variety, most potted mums can live beyond their initial blooming season with a little care and planning.
Five Options for Your Potted Mums After Blooming
Once your mums’ blooms are spent, you have several paths to choose from. There’s no single ‘right’ approach; the best choice matches your gardening goals and available time.
Option 1: Trim and Care for Rebloom (Short-Term)
If your mums have finished blooming but still show signs of green, healthy stems and foliage, you may encourage a modest second flush of blooms indoors or outdoors with proper trimming and continued care:
- Deadhead spent blooms by pinching or clipping off faded flowers down to the next green leaf or bud.
- Remove any brown or wilted foliage to prevent fungal issues and encourage new growth.
- Keep the soil moist but not soggy. Mums dry out quickly in pots, so monitor water closely.
- Move your pots to a sunny location—ideally 6–8 hours of direct sunlight daily is best for recovery and rebloom potential.
- Fertilize lightly with a balanced, water-soluble plant food to support regrowth.
Note: A dramatic rebloom is rare since mums are triggered to flower by shortening days (photoperiodic response), but with proper care, you can sometimes enjoy a lighter encore in late autumn or indoors.
Option 2: Overwinter Indoors for Next Year
If you want to keep your mums growing for another year and your winters are harsh, overwintering indoors is a smart strategy, especially for container plants. Here’s how:
- Trim the plant back to about 3–5 inches tall when growth stops.
- Place the potted mum in a cold but frost-free spot (garage, basement, or enclosed porch) with temperatures ideally 32–50°F (0–10°C).
- Water sparingly—just enough to keep the roots from completely drying out. Soil should be slightly moist, not wet or bone-dry.
- Do not fertilize during this dormant period.
- Once spring arrives and outdoor temps regularly exceed freezing, gradually acclimate the pot back outside and resume watering and feeding.
This method works well for both hardy mums (to give them a head start on the next year) and florist mums (which are otherwise unlikely to survive cold winters).
Option 3: Transplant Into the Garden
Transplanting potted mums into your landscape gives them the best chance of thriving year after year, especially for perennial garden types. Follow these steps:
- Wait until after the blooms have faded, but before your first deep frost. Mums need a little time to establish roots before winter.
- Choose a sunny garden spot with well-draining soil. Mums need at least 6 hours of direct sunlight for healthy growth and flowering.
- DIG a hole twice as wide as the pot and slightly deeper.
- Gently remove the entire root ball from the pot and tease apart any circling roots.
- Plant at the same depth as the pot, fill in with soil, and water thoroughly to settle the roots.
- Apply a 2–3 inch layer of mulch over the root zone to protect from freeze-thaw cycles (but keep mulch away from the stems).
Table: Key Transplanting Tips
| Step | Detail |
|---|---|
| When to Transplant | Immediately post-bloom, before deep frost |
| Sunlight Needed | 6+ hours daily |
| Soil | Well-draining, neutral to slightly acidic |
| Mulch | 2–3 inches for winter protection |
| Watering | Thoroughly after transplant, then regularly during dry spells |
Option 4: Compost or Discard
If you prefer not to keep your mums, composting is an eco-friendly way to dispose of them. Remove any metal, plastic, or non-biodegradable parts, then add the spent plants to your compost heap. Mums break down nicely and add valuable organic matter to your future garden beds. If composting isn’t feasible, simply remove the pots and place the plants in municipal green waste bins.
Option 5: Use as Seasonal Décor
Even after blooming ends, mums can continue to serve as autumn décor:
- Pair spent mums with pumpkins, gourds, and dried corn on your porch for a festive seasonal look.
- Repurpose potted mums for Halloween or Thanksgiving table centerpieces.
- Mix in other cold-tolerant ornamentals (like ornamental cabbage or kale) for a longer-lasting fall display.
The faded texture and muted hues of post-bloom mums often complement autumn celebrations beautifully, making every part of their life cycle useful in the landscape.
Essential Mum Care Tips Post-Blooming
The key to getting the most from your mums—even after the first flush of flowers—is to meet their core needs:
- Light: Mums thrive on sunlight, needing at least six hours per day for recovery and future blooms.
- Soil: A well-draining, slightly acidic soil (pH 6.0–7.0) is ideal; avoid soggy or heavy clay locations.
- Water: Keep soil consistently moist but not saturated, especially in containers prone to drying out.
- Fertilizer: Feed with a balanced plant food (follow package directions) during periods of active growth—not during dormancy.
- Pinching: For next year’s blooms, pinch back stems in spring and again by early July to promote bushier growth and prevent legginess.
Pinching and Pruning for Best Results
Proper pinching, or removing the tips of new growth during spring and summer, encourages bushier plants and more prolific flowering. Follow these guidelines:
- In spring, once shoots reach 8 inches, pinch off the top 1–2 inches.
- Repeat a second pinch by early July for most varieties.
- After midsummer, avoid further pinching as plants form flower buds for fall.
This approach produces a compact mum plant covered with attractive, dome-shaped blooms.
Common Issues After Blooming
- Leggy, floppy growth: Usually results from lack of pinching or insufficient sunlight.
- Pest or fungal problems: Maintain good air flow around plants, remove dead leaves, and avoid overhead watering to minimize risk.
- Poor rebloom indoors: Many mums are day-length sensitive; even with good care, indoor rebloom may be light or absent.
With attentive care and realistic expectations, you can enjoy healthy mums for many seasons.
Frequently Asked Questions (FAQs)
Q: Can I get my potted mums to bloom again this year?
A: A full second flush of blooms is rare after the initial fall display since mums are triggered to bloom by shortening days. However, careful deadheading and good sunlight may produce a lighter repeat flush indoors or out.
Q: Are all potted mums perennial?
A: Not all. “Garden” or “hardy” mums are perennials in USDA zones 5–9 when overwintered in the garden. Florist or tender potted mums are often grown as annuals in cooler climates, but you can try overwintering them indoors for another year.
Q: How do I overwinter mums in containers?
A: Cut the plants back, keep them in a cool, frost-free but non-heated place, and water sparingly. Move outdoors and resume regular care after all danger of frost has passed in spring.
Q: Is it better to plant mums in the ground or leave them in pots?
A: Mums survive winters better when planted in the ground at least six weeks before frost. In pots, roots are more exposed to cold and should be insulated or brought indoors to increase survival chances.
Q: What should I do if my potted mum looks dead after blooming?
A: Check the root system. If roots are still firm and white, trim off dead growth and try overwintering. If all roots are mushy or dry, compost the plant and start fresh next season.
Expert Tips For Stronger, Longer-Lived Mums
- Acclimate gradually: When moving mums between inside and outside, do so gradually to reduce shock.
- Mulch well: Use straw, shredded leaves, or bark for insulation in winter.
- Water deeply: Especially after transplanting, to help roots establish.
- Select the right variety: Choose hardy mums if you want perennials, or enjoy florist mums for vibrant annual color.
- Monitor daily: Containerized mums dry fast—check soil often, especially during autumn winds.
Summary Table: What To Do With Potted Mums After Blooming
| Option | Pros | Cons |
|---|---|---|
| Trim for Rebloom | May get extra flowers; quick results | Rare for full rebloom; short-term effect |
| Overwinter Indoors | Saves plant for next year; best for non-hardy types | Requires space and consistent cool temps |
| Transplant to Garden | Perennializes hardy mums; long-term enjoyment | Needs proper timing and site; not all mums are hardy |
| Compost/Discard | Eco-friendly; no further care required | Plant is gone permanently |
| Use as Décor | Extends display value beyond blooming | Temporary, not a long-term solution |
Final Thoughts: Choose What Fits Your Garden Best
Mums can do far more than provide a single splash of autumn color. Whether you encourage a mini-rebloom, overwinter indoors, transplant to the garden, compost, or simply enjoy them as seasonal décor, there’s a perfect post-bloom option for every gardener. With a little extra care, your favorite fall flowers can return to brighten your home and garden for years to come.
References
Read full bio of medha deb


