How to Make Rosemary-Infused Oil: A Complete Guide for Gardeners
Transform pantry herbs into aromatic oils that enhance every dish and daily ritual.

Introduction to Rosemary-Infused Oil
Rosemary (Rosmarinus officinalis) is an aromatic perennial herb treasured by gardeners, cooks, and herbalists alike. Known for its remarkable flavor and fragrance, rosemary also offers a range of health and cosmetic benefits. This comprehensive guide explores how to craft rosemary-infused oil from your own harvest, with advice on choosing carrier oils, infusion techniques, and suggested uses for your finished oil both in and out of the kitchen.
Why Make Rosemary-Infused Oil?
Rosemary-infused oil provides a convenient, accessible way to capture the herb’s natural oils—including powerful antioxidants and aromatic compounds—and make them available for culinary, medicinal, and cosmetic uses. Unlike pure rosemary essential oil, which requires specialized equipment and distillation, infused oil can be easily made at home with just a few ingredients and minimal tools.
- Culinary uses: Aromatic oils for drizzling over roasted vegetables, meats, or bread.
- Skincare: Homemade herbal balms, soothing massage oils, and cuticle treatments.
- Hair care: Scalp massages and nourishing conditioners using rosemary’s reputed hair-healthy properties.
- Preservation: Extend the shelf life of your rosemary harvest and reduce waste.
- Gifting: Unique, personal gifts for friends and family, beautifully packaged.
Harvesting and Drying Rosemary for Infusion
How and When to Harvest Rosemary
For the highest-quality infusion, start with fresh, healthy rosemary sprigs from your garden, farmer’s market, or reliable organic source. Harvest in the morning after the dew has dried but before the heat of the day. Use clean, sharp scissors or pruners to trim sprigs, taking care not to remove more than one-third of the plant to encourage continued healthy growth.
- Choose mature stems with plenty of green, needle-like leaves.
- Avoid cutting flowering stems unless you want to infuse the mild, slightly sweet flavors of the blossoms.
- Shake your harvested sprigs gently to remove soil or insects.
The Importance of Drying Rosemary
Drying your rosemary before infusion is essential to reduce moisture content, which prevents spoilage and increases oil shelf life. Infusing fresh herbs can introduce water into the oil, raising the risk of bacterial or mold growth.
- Air drying: Tie sprigs into small bundles and hang upside down in a warm, well-ventilated, shaded location. This usually takes 1–2 weeks depending on humidity.
- Dehydrator: Set to 95°F (35°C) and dry for 6–8 hours, checking occasionally.
- Oven drying: Lay sprigs on a baking sheet and dry at the lowest setting (usually around 170°F/77°C) for 1–2 hours, monitoring carefully to avoid browning.
The rosemary is ready when the leaves are crisp and break easily from the stems. Remove leaves by running fingers along each stem and discard the tough, woody stems.
Choosing the Best Carrier Oil
The carrier oil you select will impact the infusion’s texture, flavor, aroma, and suitability for specific uses. While many oils work well, personal and allergy considerations should guide your choice.
Recommended Carrier Oils
- Olive oil: Classic, widely available, and stable. Ideal for cooking or herbal skincare. Offers a Mediterranean flavor profile.
- Jojoba oil: Lightweight, long shelf life, excellent for cosmetic or hair applications.
- Argan oil: Rich in vitamin E and fatty acids; luxurious for skin and hair treatments.
- Sunflower oil: Neutral flavor and lightweight texture; suitable for sensitive skin.
- Grapeseed oil: Light, non-greasy, and often favored for massage blends.
- Sweet almond oil: Mild, gentle, and commonly used in balms and lotions.
Avoid coconut oil if you or your intended recipients have sensitivities; it’s allergenic for some and can solidify at cooler room temperatures.
5 Simple Steps for Making Rosemary-Infused Oil
The infusion process is straightforward and doesn’t require advanced equipment. Here are the five essential steps for making a high-quality rosemary oil at home.
Prepare Your Rosemary
Ensure your dried rosemary leaves are free from moisture and visible debris. Fill a clean, glass jar three-quarters of the way with the dried leaves. This ratio allows a flavorful, well-balanced infusion.
Add Carrier Oil
Pour your chosen carrier oil over the rosemary to fully submerge the leaves. The oil should rise at least an inch above the level of the herbs to reduce risk of mold growth, especially if some stem pieces are included.
Infuse the Herbs
Tightly seal the jar with a lid. For a traditional cold-infusion, place the jar in a cool, dark cupboard or pantry—not in direct sunlight as this may degrade the herbs and oils. Give the jar a gentle shake every few days to keep the plant matter moving and fully coated in oil. The infusion should steep for 4–6 weeks for best results.
Optional accelerated infusion: To speed up the process, place the jar in a warm spot (not exceeding 110°F / 43°C) for 24–48 hours, then proceed to strain. Note that this method may yield a slightly different flavor profile and shelf life.
Strain the Oil
After the desired infusing period, use a fine mesh strainer, cheesecloth, or nut milk bag to strain out all rosemary leaves, pressing or squeezing to extract every last drop. Transfer the strained oil into a clean, dry, airtight glass container (preferably a dark glass bottle to limit light exposure).
Store and Enjoy
Label your oil with the preparation date and oil type. Store it in a cool, dark place—most homemade herbal oils are best used within 6 months, though some will last longer if kept airtight and away from heat or sunlight.
Table: Carrier Oils Comparison for Rosemary Infusion
| Oil | Flavor/Aroma | Recommended Use | Shelf Life |
|---|---|---|---|
| Olive Oil | Medium, herbal | Culinary, skin | 12-18 months |
| Jojoba Oil | Neutral, light | Skin, hair | 2 years+ |
| Argan Oil | Nutty, rich | Skin, hair | 12-18 months |
| Sunflower Oil | Light, neutral | Culinary, skin | 6-12 months |
| Grapeseed Oil | Very light | Skin, hair | 6-12 months |
| Sweet Almond Oil | Mild, nutty | Massage, balms | 6-12 months |
Tips for Customizing Your Rosemary Oil
- Combine herbs: Try adding dried lavender, thyme, or oregano for a custom blend.
- Use essential oil: To intensify aroma, add a few drops of rosemary essential oil to the finished infusion.
- Make a balm: Combine infused oil with beeswax (ratio: 1 cup oil to 1 oz wax) to create a firm, spreadable balm for skin or cuticles.
- Adjust potency: Steep longer for a more robustly flavored or fragranced product, but always monitor for signs of spoilage.
- Allergy test: Patch skin test before using large amounts, especially with new carrier oils.
Popular Uses for Rosemary-Infused Oil
- Massage oil: Eases muscle tension and invigorates the senses.
- Hair and scalp treatments: Massage into the scalp before shampooing to stimulate circulation.
- Salad dressings and marinades: Adds an herbal note to vinaigrettes, roasted vegetables, or grilled meats.
- Bath oil: Add a tablespoon to warm bathwater for relaxation.
- Cuticle or hand oil: Soothes dry, cracked skin, especially when blended with beeswax into a balm.
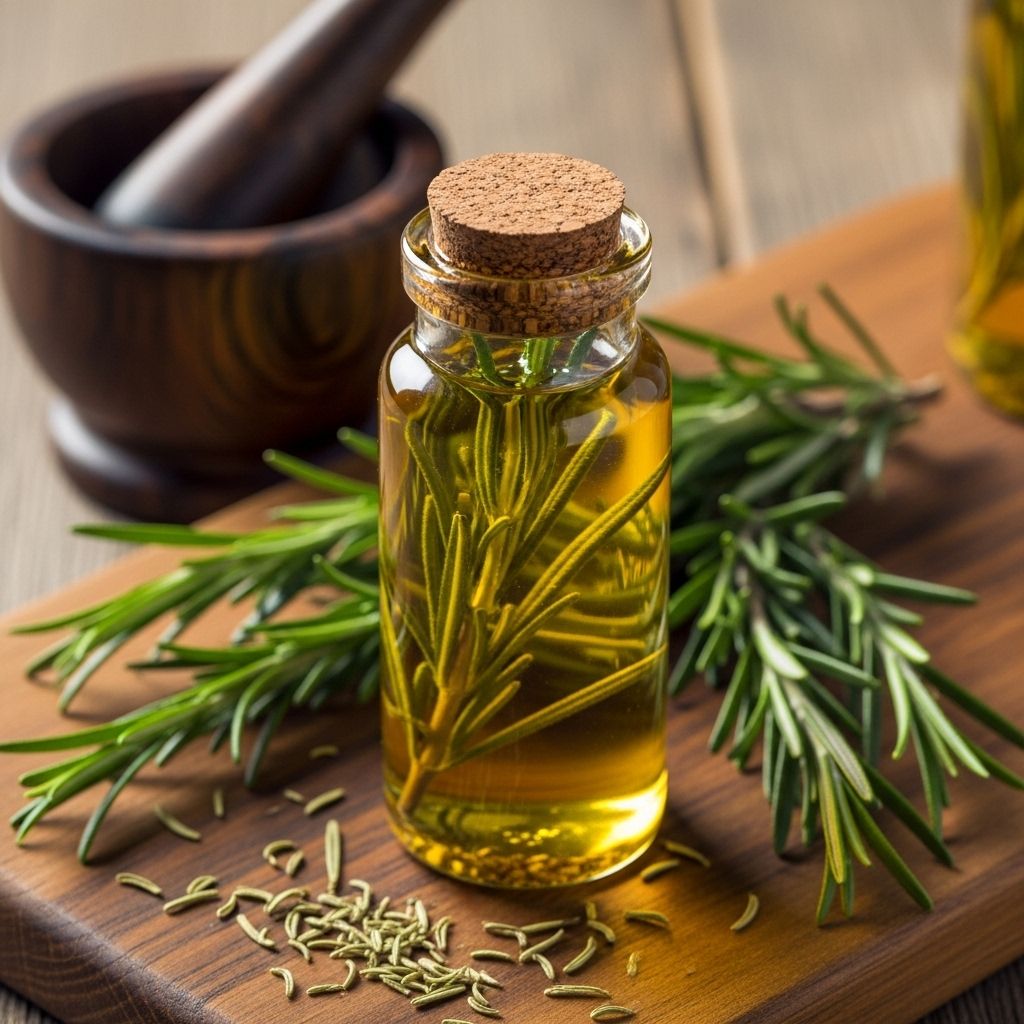
- Gifting: Fill small glass bottles, add a sprig of dried rosemary, and label for an elegant, practical gift.
Cautions and Storage Tips
- Watch for cloudiness, off-smell, or mold: Discard oil immediately if you notice spoilage—infusions contain some risk due to natural water content in the herbs.
- Use dry equipment: Sterilize jars and thoroughly dry all utensils to reduce risk of contamination.
- Avoid direct sun and heat during storage: This preserves both the oil’s flavor and medicinal qualities.
- Shelf life: Most home-infused oils are best used within 6 months; some can last longer if properly stored.
Frequently Asked Questions (FAQs)
Q: Can I use fresh rosemary instead of dried?
A: While you can use fresh rosemary, it increases the risk of contamination since water content may lead to mold or spoilage. Dry rosemary is safer for long-term infusions.
Q: Is it possible to speed up the infusion process?
A: Yes, a gentle warmth method (dating to traditional herbalism) allows infusion in 24–48 hours, but the resulting oil may have a different profile and possibly shorter shelf life than a cold infusion.
Q: Which carrier oil is best for those with nut allergies?
A: Sunflower and grapeseed oils are excellent choices for nut-sensitive individuals. Always patch test if you’re unsure.
Q: How do I know if my infused oil has gone bad?
A: Oil that smells rancid, has visible mold, or becomes cloudy should be discarded and not used.
Q: Can rosemary oil be used for cooking?
A: If you use a food-safe carrier (like olive or sunflower oil) and clean, edible rosemary, your infusion is delicious drizzled on bread, potatoes, and grilled dishes.
Q: Can I gift homemade rosemary oil?
A: Absolutely! Homemade rosemary oil makes an elegant, personal gift, especially when presented in a glass bottle and labeled with its ingredients and date.
Conclusion: Make the Most of Your Rosemary Harvest
Making your own rosemary-infused oil celebrates the connection between gardener, harvest, and home remedy. With careful attention to technique and storage, you can enjoy the flavor, fragrance, and benefits of rosemary all year long—in your food, your daily routine, and heartfelt gifts for others.
References
Read full bio of Anjali Sayee


