How To Transplant Hibiscus: 5 Steps For Healthy Blooms
Master the art of transplanting hibiscus for vibrant blooms and healthy growth season after season.

Image: HearthJunction Design Team
How and When to Transplant Hibiscus: Step-by-Step Guide
Transplanting hibiscus is an essential gardening skill, allowing enthusiasts to rejuvenate struggling plants, redesign landscapes, or expand garden beauty. Hibiscus—with its vibrant, show-stopping blooms and lush foliage—adds visual excitement to any garden space. However, a poorly timed or executed transplant can spell trouble for these otherwise resilient plants. This comprehensive, SEO-optimized guide breaks down everything you need to know about when and how to transplant hibiscus for a thriving, colorful display.
Why Transplant Hibiscus?
There are several common reasons gardeners choose to move hibiscus plants:
- Seeking better sunlight: Hibiscus thrives in full sun. If your plant languishes in shade due to tree or shrub growth over time, relocating it can restore vigorous blooming and healthy foliage.
- Outgrowing the current location: Mature hibiscus shrubs can become crowded or encroach on pathways and other plants, requiring a move to a more spacious spot.
- Soil or drainage issues: Poor drainage, erosion, or root rot may necessitate moving hibiscus to higher ground or improved soil conditions.
- Landscape redesign: Changing your garden layout for aesthetics, new garden beds, or accessibility may require hibiscus relocation.
- Improving plant enjoyment: Sometimes, you may simply want your hibiscus closer to the patio, walkway, or a window for easier viewing and enjoyment.
Fortunately, hibiscus species are hardy and able to handle transplantation with proper care and timing.
Best Time to Transplant Hibiscus
Timing is critical to ensure your hibiscus recovers quickly and continues to grow vigorously:
- After flowering: The ideal time to transplant is just after blooms have faded, which for most varieties occurs in late summer or early fall. This gives plants time to settle before winter dormancy, but avoids disrupting energy-intensive flowering.
- Before winter frost: Ensure the plant has enough time to establish roots in its new location before the first hard frost arrives. In most climates, this means moving hibiscus by late September or early October.
- Spring transplanting: In cold climates, early spring—after the last frost and before active growth—can also be a suitable time for moving hibiscus. This gives plants a full season to rebuild root systems.
- Avoid peak summer and winter: Do not move hibiscus during hot, dry summer spells or during winter dormancy. Both conditions can cause extreme transplant shock and plant decline.
Preparing to Transplant Hibiscus
Proper preparation can significantly increase your hibiscus’s chances of recovery and successful establishment after transplantation.
Site Selection
- Sunlight: Choose a site that receives at least 6-8 hours of full sunlight daily.
- Soil: Opt for well-draining soil rich in organic matter.
- Protection: Provide wind protection for large-flowered types, which can be sensitive to windburn.
Preparing the New Planting Hole
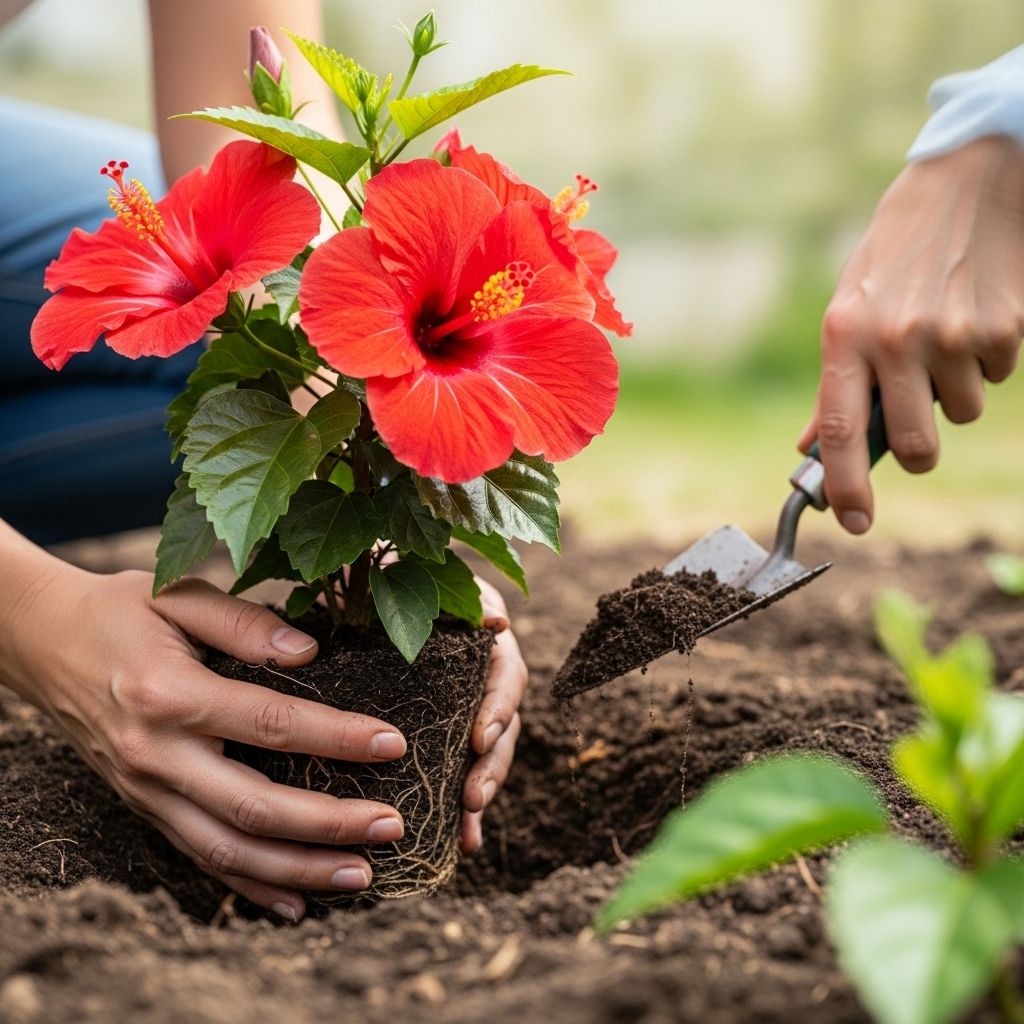
- Dig the new hole before digging up your hibiscus to minimize root exposure.
- The hole should be as deep as the root ball and at least twice as wide to allow room for root expansion.
- Place removed soil on a tarp for easy backfilling and to avoid mess.
- Amend the soil if needed with compost or aged manure for fertility and drainage.
Watering
- Water the hibiscus thoroughly a day or two before transplanting to hydrate roots and reduce stress.
Pruning
- Cut the shrub back by about one-third before moving. This reduces water and nutrient demand, helping the root system support the top growth during recovery.
Step-by-Step Guide: How to Transplant Hibiscus
- Mark and Prepare the New Site
- Dig a hole the size described above at the new location.
- Add a generous layer of compost to the hole bottom and mix with some native soil.
- Prune and Water the Plant
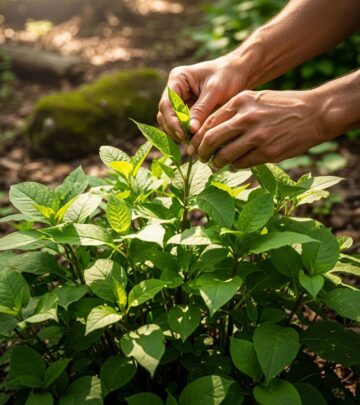
- Trim the hibiscus by one-third, focusing on leggy or damaged stems.
- Give it a thorough watering one day before moving.
- Dig the Plant Out
- Moisten the soil on transplant day to soften it and reduce root disturbance.
- Starting about 1 foot out from the trunk for each inch of trunk diameter (e.g., if the trunk is 2 inches wide, dig 2 feet out), dig a circle around the plant.
- Dig down to the same depth as the root mass (~12-18 inches for mature plants).
- Use a sharp spade or shovel to cut under the root ball, working gently to lift the plant with as much of its root system as possible.
- Lift the plant from the ground, keeping the root ball intact. Use burlap to wrap roots for large specimens.
- Transport and Plant
- Move the hibiscus immediately to its new location to minimize root drying.
- Set the plant in the new hole at the same depth it grew previously.
- Backfill with soil, pressing gently to remove air pockets but not compacting excessively.
- Water thoroughly to settle soil around roots.
- Mulch and Water
- Apply a 2-3 inch layer of organic mulch around the base, keeping it away from direct stem contact.
- Water regularly during the first several weeks to help roots establish, ensuring soil stays moist but not waterlogged.
Aftercare: Ensuring Successful Transplantation
After moving, hibiscus may display mild wilting or leaf drop—normal symptoms of transplant shock. With attentive care, your plant should recover swiftly:
- Continue watering regularly for the first month, especially during dry spells. Deep, infrequent waterings encourage deep rooting.
- Monitor for pests or disease, as stressed plants are more vulnerable.
- Hold off on fertilizing for 4-6 weeks post-transplant, then resume a gentle, balanced fertilizer as active growth begins.
- Check mulch to maintain even soil moisture and weed suppression.
Dividing Hibiscus
If your goal is to multiply your hibiscus, some perennial types can be divided at the same time as transplantation:
- After digging up the plant, gently shake loose soil from the root ball.
- Using a sharp, sterilized knife or spade, separate the root ball into sections. Each division should have several stems and a healthy root mass.
- Replant divisions immediately in prepared holes, following the steps outlined above for transplanting.
Note: Tropical hibiscus are rarely divided in this way; hardy hibiscus and certain perennial species are better suited for division.
Common Transplanting Mistakes With Hibiscus
- Transplanting during bloom: Moving hibiscus when actively flowering can disrupt energy flow and increase stress. Wait until blossoms fade.
- Moving too late in the year: If the plant lacks time to establish before winter, death or severe setback may follow.
- Inadequate root ball: Cutting too small a root ball will reduce survival odds. Dig wide and deep to capture most roots.
- Over-fertilizing after transplant: Fertilizer can burn stressed roots. Wait until new growth appears before resuming feeding.
- Poor site selection: Planting in low-light or poorly drained soil guarantees poor performance.
Table: Quick Reference for Hibiscus Transplantation
| Task | Optimal Timing | Notes |
|---|---|---|
| Prepare new site | 1-2 days before moving | Amend with compost; dig hole twice as wide as root ball |
| Prune hibiscus | Day of or before transplant | Remove 1/3 of plant for easier handling and less stress |
| Dig up plant | Early morning or late afternoon | Cooler parts of day minimize water loss |
| Transplant | Immediately after digging | Don’t let roots dry out; plant at same depth |
| Water and mulch | After planting | Deep water; mulch 2-3 inches thick |
| Fertilize | 4-6 weeks later | Use mild, balanced fertilizer when new growth appears |
Frequently Asked Questions (FAQs)
Q: When is the absolute best time to transplant hibiscus?
A: The best time is in late summer or early fall, just after flowering finishes. This allows the plant to root in before winter. In very cold zones, early spring after the last frost is also acceptable.
Q: Can you transplant hibiscus while it is blooming?
A: It’s best to avoid transplanting during bloom, as this stresses the plant and may reduce flowering the following year.
Q: How much of the root ball should I dig up?
A: Dig at least 1 foot away from the trunk for every inch of trunk diameter, going as deep as the roots extend (often 12-18 inches for mature shrubs).
Q: How soon should I water after transplanting?
A: Water immediately after transplanting to settle the soil and hydrate roots. Continue to water consistently through the first month.
Q: Can I divide my hibiscus during transplanting?
A: Many perennial hibiscus types can be divided at transplant, but tropical hibiscus are usually not divided.
Summary
Whether you’re rescuing a sun-starved shrub, adapting to garden changes, or propagating new plants, transplanting hibiscus is an accessible project for gardeners. With the right timing, careful handling, and attentive aftercare, your hibiscus will reward you with years of flamboyant flowers and lush, healthy growth.
Key Takeaways for Successful Hibiscus Transplantation
- Transplant in early fall (post-bloom) or early spring (in cold zones).
- Prepare the new hole before digging up the plant.
- Prune by one-third and water well before moving.
- Dig wide and deep to preserve roots, and replant at the same depth.
- Mulch and water consistently until established.
- Wait 4-6 weeks before fertilizing after transplanting.
With these steps, your hibiscus can thrive in its new location, providing vibrant color and foliage for seasons to come.
References
- https://www.epicgardening.com/transplant-hibiscus/
- https://www.epicgardening.com/hibiscus/
- https://es.pinterest.com/pin/how-and-when-to-transplant-hibiscus-plants-this-season-in-2024–255438610109044166/
- https://www.youtube.com/watch?v=JnSKYnDgj1M
- https://www.gardeningknowhow.com/ornamental/flowers/hibiscus/transplanting-hibiscus.htm
Read full bio of Shinta


