Handmade Pots: Showcasing Amaryllis and Paperwhite Bulbs in Style
Elevate winter blooms with artisan vessels that showcase flowers as living decor.
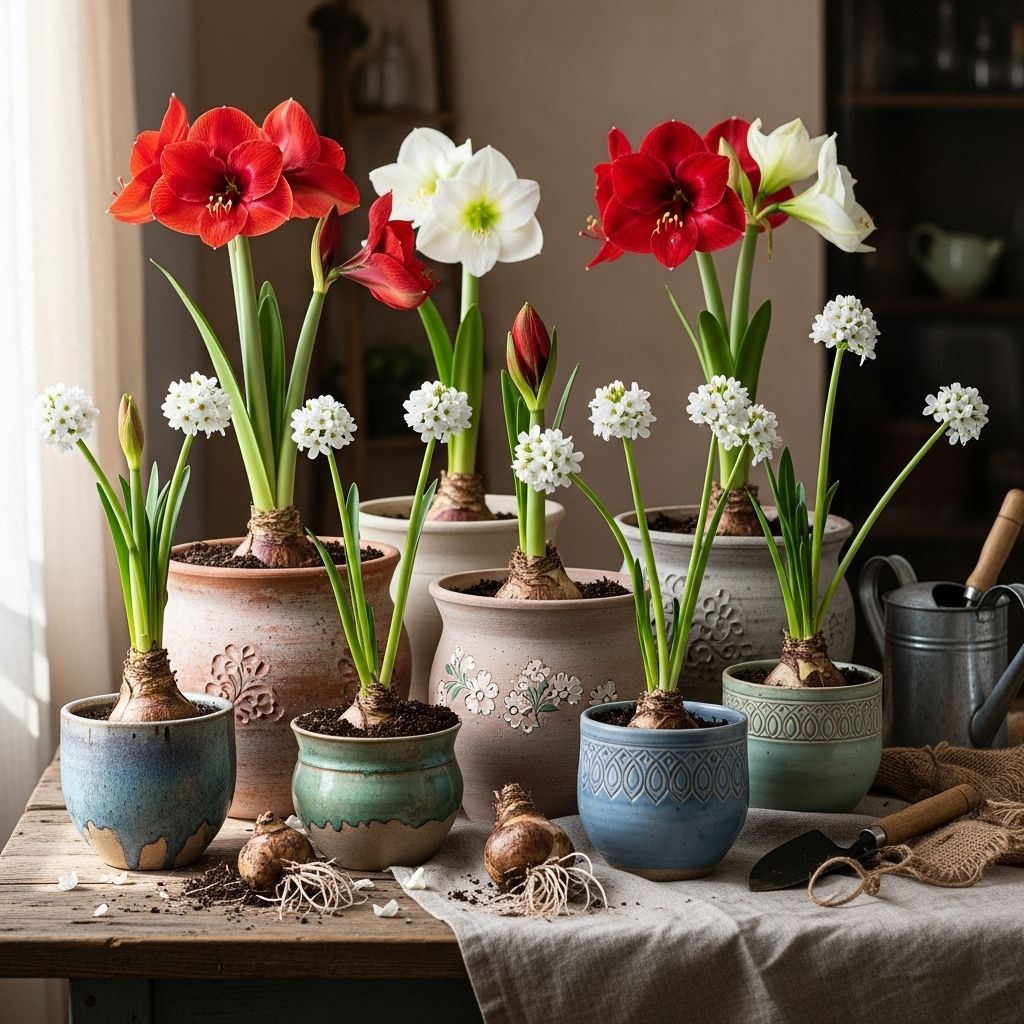
As winter draws in, gardeners often turn to amaryllis and paperwhite bulbs to enliven their homes with fresh blooms. These bulbs are incredibly easy to cultivate indoors, brightening the darkest days with their striking flowers and, in the case of paperwhites, delightful fragrance. The choice of container is key: a handmade pot not only complements the blooms but also brings artisanal beauty to your windowsill display. This guide explores both the planting techniques for amaryllis and paperwhite bulbs and provides inspiration for showcasing them in unique, handcrafted vessels.
Why Grow Amaryllis and Paperwhites Indoors?
- Winter cheer: With their bold colors and uplifting presence, amaryllis and paperwhites add warmth and vitality to interiors during the winter months.
- Easy to grow: Both bulbs are beginner-friendly and require minimal care when grown indoors.
- Creative display: Planting in handmade pots provides a chance to experiment with textures, glazes, and forms that elevate indoor décor as much as the flowers themselves.
Choosing the Right Handmade Pot
The ideal pot is more than just a container—it frames your plant as a living sculpture. When selecting a handmade vessel for amaryllis or paperwhite bulbs, consider:
- Material: Ceramic, stoneware, and terracotta hold moisture well and offer a sturdy base for top-heavy blooms.
- Drainage: For soil planting, ensure your pot has a drainage hole to prevent bulb rot.
- Shape: Taller pots provide better support for long stems, while wide, shallow containers are ideal for grouping bulbs.
- Artisan details: Unique glazes, hand-carved textures, or rustic finishes add personality to your arrangement.
Notable Artisans
Many gardeners seek out wares from respected makers—pottery studios and ceramicists who craft each piece by hand, rendering containers that are both practical and beautiful. Look for work by local artists or explore online marketplaces for pots that stand out as much as the blooms they hold.
Planting Amaryllis and Paperwhites in Soil
Soil planting is the classic approach for both bulb types, providing stability and gentle hydration. Here’s how to get started:
- Step 1: Choose a well-drained potting mix to fill your vessel. Avoid garden soil, which retains too much moisture.
- Step 2: For amaryllis, nestle the bulb into the soil so that the lower three-quarters are covered, leaving the upper portion exposed—this reduces the risk of rotting.
- Step 3: Paperwhites can be planted similarly, but keep the top third of each bulb above the soil line.
- Step 4: Water thoroughly after planting, then wait until the bulb shows signs of sprouting before watering again. Overwatering leads to bulb rot.
- Step 5: Place containers in a sunny window to encourage strong, upright growth.
Tip: Once sprouted, maintain consistently moist (but not soggy) soil. Both plant types benefit from indirect but bright sunlight and a cool, draft-free location for longest-lasting blooms.
Where to Buy Bulbs
High-quality amaryllis and paperwhite bulbs can be found at specialty garden shops and reputable sources like John Scheepers, White Flower Farm, and Terrain. Seek out large, firm bulbs for the best results.
Growing Paperwhites and Amaryllis in Water
For a minimalist twist, many indoor gardeners opt to grow bulbs in water rather than soil. The method is especially popular with paperwhites, though it is possible for amaryllis as well.
- Step 1: Select a watertight vessel—glass bowls, vases, or jars work well for this method.
- Step 2: Create a foundation with pebbles or pea gravel to support the bulbs. Fill the bottom of the container with two to three inches of stones.
- Step 3: Place the bulbs roots down, tops up, nestling them into the stones so they remain upright.
- Step 4: Add water until it just barely reaches the base of the bulbs, ensuring that only the roots are submerged to prevent rot.
- Step 5: Set the vessel in a bright window and monitor water levels—replenish as needed to keep the roots in contact with moisture.
Note: Amaryllis bulbs are heavier and larger, so more pebbles and a steadier base are necessary to stabilize them as they grow. In all cases, avoid letting bulbs sit in standing water.
Displaying Your Bulbs for Maximum Impact
The right container enhances your bulbs’ beauty. Try these display strategies for best aesthetic effects:
- Groupings: Plant several bulbs of the same or different varieties in a single, wide bowl for lush, abundant impact.
- Single specimens: Spotlight a striking handmade pot by planting one dramatic amaryllis bulb at its center.
- Mixed arrangements: Pair bulbs with moss, pebbles, or decorative stones for a finished look that hides soil or supports stems.
- Window sills: Lined up along a sunny ledge, a collection of artisan pots and blooming bulbs makes a living gallery.
Practical and Aesthetic Considerations
| Criterion | Soil Planting | Water Planting |
|---|---|---|
| Ease of Care | Simple, retains more moisture | Requires more monitoring; water levels must be checked |
| Support | Soil anchors bulbs naturally | Balls may topple; stones/gravel help stabilize |
| Aesthetic | Classic, earthy look | Modern, minimalist; roots visible through glass |
| Reusability of Container | Reusable, may develop soil residue | Easy to clean and reuse |
Timing and Aftercare
For holiday blooms, plant amaryllis bulbs about 6-8 weeks before your desired display time (late October or early November for Christmas). Paperwhites tend to flower more quickly, often within 3-5 weeks.
- Once the blooms fade, stalks can be cut down while leaves are left to regenerate the bulb for future seasons.
- If you wish to save bulbs for next year, allow foliage to yellow naturally before storing them in a cool, dry place.
Caring for Top-Heavy Stems
Both amaryllis and paperwhites may become top-heavy as they reach full height. To prevent tipping:
- Use deeper, heavier pots for balance.
- Add extra pebbles or decorative stones atop the soil for stability.
- Stake tall stems discreetly or group multiple plants so they support each other.
Creative Container Ideas
Take inspiration from these creative ideas for showcasing bulbs:
- Heirloom bottles: Use vintage glass bottles or jars for a distinctive, upcycled arrangement, especially for water-grown paperwhites.
- Rustic terracotta: Choose locally-made clay pots with natural textures for a warm, earthy effect.
- Modern stoneware: Glazed stoneware pieces add a contemporary touch, complementing minimalist interiors.
- Mixed materials: Combine wood trays, baskets, or iron stands with your handmade pots for a layered decorative look.
The Artisan Advantage: Where Craft Meets Horticulture
Handmade ceramics are prized for their tactile quality, subtle imperfections, and connection to the maker. By displaying your blooms in artisan-made vessels, you create a one-of-a-kind composition that celebrates both nature and craft.
- Local pottery studios often sell unique, garden-friendly wares perfect for indoor bulb displays.
- Online marketplaces such as Etsy offer a vast selection of handmade pots in every style, size, and finish.
- Custom orders are available if you want a pot tailored to your own vision or space.
Common Problems and Solutions
- Bulb Rot: Overwatering or poor drainage leads to mushy bulbs. Always allow excess water to escape, and never submerge the bulb entirely.
- Leaning Stems: Insufficient light or lack of support may cause plants to flop. Rotate pots regularly and provide staking or support if needed.
- Pest Issues: Indoor-grown bulbs rarely face pests, but monitor for fungus gnats if soil remains overly damp. Good drainage and minimal watering help prevent infestations.
Frequently Asked Questions (FAQs)
Q: Can I reuse bulbs from year to year?
A: Yes. After flowering, let the foliage die off naturally. Remove the bulbs, clean and dry them, then store in a cool, dry place until next season.
Q: How do I prevent my bulbs from getting too tall and floppy?
A: Provide as much natural light as possible and rotate your pots regularly. For paperwhites, adding a small amount of alcohol to the water can stunt stem growth without inhibiting flowers.
Q: Is it safe to grow amaryllis and paperwhites where pets or children may access them?
A: Both amaryllis and paperwhite bulbs are toxic if ingested. Keep containers out of reach of pets and young children.
Q: Do I need fertilizer for indoor-grown bulbs?
A: Generally, bulbs contain enough stored energy for one season of blooms. Fertilizer isn’t necessary if you dispose of bulbs afterward, but if you plan to keep them, feed lightly after blooming as leaves remain.
Summary Tips for Success
- Choose large, healthy bulbs from reputable sources.
- Opt for artisan-crafted pots to elevate the display and ensure proper drainage.
- Follow the planting directions for either soil or water methods, attending to the nuances of each.
- Water carefully: keep bulbs moist but never soggy.
- Place arrangements in a sunny, cool area for robust growth and maximum bloom duration.
Conclusion
Nothing lifts winter spirits like a flower in bloom—and few flowers rival the stately beauty of amaryllis or the fragrant freshness of paperwhites. By growing them in one-of-a-kind handmade pots, you add a second level of artistry and intention to your display. Whether as a creative project, a thoughtful gift, or a personal ritual to mark the season, cultivating winter bulbs indoors offers joy, inspiration, and a living connection to nature’s beauty year-round.
References
- https://www.gardenista.com/posts/handmade-pots-amaryllis-paperwhite-bulbs/
- https://www.youtube.com/watch?v=banNPnkaQuA
- https://www.gardenista.com/posts/diy-bottle-fed-paperwhites/
- https://www.gardenista.com/tag/amaryllis/
- https://www.gardenista.com/tag/indoor-pots/
- https://www.longfield-gardens.com/blog/?p=planting-paperwhites-and-amaryllis-bulbs-in-recycled-containers
- https://www.gardenista.com/garden-design-101/bulbs-and-tubers/amaryllis-bulbs-plant-care-growing-guide/
- https://www.themarthablog.com/2013/11/planting-amaryllis-and-paperwhites.html
Read full bio of Sneha Tete


