Growing Ginger In Containers: 15 Tips For Thriving Plants
Unlock the secrets to lush, flavorful ginger harvests—indoors or out—with these proven container gardening techniques.
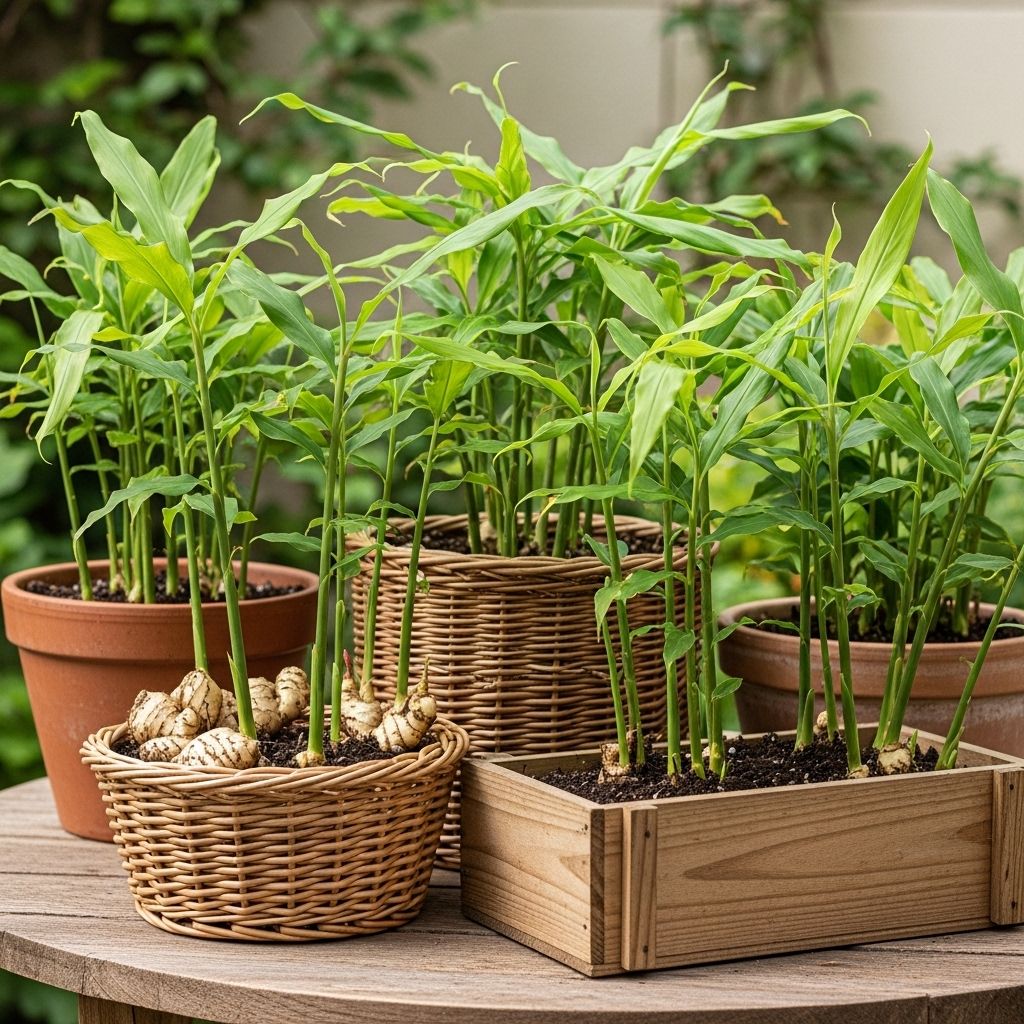
Image: HearthJunction Design Team
15 Tips For Growing Thriving Ginger Plants in Containers
Ginger is a versatile plant treasured both for its culinary uses and ornamental beauty. While it is native to tropical regions and typically flourishes in warm, humid climates, you don’t need a steamy rainforest to enjoy homegrown ginger. Growing ginger in pots or containers makes it possible to cultivate this fascinating herb just about anywhere, including indoors or on small patios. This comprehensive guide reveals proven tips and strategies for nurturing healthy, productive ginger plants in containers, regardless of your climate.
Why Grow Ginger in Containers?
Container growing offers several distinct advantages for ginger:
- Climate Flexibility: Move your container indoors when temperatures drop.
- Pest Control: Reduce the risk of soil-borne pests and diseases.
- Convenient Harvest: Easily harvest fresh rhizomes without disturbing other plants.
- Space Saving: Perfect for patios, balconies, and small urban gardens.
Understanding Ginger’s Needs
Ginger (Zingiber officinale) is a tropical, rhizomatous perennial. Its success hinges on mimicking its native environment—warmth, filtered sunlight, humidity, and loose, fertile soil.
1. Choose the Right Container
Ginger rhizomes grow outward, not deep. Opt for wide, shallow containers at least 12-16 inches across and 8-12 inches deep. Ensure your pot has ample drainage holes to prevent soggy roots, which can quickly lead to rot.
2. Use Well-Draining, Fertile Soil
- Mix high-quality potting soil with compost for organic matter.
- Add perlite or coconut coir to improve drainage.
- Avoid heavy clay soils or mixes that retain too much moisture.
Pro tip: A pH of 5.5-6.5 is ideal for ginger, which prefers slightly acidic to neutral conditions.
3. Select Healthy Seed Ginger
Purchase plump, unblemished ginger rhizomes from a nursery or reputable supplier. Grocery store ginger can work, but it may be treated with growth inhibitors. Look for pieces with visible “eyes” or growing buds.
4. Pre-Sprout Your Ginger Rhizomes
Soak the ginger rhizomes overnight in warm water to encourage sprouting. If possible, place them in a warm, humid spot for a few days until buds begin to swell. This boosts early growth.
5. Planting Your Ginger
- Break the ginger rhizome into chunks, each with at least one eye.
- Lay pieces horizontally about 2 inches below the soil surface, eyes facing up.
- Space chunks 6-8 inches apart.
- Lightly cover with soil; do not compact.
6. Provide Warmth for Optimal Growth
Ginger thrives in temperatures between 70-90°F (21-32°C). Place containers where they will receive gentle, warm conditions—indoors near a sunny window or outside after all danger of frost has passed. If starting early, a heat mat can help encourage sprouting.
7. Give Ginger Bright, Filtered Light
Direct harsh sunlight can scorch ginger’s delicate leaves, while too little light stalls growth. Aim for dappled sunlight or bright, indirect light for at least 4-6 hours daily. A spot under a shade cloth, in a greenhouse, or in a lightly shaded part of your yard works well.
8. Maintain High Humidity
- Keep humidity levels between 70-90% for vigorous growth.
- Use a pebble tray with water under your pot, group plants together, or run a humidifier.
- In dry climates or homes, mist plants occasionally.
- A bright bathroom is an excellent spot for container ginger.
9. Watering: Not Too Little, Not Too Much
Ginger loves consistent moisture but hates soggy roots. Water thoroughly when the top inch of soil feels barely dry to the touch—typically once or twice a week, depending on conditions. Increase frequency during hot or dry spells. Never let soil dry out completely, but avoid waterlogging.
10. Fertilize for Healthy Growth
- Feed ginger every 4-6 weeks with a balanced, slow-release organic fertilizer or fish emulsion.
- Supplement with compost tea for extra nutrients.
- Reduce feeding toward the end of the growing season.
11. Mulch to Help Retain Moisture
Apply a two-inch layer of organic mulch (like straw or shredded leaves) to the soil surface. This insulates roots, locks in moisture, and adds organic nutrients as it decomposes.
12. Move Containers Indoors for Cool Weather
If your temperatures drop below 50°F (10°C), move ginger containers indoors before the chill sets in. Place in a warm, humid spot with filtered light. Container growing makes it easy to protect ginger from cold snaps.
13. Watch for Pests and Diseases
- Root rot is the most common problem—avoid overwatering and ensure drainage.
- Spider mites, aphids, or fungus gnats—treat infestations early with neem oil or insecticidal soap.
- Keep containers clean and well-ventilated.
14. How and When to Harvest Ginger
- Ginger roots can be harvested as early as 4–6 months for tender “baby ginger,” but full maturity takes 8–10 months.
- Wait until the leaves start to yellow and die back; this signals maximum rhizome growth.
- Use your hands or a trowel to gently dig up rhizomes. Take what you need and replant a chunk to keep your plant growing.
- With container-grown ginger, harvesting is as easy as tipping out the pot and retrieving the rhizomes.
15. Storing Freshly Harvested Ginger
- Store unpeeled ginger rhizomes in a cool, dry, dark place for a couple of weeks.
- For longer storage, peel and slice the root, then freeze in airtight containers.
- Alternatively, grate and freeze in ice cube trays for portioned use.
Common Problems and Troubleshooting
| Problem | Cause | Solution |
|---|---|---|
| Yellowing leaves | Overwatering, poor drainage, or nutrient deficiency | Check soil moisture, ensure drains, feed with balanced fertilizer |
| No sprouting | Cold temperatures or old/inhibited rhizomes | Warm the container, use fresh ginger pieces |
| Moldy rhizomes | Excess moisture, poor ventilation | Improve air flow, let soil dry slightly before watering |
| Pests on leaves | Dry air, weak plants | Boost humidity, treat with insecticidal soap |
Companion Planting Ideas
- Shade-tolerant greens like lettuce or spinach pair well in wide ginger containers.
- Avoid heavy feeders or aggressive root systems as companions.
Creative Container Placement
- Place containers on rolling caddies for easy mobility.
- Group with other tropical plants to create a lush, indoor or patio oasis.
- Avoid windy, exposed sites that can stress ginger’s delicate leaves.
Frequently Asked Questions (FAQs)
Q: Can you grow ginger indoors year-round?
Yes, you can grow ginger indoors as long as you provide warmth (above 65°F/18°C), humidity, and bright, indirect light. Container growing allows you to control these conditions easily.
Q: How long does it take to harvest ginger from containers?
Ginger can be harvested as tender baby ginger in 4–6 months, but mature rhizomes usually take 8–10 months to fully develop in containers.
Q: Why are my ginger leaves turning brown?
This is commonly due to low humidity, excessive sun, or underwatering. Increase humidity, provide filtered light, and adjust watering for best results.
Q: What size container is best for ginger?
A wide, shallow pot (12-16 inches diameter, 8-12 inches deep) works best to give ginger space to spread out while allowing shallow roots to breathe.
Q: Is ginger a good candidate for small space or apartment gardening?
Absolutely! With its love of containers and shade-tolerance, ginger is an outstanding plant for patios, balconies, or sunny rooms with adequate humidity.
Final Thoughts
Whether grown for its zesty flavor or its graceful ornamental foliage, ginger is an adaptable, rewarding herb perfectly suited to container cultivation. With a bit of attention to warmth, light, moisture, and humidity, even gardeners in colder climates can enjoy generous harvests of fresh, aromatic ginger year after year. Put these tips to work, and you’ll soon be enjoying the vibrant growth and homegrown flavor of your own potted ginger plants!
References
Read full bio of Shinta


