Comprehensive Guide to Growing Anemones in Pots and Containers
Transform limited spaces into vibrant floral displays with expert planter care tips.
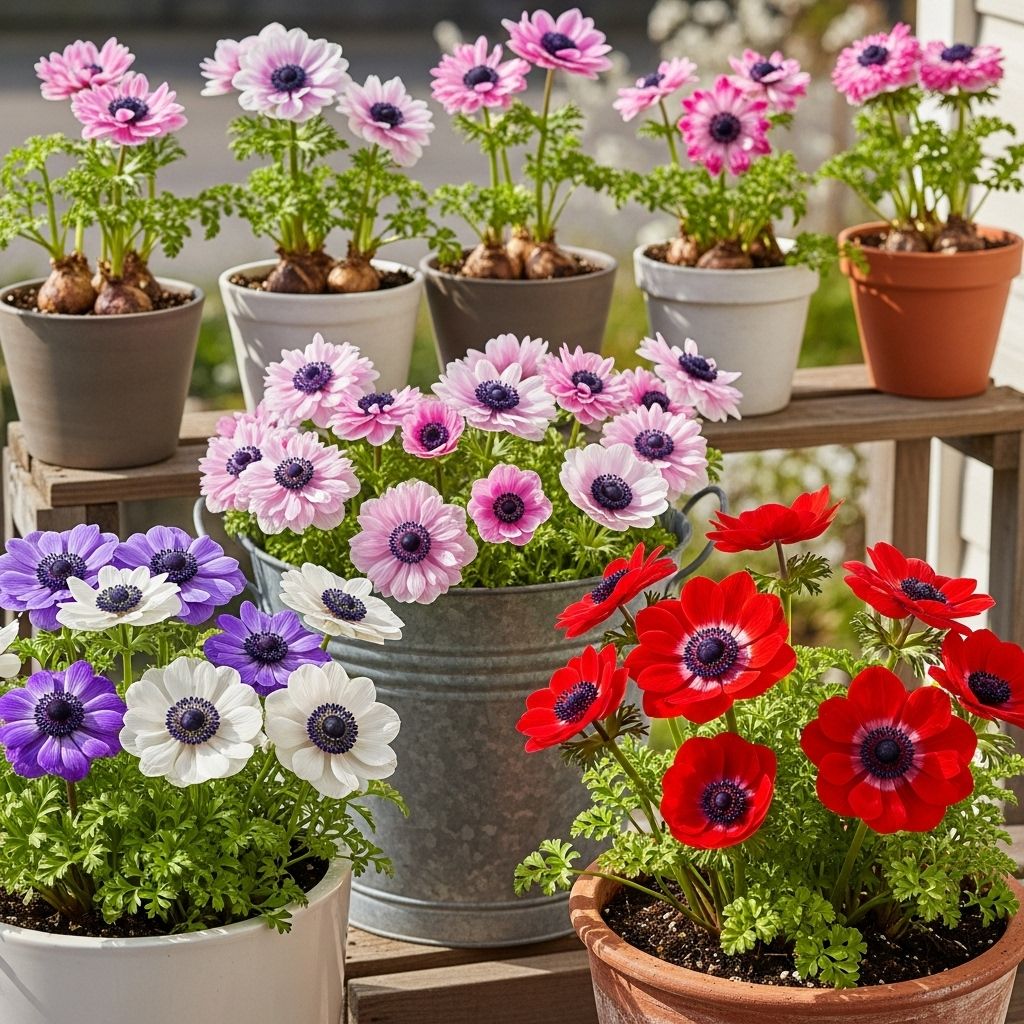
Growing anemones in pots or containers offers flexibility and beauty to any garden, balcony, or indoor space. These charming flowers—members of the Ranunculaceae family—are celebrated for their vivid colors and elegant blooms. This guide covers all facets of container anemone care, tailored for both beginners and experienced gardeners.
About Anemones: Species and Growth Habits
Anemones, also called Grecian windflowers, are herbaceous perennials grown from either small tubers (corms) or rhizomes, depending on species. With their popularity skyrocketing in cut-flower bouquets and container displays, understanding their specific growth needs is crucial for success.
- They thrive in containers and beds alike.
- Most garden anemones (such as Anemone coronaria) are grown from corms, resembling hard, dried bulbs prior to planting.
- They generally bloom in spring, offering several weeks of color with proper care.
Advantages of Growing Anemones in Containers
Opting for containers has several benefits for the home gardener:
- Allows gardening in small or paved spaces, patios, balconies, and indoors near bright windows.
- Makes it easier to control soil quality, moisture levels, and sunlight exposure compared to open beds.
- Simplifies overwintering and moving plants to protect from harsh weather.
Choosing the Right Container
The first step is selecting a suitable pot. Container choice directly impacts drainage, root development, and bloom quality.
- Drainage Holes: Essential for preventing waterlogged soil and root rot; always select pots with ample drainage holes.
- Material: Clay, ceramic, plastic, or even resin pots will all work. Choose based on aesthetics, weight, and insulation properties.
- Size: Avoid very large containers; anemones have shallow root systems and are prone to rot if excess soil remains wet. A 3-gallon pot (or similar) is generally ideal for several corms .
- Depth: Around 8–10 inches deep is sufficient for most species.
Best Soil Mix for Anemones
Anemones require well-draining, light-textured soil. They are highly susceptible to rot when roots sit in stagnant water.
- Use a high-quality commercial potting mix that incorporates perlite, pumice, or sand for drainage.
- Avoid heavy garden soils or mixes with moisture-retaining gels.
- If using your own blend, combine:
- Two parts potting mix
- One part coarse sand or perlite
- Optional: a scoop of compost for nutrients, but in moderation
Understanding Anemone Corms: Preparation and Pre-Soaking
Most popular anemones for containers (e.g., Anemone coronaria) start as hard, dry corms. Proper pre-soaking is vital for a strong start.
- Soak corms for 4–6 hours in room temperature water before planting. This wakes them from dormancy and ‘plumps’ them for sprouting .
- If sprouting indoors, start corms in shallow trays of pre-moistened potting mix and keep at 40–50°F (4–10°C).
- Check corms for mold or rot before planting; discard any that show damage.
Planting Anemones in Containers: Steps & Tips
Planting depth, positioning, and spacing play key roles in long-term health and flowering.
- Depth: Plant corms 1.5 to 2 inches below the soil surface.
- Spacing: For a 3-gallon pot, place 4–6 corms. In larger containers, increase proportionally, but avoid overcrowding.
- Orientation: Place corms with the rounded side down and pointed side up if visible. If indistinguishable, plant on their side; the shoots will find the surface.
- Cover gently and firm soil, but avoid compacting too tightly, as roots prefer aerated media.
- Lightly water after planting to settle the soil.
Ideal Light and Temperature Conditions
Anemones thrive with the right balance of light and temperature:
- Light: Provide full sun to light shade. 6+ hours of direct sunlight is optimal for robust stems and blooms.
- Indoor Placement: Near bright east- or south-facing windows works well during early growth. Avoid dark locations to prevent leggy, weak plants .
- Temperature Range: Anemones do best at 50–65°F. Avoid exposing young plants to freezing temperatures; bring pots in or shelter them during frost or snow .
- If forced blooms are desired earlier, keep containers in a cool location (garage, cold frame) and then bring into warmer, brighter conditions to stimulate growth.
Watering Anemones in Containers
Consistent moisture is important, but overwatering is the primary cause of failure:
- Initial Watering: Water the pot after planting to settle the soil.
- Ongoing: Allow the top 1 inch of soil to dry out between waterings.
- Water at the base, not the foliage, to minimize disease risk.
- Never let the pot sit in water; empty saucers after rain or irrigation.
Tip: Containers generally dry faster than in-ground beds, but beware of waterlogging in cold, dark winter conditions.
Fertilizing Container-Grown Anemones
- Start with a fertile potting mix. Slow-release fertilizer can be mixed in before planting.
- During active growth, supplement every month with a balanced, water-soluble fertilizer or add a seaweed tonic for a boost, especially right after sprouting .
- Do not over-fertilize, as too much nitrogen can promote leafy growth at the expense of flowers.
Supporting and Deadheading Anemones
Stem support and basic maintenance will enhance the display:
- Most container anemones won’t need staking if given plenty of sun and not overcrowded.
- Remove fading blooms (deadhead) regularly to prolong flowering and direct energy into bulb development, not spent flowers.
- Trim yellowing or dead leaves as needed to tidy your display.
Aftercare: Post-Bloom and Overwintering Tips
- When flowering ends, reduce watering as leaves yellow and die back naturally.
- In mild climates, keep corms dormant in the pot with minimal moisture; resume watering in late winter or early spring.
- In harsh winters, store pots in a frost-free location (garage, shed) until the risk of frost passes.
- To force blooms indoors for winter color, follow standard bulb forcing protocols.
Common Problems and Troubleshooting
- Rotting corms/stems: Usually from overwatering or poor drainage. Discard mushy corms and replant in fresh, drier soil.
- Leggy, weak plants: Caused by insufficient sunlight; move to a brighter position or supplement with grow lights.
- Pest issues: Slugs and snails may nibble on young shoots; use organic controls or physical barriers.
- Diseases: Fungal issues (downy mildew, botrytis) appear with excess humidity and poor air movement. Prune infected parts, increase spacing, and avoid wetting foliage.
Design Tips for Anemone Containers
- Mix anemones with other bulbous plants (like ranunculus or miniature daffodils) for prolonged interest.
- Use decorative containers to complement the color of your anemones’ blooms.
- Consider multi-level planting by layering early spring bulbs below anemone corms.
Container Anemones: Bloom Timeline and Life Cycle
| Stage | Description | Timing |
|---|---|---|
| Corm Planting | Soaked and planted in well-draining medium | Late fall or late winter |
| Shoot Emergence | First green growth appears above soil | 2–4 weeks after planting |
| Budding | Flower buds form as daylight increases | 1–2 weeks after leaves emerge |
| Flowering | Blooms open and last several weeks | Spring or early summer (varies by climate) |
| Post-bloom Dormancy | Plants die back; corms rest | Late summer to winter |
Frequently Asked Questions (FAQs)
Q: Can anemones be grown indoors year-round in containers?
A: Yes, anemones can be started and grown indoors provided they receive enough bright light. Grow lights may be necessary in low-light homes to prevent legginess.
Q: How often should anemones in pots be watered?
A: Water thoroughly after planting, then allow the top inch of soil to dry before watering again. Overwatering is the most common mistake; err on the side of slightly dry rather than soggy.
Q: What’s the best fertilizer for container anemones?
A: Use a balanced, slow-release fertilizer at planting, supplemented by liquid feed (such as seaweed tonic or balanced houseplant fertilizer) monthly during active growth.
Q: How do I prevent my anemones from getting leggy and floppy?
A: Ensure your anemones receive at least 6 hours of sunlight daily. Move them to a sunnier location or use grow lights for indoor pots.
Q: Can I reuse soil from last season’s anemone pots?
A: It’s best to refresh the soil at least partially each season to prevent disease buildup and replenish nutrients.
Summary: Key Tips for Success
- Always use pots with drainage holes.
- Choose a light, well-drained potting mix.
- Pre-soak corms for best sprouting and discard any damaged corms before planting.
- Don’t overwater. Let the surface dry slightly between waterings.
- Give plenty of bright light and protect from frost during early growth.
- Deadhead faded blooms to encourage continued flowering.
- Store pots in a cool, dry place after flowering until the next season.
With these best practices, your anemones will thrive and delight, making a vivid statement in any pot or container garden.
References
Read full bio of Sneha Tete

