Green Walnuts Preserved: A Complete Guide to Making Sweet Green Walnut Preserves
A fragrant recipe that transforms a fleeting spring harvest into a year-round delicacy.
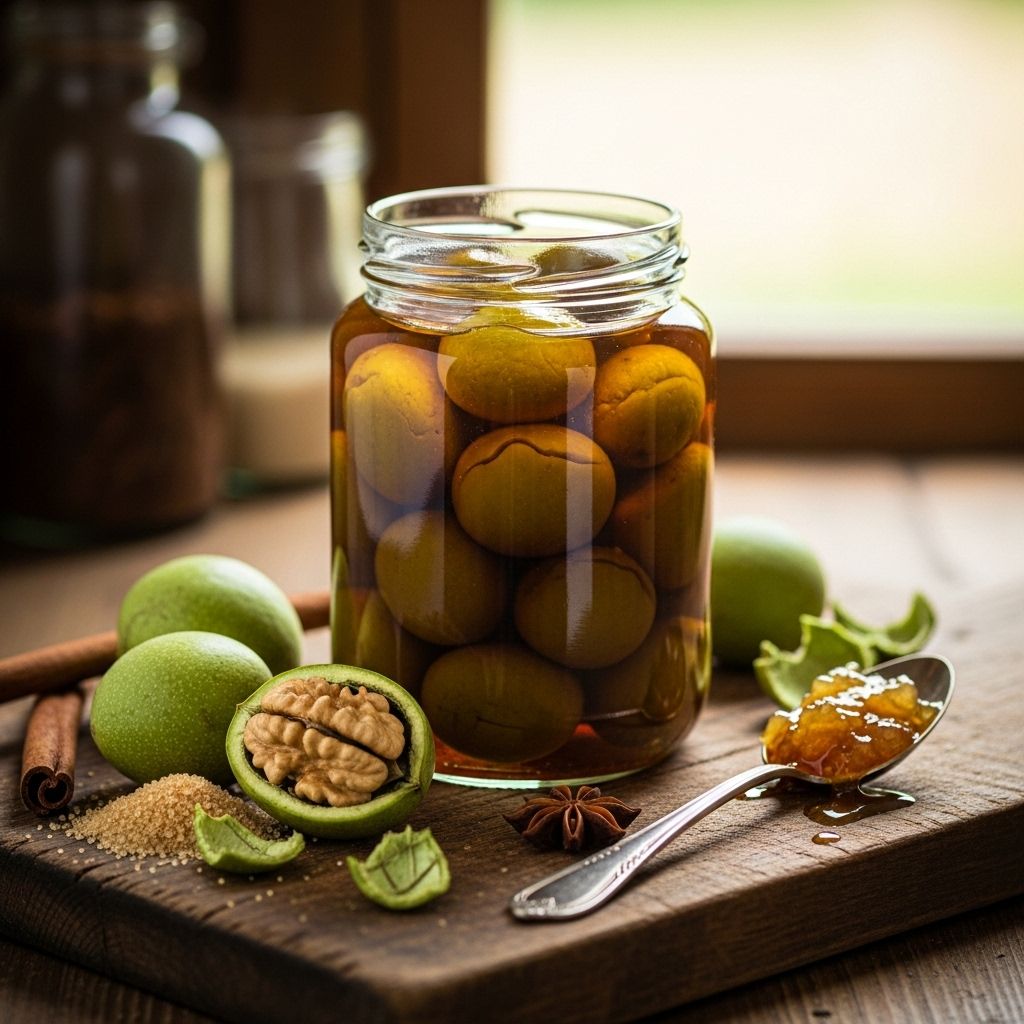
Image: HearthJunction Design Team
If you have ever strolled beneath a walnut tree in late spring, you may have noticed the clusters of green, unripe nuts dotting its branches. Before these young walnuts have formed a hard shell, they can be transformed into a unique and aromatic preserve, prized in many Mediterranean and Eastern European cuisines. In this comprehensive guide, you’ll learn how to make green walnut preserves—sometimes called spoon sweets or glyko karydaki—through every step: from harvesting the right walnuts to preparing, cooking, and storing these complex, sweet treats.
Why Make Green Walnut Preserves?
Green walnut preserves are unparalleled in flavor: sweet, spiced, earthy, and slightly bitter, with a texture that is both tender and chewy. These preserves are traditionally enjoyed as spoon sweets, offered to guests with coffee, or served with cheese and desserts. Preserving walnuts at this immature stage transforms a fleeting seasonal product into a year-round delicacy. The process is richly traditional yet surprisingly adaptable for the home kitchen.
Table of Contents
- About Green Walnuts
- Gathering and Preparing Green Walnuts
- Essential Ingredients and Equipment
- Recipe Method: Overview of the Five Stages
- Step-by-Step Recipe Instructions
- Flavor Variations and Cultural Notes
- How to Serve Green Walnut Preserves
- Storage, Shelf Life, and Safety
- Frequently Asked Questions
About Green Walnuts
Green walnuts are the immature fruits of Juglans regia (English/Persian walnut) or Juglans nigra (black walnut). They’re picked early, generally from late May to mid-June, before the inner shell has fully formed and while the nut can still be pierced with a skewer or needle. As the nut matures, the shell hardens and the fruit becomes unsuitable for preserves.
When preserved, they offer a complex flavor: slightly tannic, deeply aromatic, and richly flavored from the long steeping in sugar syrup and spices.
Gathering and Preparing Green Walnuts
Preserving green walnuts starts with careful selection and hands-on preparation:
- Harvest young, tender walnuts when they are still green and can be easily pierced through (generally about the size of a small plum).
- Wear gloves: the walnut’s outer green hull contains juglone, a staining compound that can dye hands, tools, and even clothing. Use a sturdy paring knife or a skewer.
- Weigh your walnuts. Most recipes express proportions by weight rather than count. Expect to use about 1-2 kg (2-4 lbs) of green walnuts per batch.
Essential Ingredients and Equipment
The foundation for sweet green walnut preserves is simple and traditional, but subtle tweaks in spice and technique set each recipe apart. Below are the core ingredients and optional aromatics:
- Green walnuts: Selected as above, fully tender and uncured.
- Baking soda: Used for soaking, helps soften walnuts and remove bitterness.
- Granulated sugar: The main sweetener for the syrup; some use raw sugar for deeper flavor.
- Spices: Cinnamon sticks and sometimes whole cloves are classic. You may also use spicebush berries or vanilla if available.
- Lemon juice: Balances sweetness, stabilizes the syrup, and enhances flavor complexity.
- Water: Needed for soaking, boiling, and syrup-making.
- Optional flavorings: Fragrant geranium leaves, cardamom, or even rosewater.
Equipment: Large pot, bowls for soaking, colander, glass jars with lids, skewer or paring knife, slotted spoon, kitchen scale, and candy thermometer (recommended).
Recipe Method: Overview of the Five Stages
The process of making green walnut preserves unfolds over several days and five main stages:
- Pricking: Pierce each walnut in several places (with a skewer or toothpick) to help absorb syrup and leach bitterness.
- Soaking: The pierced walnuts are soaked in water, which is changed daily for up to a week, often with baking soda for the first 24 hours. This removes bitterness and helps soften the fruit.
- Boiling: Parboil the soaked walnuts in fresh water to further tenderize them, repeating as needed until the walnuts no longer taste bitter.
- Steeping in syrup: Cook walnuts in thickened sugar syrup flavored with spices. After an initial simmer, let the mixture rest overnight to help the flavors penetrate.
- Final syrup concentration: The next day, boil the walnuts and syrup again until the syrup reaches a dense, jammy consistency (usually 105–107˚C/220–225˚F).
Step-by-Step Recipe Instructions
Ingredients (for about 1.5-2 kg walnuts):
- 1.5-2 kg (3–4 lbs) green walnuts
- 1-2 tablespoons baking soda
- About 2 kg (4 lbs) granulated sugar (weigh your walnuts and use an equal weight of sugar)
- 1–2 liters (1–2 quarts) water (plus more for soaking and boiling)
- 2–3 cinnamon sticks
- 5–10 whole cloves (optional)
- 1–2 tablespoons spicebush berries or vanilla (optional)
- ½ cup (120 ml) freshly squeezed lemon juice
Preparation:
- Day 1–2: Pricking and Soaking:
- With gloved hands, rinse and scrub the walnuts under cool water to remove any fuzz or debris.
- Pierce each with a skewer/toothpick several times through the skin.
- Place in a large bowl, cover with cold water, and dissolve in 1–2 tablespoons baking soda. This helps loosen bitterness and soften.
- Soak for 24 hours, then drain. Rinse thoroughly.
- Day 2–5: Continued Soaking:
- Each day, change the water, rinse, and re-cover the walnuts with fresh water. Continue for 3–7 days, until the walnuts lose their bitterness and water runs clear. The exterior will darken.
- Day 5: Parboil the Walnuts:
- Drain the last soaking water; place nuts in a large pot and cover with fresh water.
- Bring to a boil, simmer for about 10–15 minutes, and drain. Taste a walnut: it should be tender, not chalky, and with only the faintest bitterness. Repeat boiling if needed.
- Rinse the boiled walnuts in cool water and drain thoroughly. Some traditions blanch them a final time with a squeeze of lemon juice.
- Make the Syrup:
- In a clean pot, combine weighed sugar with 1–2 liters water. Bring to a simmer, stirring until the sugar dissolves, then add cinnamon sticks, cloves, and any optional aromatics.
- Add the prepared walnuts to the syrup. Simmer gently for 20–30 minutes. Remove from heat; let the nuts steep in the syrup overnight to infuse the flavors fully.
- Finish the Preserve:
- After resting, return the pot to a low heat and add the lemon juice. Cook gently for another 30–45 minutes, or until the syrup reaches a thick, glossy consistency and 105–107˚C (220–225˚F) if using a thermometer.
- The syrup should coat a spoon. Avoid overcooking, as walnuts can toughen or syrup can crystallize.
- Jar and Store:
- While still hot, pack the walnuts in sterilized glass jars, cover fully with syrup, and seal. Process jars in a boiling water bath for 10 minutes if long-term storage is desired.
Flavor Variations and Cultural Notes
Throughout the Mediterranean and the Caucasus, green walnut preserves are flavored in subtly different ways. Here are some popular regional variations:
- Greek Glyko Karydaki: Uses cinnamon, cloves, and sometimes rose geranium leaves (but vanilla extract is often substituted if those aren’t available).
- Persian Morabaye Chagale Gerdoo: May use cardamom and serve preserves chilled from the fridge.
- Armenian/Georgian Variants: Sometimes flavored with galium or vanilla bean and served with nuts in the syrup.
- Spicebush Version: Substitute some of the cinnamon/cloves with dried spicebush berries (available from specialty foragers).
How to Serve Green Walnut Preserves
- As a dramatic dessert: Serve a single walnut (or a spoonful) drizzled with syrup on a small plate as a spoon sweet alongside espresso or black coffee.
- With soft cheese: Pair the preserves with fresh ricotta, mascarpone, or tangy sheep’s milk cheeses for a sophisticated cheese plate.
- As a topping: Use over vanilla ice cream or panna cotta for an exotic, aromatic finish.
- Layer with cakes: Place thin slices between layers of dense cakes or use the syrup to moisten cake rounds.
- As a condiment: Add to breakfast yogurt or porridge for an earthy, sweet accent.
Storage, Shelf Life, and Safety
- Storage: Keep unopened jars in a cool, dark place. Once opened, refrigerate and use within four weeks for best flavor.
- Shelf life: Properly jarred preserves can last up to a year in the pantry. The sugar syrup acts as a preservative, but always check for spoilage after opening.
- Preservation tips: Always use sterilized jars and process in a boiling water bath if you plan to keep them unrefrigerated for extended periods.
Frequently Asked Questions (FAQs)
Q: What if my walnuts remain bitter after soaking?
A: Extend the soaking stage, changing water daily for up to 10 days if needed. Parboiling after soaking can also help remove persistent bitterness.
Q: Can I use walnuts that are already showing signs of the inner shell forming?
A: You may use them, but the preserves may remain hard in the center. If the shell is too developed, only the syrup will be enjoyable, not the nuts themselves.
Q: Do I need to peel the walnuts?
A: Some traditions recommend peeling the outer green rind for a lighter flavor and appearance, but most recipes leave the rind on for maximum aroma and character.
Q: How do I know when the syrup is ready?
A: The syrup should be thick, glossy, and reach about 105–107˚C (220–225˚F) on a candy thermometer. It should slowly coat the back of a spoon.
Q: Are there common mistakes to avoid?
A: Overcooking can lead to crystallized syrup or tough walnuts. Always monitor both the syrup’s thickness and the walnuts’ tenderness as you cook.
Table: Key Stages in Making Green Walnut Preserves
| Stage | Purpose | Time Frame | Tips |
|---|---|---|---|
| Pricking | Helps syrup penetrate, removes bitterness | 30–60 minutes | Use gloves, prick through with skewer |
| Soaking (with/without baking soda) | Removes bitterness, softens walnuts | 3–7 days | Change water daily; more days = milder preserves |
| Parboiling | Tenderizes, removes remaining bitterness | 10–20 minutes | Test one walnut for tenderness and flavor |
| Steeping in syrup | Infuses flavor, starts glaze process | Overnight rest | Add spices only after sugar dissolves |
| Final syrup concentration | Creates glossy, thick syrup for preservation | 30–45 minutes | Monitor syrup temp and thickness closely |
Tips for Success
- Always harvest green walnuts before the shell firms. Test by poking through with a skewer with little resistance.
- Patience in soaking and daily water changes brings the best flavor and texture.
- Experiment with spices—traditional cinnamon and cloves can be swapped for cardamom, vanilla, or local foraged aromatics like spicebush.
- Use a candy thermometer for precise syrup consistency.
- Label jars with the date—the flavor develops and deepens over several months.
Conclusion: A Heritage Worth Preserving
Making green walnut preserves is a ritual of the harvest, a method passed down through generations and across cultures. Combining craftsmanship, patience, and respect for seasonality, these preserves transform young walnuts into a heady, spiced treat with universal table appeal. With practice and care, anyone can carry on this tradition and share a spoonful of history with each jar.
References
- https://www.youtube.com/watch?v=7jZDwxu9PdI
- https://www.gardenista.com/posts/green-walnuts-recipe-sweet-preserves/
- https://labsalliebe.com/en/morabaye-chagale-gerdoo-green-walnut-preserves-%D9%85%D8%B1%D8%A8%D8%A7%DB%8C-%DA%AF%D8%B1%D8%AF%D9%88/
- https://www.kopiaste.org/2007/11/glyko-karydaki-fresh-walnuts-preserved-in-syrup/
- https://foragerchef.com/green-walnut-jam-preserves/
Read full bio of Srija Burman

