Spring Bulb Garden Design Ideas: 6 Expert Strategies
Illuminate your garden with vibrant blooms and expert tips for lasting seasonal beauty.
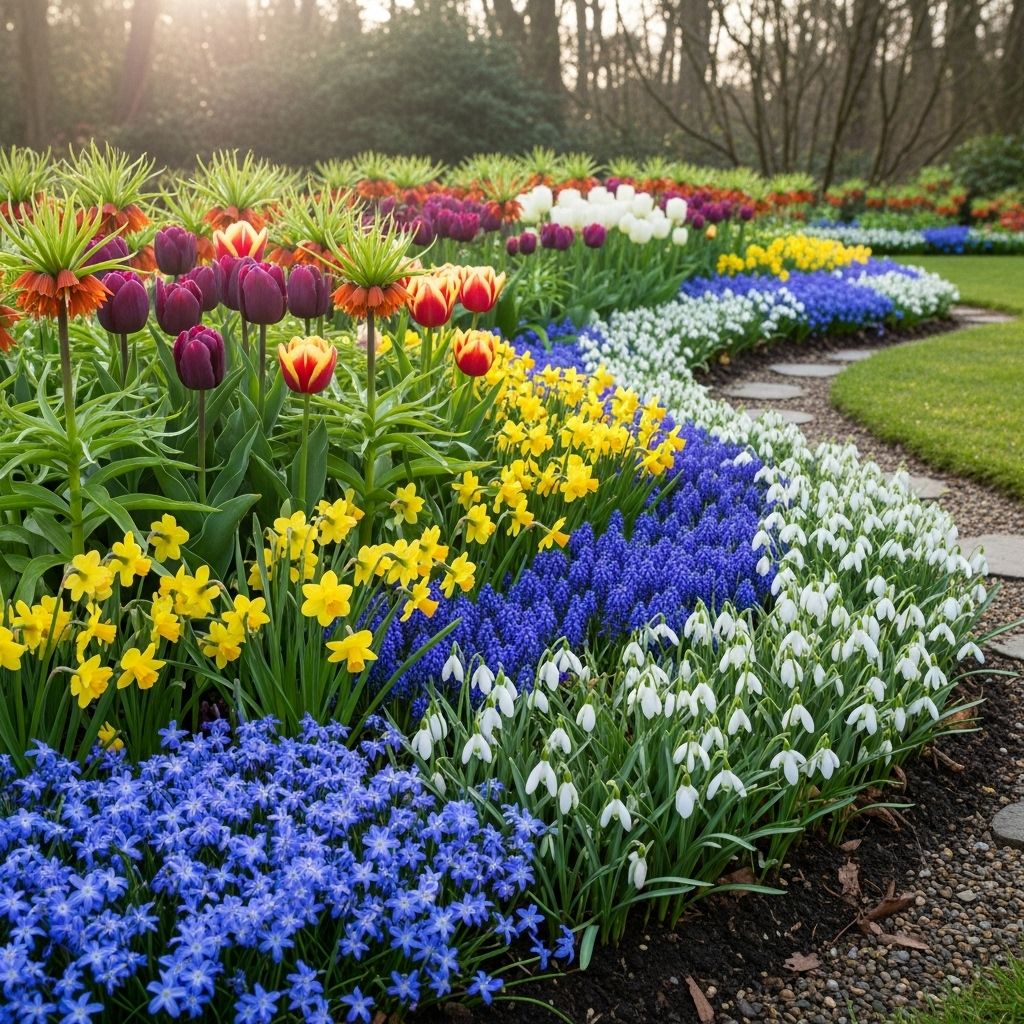
Image: HearthJunction Design Team
The Complete Guide to Designing with Spring Bulbs
Spring-flowering bulbs offer gardeners the first vibrant colors of the growing season, creating breathtaking displays that announce winter’s end. Whether you’re designing an entirely new garden or enhancing an existing landscape, understanding how to effectively plan and plant spring bulbs will ensure spectacular results. This comprehensive guide explores professional design techniques, planting strategies, and creative approaches to help you create stunning spring bulb displays that will delight season after season.
Planning Your Spring Bulb Garden
The key to a successful spring bulb garden lies in thoughtful planning. Unlike perennials that can be moved if they don’t work in their initial location, bulbs perform best when planted correctly from the start and left undisturbed. Consider these essential planning elements before breaking ground.
Selecting the Perfect Location
Most spring-flowering bulbs require at least 6 hours of direct sunlight daily during their growing season. This light requirement is crucial because bulbs rely on sufficient sunlight after flowering to store energy for next year’s blooms. When scouting locations in your garden, remember that areas that receive full sun in early spring may become shaded once deciduous trees leaf out. For optimal results:
- Choose areas that receive morning sun with light afternoon shade in warmer climates
- Select locations with good drainage to prevent bulb rot
- Consider visibility from indoor and outdoor viewing points
- Avoid areas where water collects after heavy rain
Choosing a Color Scheme
A carefully planned color palette creates visual harmony and maximizes impact in your garden. When selecting bulbs, consider these approaches:
- Monochromatic: Using variations of a single color creates a sophisticated, elegant look
- Complementary: Pairing colors opposite on the color wheel (purple and yellow, red and green) creates vibrant contrast
- Analogous: Using colors adjacent on the color wheel (purple, blue, and pink) creates a harmonious progression
- Warm or cool: Focusing on either warm tones (reds, oranges, yellows) or cool tones (blues, purples, whites) creates a cohesive feeling
For smaller spaces, limiting your palette to one or two colors creates greater impact and makes the area appear larger, while mixed colors can make small spaces feel more confined.
Planning for Continuous Bloom
One of the most effective strategies for creating a dynamic spring display is selecting bulbs with different blooming periods. This approach ensures your garden remains colorful throughout the season rather than having a short, intense burst of flowers followed by nothing. Consider including:
| Blooming Period | Examples |
|---|---|
| Early Spring (February-March) | Snowdrops, Winter Aconite, Snow Crocus, Early Daffodils |
| Mid-Spring (April) | Tulips, Hyacinths, Muscari, Most Daffodils |
| Late Spring (May-June) | Late Tulips, Allium, Late Daffodils, Camassia |
By combining early, mid, and late-spring bloomers, you’ll create a landscape that evolves throughout the season, delivering new visual interest as certain plants finish and others begin their display.
Effective Planting Strategies
How you arrange and plant your bulbs significantly impacts the final appearance of your garden. Professional designers use several proven techniques to create natural-looking, impactful displays.
Mass Planting for Impact
For dramatic visual impact, plant bulbs in generous clusters rather than spacing them individually throughout the garden. This approach mimics how bulbs naturally grow in the wild and creates bold blocks of color that can be appreciated from a distance. For maximum effect:
- Plant at least 12 bulbs of one variety in each grouping for medium to large bulbs like tulips
- Use 50 or more small bulbs (like crocus or snowdrops) to create noticeable impact
- For summer bulbs, plant a minimum of 3-6 bulbs of the same variety in each group
The larger the planting space, the more bulbs you should include in each grouping. A good rule of thumb is that the display should be proportionate to the viewing distance—farther viewing points require larger groupings to make an impression.
Creating Natural-Looking Drifts
To achieve a naturalistic look that appears as though the bulbs have spread on their own over time, try the drift planting technique. Instead of planting in tight circular clusters:
- Scatter bulbs across the planting area before placing them in the soil
- Create irregular, elongated groupings that flow through the garden
- Vary the density of plantings, with some areas more concentrated than others
- Plant in odd numbers (3, 5, 7, etc.) for a more natural appearance
This approach is particularly effective for naturalizing bulbs in lawn areas or woodland gardens, creating the impression that the flowers have spread naturally over many seasons.
The Lasagna Planting Method
The lasagna planting technique maximizes space by layering bulbs with different blooming times in the same area. This clever approach allows you to enjoy successive waves of color from a single planting spot. To create a lasagna planting:
- Dig a hole to the depth required by your deepest bulbs (usually 8-10 inches)
- Place the largest, latest-blooming bulbs (like alliums or late tulips) at the bottom
- Add 2-3 inches of soil on top
- Place mid-season blooming bulbs (like daffodils) in the middle layer
- Add another 2-3 inches of soil
- Place early-blooming, smaller bulbs (like crocus) in the top layer
- Cover with the remaining soil and water thoroughly
This technique works wonderfully in containers and garden beds alike, providing a continuously evolving display from the same planting area. Each layer emerges and blooms in sequence, with the foliage of earlier bloomers masked by the fresh growth of later varieties.
Integrating Bulbs with Other Garden Elements
Spring bulbs rarely exist in isolation in well-designed gardens. Their integration with other plants and landscape features creates more sophisticated, multi-season displays.
Combining Bulbs with Perennials
Interplanting bulbs with perennials solves one of the main challenges of bulb gardening: dealing with fading foliage after blooming. As bulb foliage yellows (which must be left in place to feed next year’s flowers), emerging perennials conceal the declining leaves. Effective combinations include:
- Tulips with emerging hostas or daylilies
- Daffodils with catmint or hardy geraniums
- Alliums rising through the foliage of salvias or coreopsis
- Early spring bulbs with later-emerging perennials like asters and ornamental grasses
When planning these combinations, consider not just bloom time but also the height, texture, and color of both the bulbs and their perennial companions.
Designing with Hardscape Elements
Integrating bulbs around hardscape features draws attention to both the plants and the structural elements of your garden. Consider these placements:
- Line garden paths with shorter bulbs like grape hyacinths or species tulips
- Plant small-flowered bulbs between stepping stones where they can be appreciated up close
- Use taller bulbs like alliums or fritillaria as focal points near garden benches
- Create dramatic effects with bulbs planted en masse against stone walls or fences
The contrast between the soft, ephemeral nature of spring blooms and the permanence of hardscape elements creates visual tension that enhances both components.
Creating Woodland and Naturalized Areas
Some bulbs excel in more naturalistic settings, creating magical woodland displays under deciduous trees or in informal lawn areas. For these naturalized plantings:
- Choose bulbs that reliably perennialize and spread naturally, like daffodils, snowdrops, and species tulips
- Scatter bulbs across the area and plant them where they fall for a truly natural appearance
- Plant in drifts that follow the contours of the landscape
- Remember that lawn areas with naturalized bulbs cannot be mowed until the bulb foliage has yellowed (typically 6-8 weeks after flowering)
These naturalized plantings improve over time as the bulbs establish and multiply, requiring minimal maintenance beyond occasional dividing if they become overcrowded.
Practical Planting Guidelines
Successful spring bulb displays begin with proper planting techniques. Following these guidelines ensures your bulbs will thrive and return for many seasons.
Timing Your Planting
Spring-flowering bulbs should be planted in fall when soil temperatures have cooled but before the ground freezes. The optimal planting window varies by climate:
- Northern regions (Zones 3-5): September to early October
- Middle regions (Zones 6-7): October to early November
- Southern regions (Zones 8-9): November to December
This timing allows bulbs to establish roots before winter while preventing premature sprouting that could be damaged by severe cold.
Planting Depth and Spacing
Proper planting depth is crucial for bulb performance and longevity. As a general rule:
- Plant bulbs at a depth equal to three times their height
- Space bulbs according to their size: larger bulbs (tulips, daffodils) 4-6 inches apart; smaller bulbs (crocus, snowdrops) 2-3 inches apart
- In containers, bulbs can be spaced more closely than in garden beds
- Always plant bulbs with the pointed end facing upward
Bulbs planted too shallowly may emerge too early and suffer frost damage, while those planted too deeply may have reduced vigor or fail to emerge.
Soil Preparation and Care
Most spring bulbs prefer well-draining soil with moderate fertility. To prepare your planting area:
- Incorporate 2-3 inches of compost or well-rotted organic matter
- Add a balanced, low-nitrogen fertilizer specifically formulated for bulbs
- Avoid fresh manure, which can promote bulb rot
- Improve heavy clay soils with sand or grit to enhance drainage
After planting, water thoroughly to settle the soil and initiate root growth. In subsequent years, avoid overwatering during the dormant period, as excessive moisture can cause bulbs to rot.
Frequently Asked Questions
Q: How do I prevent squirrels and other animals from digging up my bulbs?
A: Several strategies can deter hungry wildlife: plant bulbs that animals tend to avoid (like daffodils, alliums, and fritillaria); cover newly planted areas with chicken wire until the ground freezes; sprinkle blood meal or crushed gravel over planting areas; or create physical barriers using hardware cloth buried below the bulbs.
Q: Can I plant spring bulbs in containers?
A: Yes, containers are excellent for spring bulbs. Use pots at least 12 inches deep with drainage holes. In cold climates, choose frost-resistant containers and consider moving them to a protected location (like an unheated garage) during the coldest months to prevent freezing and cracking.
Q: What should I do with bulbs after they finish flowering?
A: Allow the foliage to yellow and wither naturally, as the leaves are photosynthesizing and storing energy for next year’s blooms. Remove only the spent flower stems. If the yellowing foliage is unsightly, interplant bulbs with later-emerging perennials that will hide the declining leaves.
Q: Do I need to dig up my bulbs every year?
A: Most daffodils, crocuses, and species tulips can remain in the ground for many years. However, hybrid tulips and hyacinths often decline after a year or two and may need annual lifting and replanting for the best display. Summer-flowering bulbs that aren’t hardy in your zone must be dug up in fall and stored for winter.
Q: When is the best time to divide overcrowded bulbs?
A: Divide spring-flowering bulbs in early summer after the foliage has completely yellowed. Carefully dig up the clumps, separate the bulbs, and replant immediately or store in a cool, dry place until fall planting time. Most bulbs benefit from division every 3-5 years when they become crowded.
Conclusion
Designing with spring bulbs offers endless creative possibilities for transforming your garden with vibrant, seasonal color. By thoughtfully planning your color schemes, implementing strategic planting techniques, and combining bulbs with complementary garden elements, you can create spectacular displays that evolve throughout the season. Whether you’re planting a formal garden bed, naturalizing bulbs in a woodland setting, or creating container displays, the principles outlined in this guide will help you achieve professional-looking results that improve year after year.
With proper planning and care, your spring bulb garden will not only announce the arrival of the growing season with a glorious display but will also provide years of reliable beauty with minimal maintenance. Start small, experiment with different combinations, and watch as your garden transforms into a spring showcase that delights both you and your visitors.
References
- https://www.longfield-gardens.com/article/how-to-plan-a-spring-bulb-garden
- https://www.bhg.com/gardening/flowers/bulbs/design-with-spring-bulbs/
- https://www.brecks.com/pages/how_to_landscaping_with_bulbs_design_ideas
- https://plantperfect.com/design-a-spring-flower-bed-with-bulbs-in-the-fall/
- https://gowestgardener.com/blog/spring-bulb-garden-design/
Read full bio of Srija Burman


