How To Grow Chia Microgreens At Home In 5 Easy Steps
Tiny shoots deliver concentrated nutrition in under two weeks with minimal supplies.
How to Grow Chia Microgreens in 5 Easy Steps
Chia microgreens are a nutritional powerhouse, offering a concentrated source of fiber, vitamins, minerals, and antioxidants. Not only are these tiny greens easy and quick to grow at home, but their vibrant flavor and texture can boost any salad, sandwich, or smoothie. If you’ve ever admired chia pets or wondered about the superfood value behind those famous seeds, this guide will walk you through the entire process of growing lush, healthy chia microgreens indoors or outdoors, using easy-to-follow steps, practical care tips, harvesting advice, and frequently asked questions.
Why Grow Chia Microgreens?
Many are familiar with chia seeds thanks to their popularity in the health food world or as the classic “fur” on chia pets. However, chia microgreens are lesser known—and even more nutritious than sprouts. Growing chia microgreens at home ensures you get fresh, safe, and flavorful greens in just days, with minimal equipment or gardening experience required.
- High Nutritional Value: Chia microgreens are rich in calcium, fiber, omega-3 fatty acids, and essential vitamins.
- Quick to Grow: Harvest in just 8–14 days from sowing.
- Minimal Requirements: No need for a large garden or special expertise—just seeds, a tray, and water.
- Fresh Flavor & Texture: Adds a mild, slightly nutty, and earthy taste to dishes.
Chia Microgreens vs. Chia Sprouts
| Feature | Chia Microgreens | Chia Sprouts |
|---|---|---|
| Growth Medium | Soil or soilless media | No soil; typically a jar/mesh |
| Harvest Time | 8–14 days | 3–7 days |
| Nutrient Content | Richer in chlorophyll, vitamins, and minerals | Lower compared to microgreens |
| Flavor | Mild, earthy, with crunchy stems | Slimmer texture, less complex taste |
| Safety | Lower risk of bacteria from soil-based method | Higher risk when not sanitized properly |
What Are Chia Microgreens?
Chia microgreens are simply the young, edible greens of the Salvia hispanica plant, harvested shortly after the first true leaves (cotyledons) have emerged. Unlike mature chia plants, microgreens focus all their nutrients and vitality into small, tender shoots, making them especially valuable for nutrition-conscious cooks and gardeners. These greens pack dense clusters of vitamins A, B, C, E, essential minerals, antioxidants, and amino acids, presenting a more favorable nutritional profile compared to sprouts or mature plants.
Essential Supplies for Growing Chia Microgreens
- Chia Seeds: Purchase organic chia seeds suitable for sprouting or microgreens. Store-bought seeds often work as well as those marketed for microgreens.
- Growing Tray: Choose a shallow tray (with or without drainage holes), at least 1–2 inches deep.
- Seed Starting or Potting Mix: For the best moisture retention and minimal contamination; coconut coir, peat moss, or soilless mixes work well.
- Spray Bottle: For gentle misting during germination and early growth.
- Grow Light or Window: Bright, indirect sunlight or a dedicated LED grow light for even, consistent exposure.
Step-by-Step Guide: How to Grow Chia Microgreens
Step 1: Prepare Your Tray and Growing Medium
Start by adding water to the bottom of your tray—just enough to dampen, not flood, the base. Then, spread about 1 to 1.5 inches of your seed starting or potting mix across the tray. Gently firm the surface to create an even, level bed for the seeds. The dampness should come from below, reducing the risk of washing away the tiny chia seeds or causing them to clump.
Step 2: Sow the Chia Seeds
Do not soak chia seeds before sowing. Unlike many microgreens, chia absorbs water so rapidly it forms a gelatinous coating, making them difficult to spread or handle when wet. Directly sprinkle the *dry* chia seeds evenly across the surface, ensuring coverage but avoiding overlapping. About 1–2 teaspoons of seeds will cover a standard 10″ x 20″ tray.
Step 3: Mist and Cover
Gently mist the surface with a spray bottle, ensuring seeds settle and the top layer remains moist. Do not cover chia seeds with extra soil—they need light to germinate. Place a humidity dome (an overturned tray, plastic wrap, or simply a breathable plastic lid) loosely over the tray to retain moisture until seeds sprout.
Step 4: Germination and Early Growth
- Place the tray in a warm, bright area (70–75°F/21–24°C ideal).
- Check daily: lightly mist the surface as needed to avoid drying out.
- Germination usually occurs within 1–3 days. Once seeds sprout, remove any dome or cover for increased airflow, and move the tray to a brighter spot or under a grow light for 10–16 hours per day.
Step 5: Water, Care, and Growing On
- Water from below: Add water to the tray’s base as microgreens grow to avoid wetting stems and leaves—this helps prevent damping off and mold.
- Ensure Airflow: Good ventilation helps the young greens grow upright and reduces risk of disease.
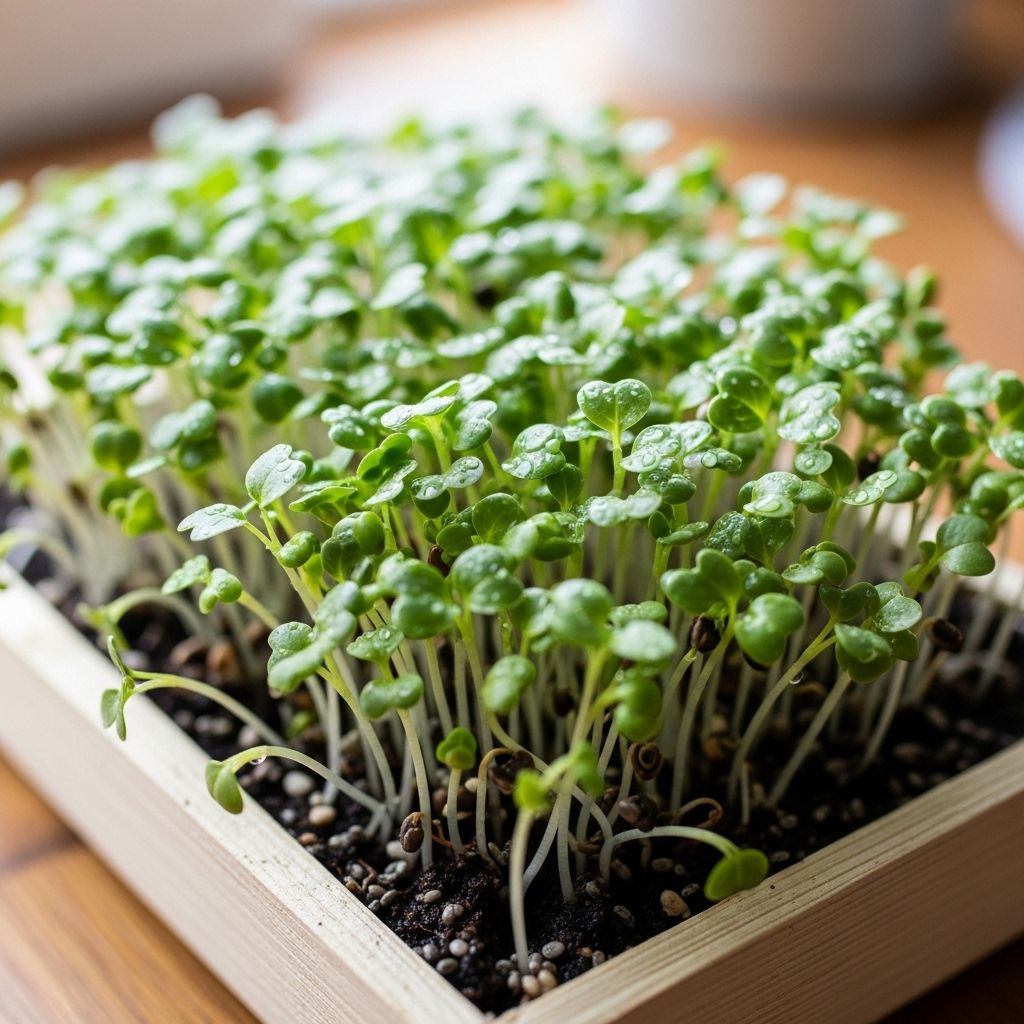
- Monitor Growth: Chia microgreens are typically ready to harvest in 8 to 14 days, once the first pair of true leaves has formed and height reaches 2–3 inches.
Harvesting Chia Microgreens
To harvest, use clean scissors or a sharp knife to snip the microgreens just above the soil line. Rinse gently in cool water to remove any debris or seed hulls, then dry on a clean towel or in a salad spinner. Store in an airtight container in the refrigerator for up to a week for the best flavor and nutritional value.
Tips for Growing the Best Chia Microgreens
- Light Is Key: Consistent, bright light ensures sturdy, dark green leaves and prevents stretching (legginess).
- Avoid Overcrowding: Space seeds evenly to reduce fungal problems and ensure healthy growth.
- No-Fertilizer Needed: Chia microgreens have all the nutrients they need within the seed for their short lifespan; extra fertilizer is unnecessary.
- Sanitize Equipment: Prevent mold and bacteria by thoroughly cleaning trays and tools between plantings.
Troubleshooting Common Problems
- Mold: Most often caused by poor airflow or excess moisture. Remove affected greens and increase ventilation.
- Seeds Not Sprouting: Old or non-viable seeds are the main culprit. Always use fresh, high-germination chia seeds.
- Leggy Microgreens: Usually due to low light. Move to a brighter location or increase grow light intensity.
- Wilting or Yellowing: Indicates either overwatering/root rot or insufficient light.
Nutritional Benefits of Chia Microgreens
- Calcium: Supports bone health—chia microgreens contain more calcium per gram than most leafy greens.
- Omega-3 Fatty Acids: Promote heart and brain health.
- Fiber: Aids digestion and supports gut health.
- Antioxidants & Vitamins (A, C, E): Enhance immune function and combat oxidative stress.
- Amino Acids: Essential for cellular repair and body functions.
Culinary Uses for Chia Microgreens
- Salads: Add a fresh, tender crunch.
- Sandwiches & Wraps: Use as a nutritious topping or filling.
- Garnish: Sprinkle over soups, eggs, or grain bowls.
- Smoothies: Blend for extra nutrients and subtle earthiness.
- Juicing: Combine with other microgreens for a concentrated green juice shot.
Frequently Asked Questions (FAQs)
What makes chia microgreens different from chia seeds or sprouts?
Chia microgreens are grown in soil or soilless media and harvested after developing their first true leaves. They are more nutrient-dense, flavorful, and versatile than sprouts, which are simply germinated seeds eaten earlier in development with less flavor and nutrition.
Do chia microgreens need to be grown with soil?
No, although soil or soilless mixes (like coconut coir) are highly recommended for best results, you can also use a damp paper towel or hydroponic mat as a medium.
Why shouldn’t I soak chia seeds before planting?
Chia seeds produce a gel when wet, making them difficult to spread and handle. Sowing them dry directly on the surface is far easier and yields better results.
What are the signs chia microgreens are ready to harvest?
When the first set of true leaves (beyond the initial seed leaves/cotyledons) have emerged, and the shoots reach about 2–3 inches tall (typically 8–14 days), they’re ready for harvest.
Can I grow chia microgreens from store-bought chia seeds?
Yes, most store-bought chia seeds will sprout well as long as they are raw and untreated. Look for organic, food-grade seeds for best results.
How long do chia microgreens last once harvested?
If kept dry and refrigerated in an airtight container, chia microgreens last up to a week, though they’re best when consumed within 3–4 days for optimal texture and flavor.
Final Thoughts
Chia microgreens are an exceptional way to add highly concentrated nutrition and fresh flavor to your diet, requiring minimal resources and effort. Whether you’re an experienced home gardener or looking to sprout your first seeds, these microgreens offer a swift, satisfying project and delicious, healthful rewards.
References
Read full bio of medha deb

