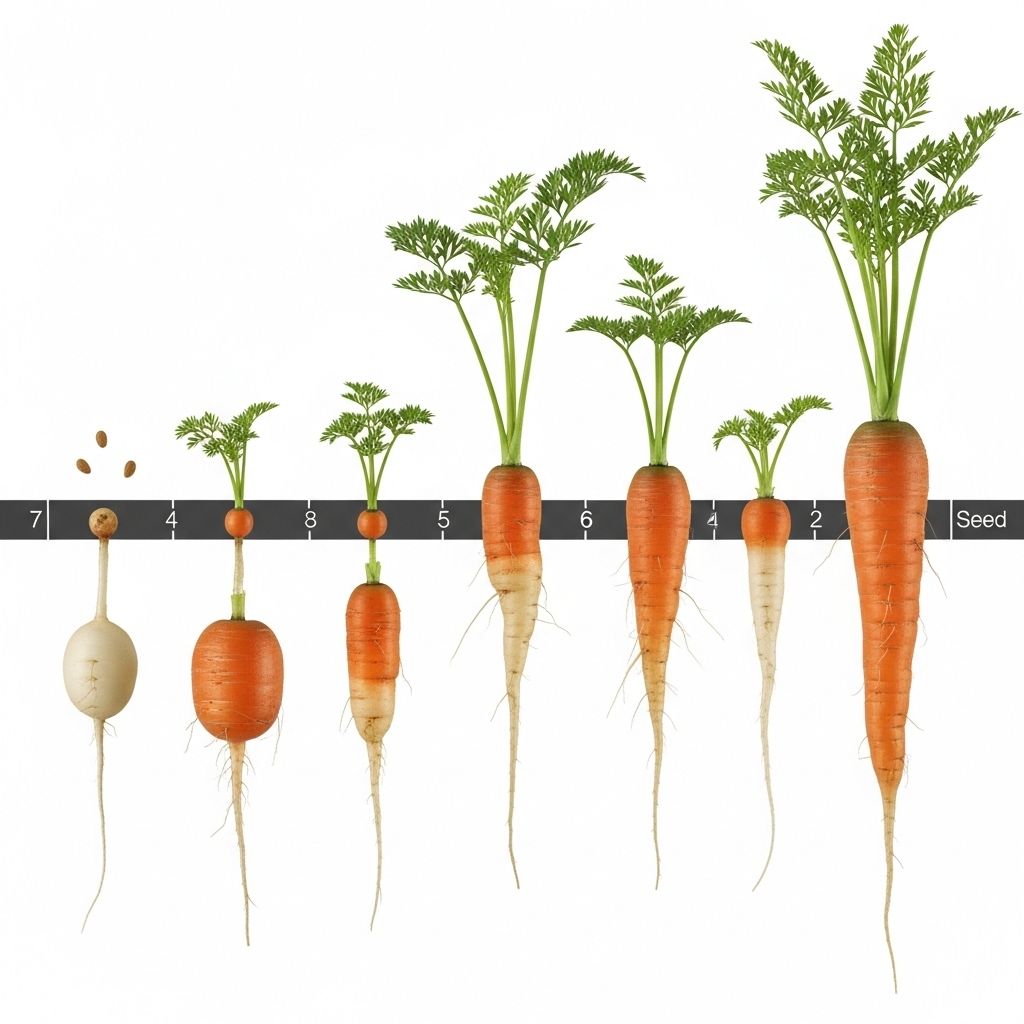
Carrot Growth Stages: 7 Essential Steps For Bountiful Harvests
Discover the fascinating journey of carrots as they develop from tiny seeds to delicious root vegetables in your garden

Image: HearthJunction Design Team
Introduction to Carrot Growth Stages
Carrots are one of the most rewarding vegetables to grow in a home garden. Whether you’re planting them in traditional garden rows, raised beds, or even containers, understanding the growth stages of carrots can help you cultivate healthier, more abundant harvests. As a biennial plant grown as an annual for its delicious taproot, carrots follow a predictable development pattern that gardeners can monitor to ensure optimal growing conditions.
The journey from a tiny carrot seed to a fully developed, harvest-ready vegetable typically takes between 50 to 100 days, depending on the variety and growing conditions. Carrots grown in ideal conditions with proper care will develop faster and produce better yields than those grown in less favorable environments. By recognizing each stage of growth, you can provide appropriate care at the right time, resulting in sweet, crisp carrots that are far superior to store-bought options.
In this comprehensive guide, we’ll explore the seven distinct stages of carrot growth, from seed selection to harvest, and provide essential tips for successful carrot cultivation at each phase. Whether you’re a beginner gardener or looking to improve your carrot-growing skills, understanding these growth stages will help you achieve gardening success.
The Seven Stages of Carrot Growth
Stage 1: Seed Selection and Preparation
The journey to growing perfect carrots begins with selecting the right seeds for your growing zone and preferences. Carrot varieties range from tiny globe-shaped specimens to long, tapered roots, each with unique growing requirements and flavor profiles. When selecting carrot seeds, consider your soil type, climate, and the amount of growing space available.
Carrot seeds are quite small, making them somewhat challenging to plant evenly. Some gardeners opt for pelleted seeds, which have a clay coating that makes them larger and easier to handle. You can also use seed tape or create your own by placing seeds on biodegradable paper strips with water-soluble glue at the appropriate spacing.
Proper soil preparation is crucial for successful carrot growth. These root vegetables thrive in loose, well-draining soil free from rocks, clumps, and other obstacles that could impede root development. Before planting, work the soil to a depth of at least 12 inches, removing any stones or debris. Consider adding fine compost or well-rotted organic matter to improve soil structure, but avoid fresh manure, which can cause carrots to fork.
Stage 2: Germination
Carrot seeds can be planted as soon as soil temperatures reach 40°F, even before the last frost date in your area. However, they germinate best when soil temperatures are between 55°F and 75°F. At these optimal temperatures, seeds typically begin to sprout within 1-3 weeks after planting. Temperatures above 80°F can reduce germination rates and affect the quality of the developing roots.
One of the most critical factors during the germination stage is consistent moisture. Carrot seeds need to remain evenly moist (but not waterlogged) until they sprout. The seed bed should never be allowed to dry out completely during this period. Many gardening experts recommend covering the planted area with a board or burlap for the first week to help retain moisture and prevent the formation of soil crust that might impede germination.
Patience is essential during this stage, as carrot seeds are notoriously slow to germinate compared to many other garden vegetables. Depending on conditions, it can take anywhere from 14-21 days for the first sprouts to emerge. Once seedlings appear, remove any covering to allow them access to sunlight.
Stage 3: Seedling Development
When carrot seeds germinate, they first produce two slender seed leaves that don’t resemble the feathery foliage of mature carrot plants. These initial leaves, called cotyledons, are followed by the development of true leaves, which have the characteristic fern-like appearance of carrot foliage. At this stage, the seedlings are quite delicate and require gentle care.
During the seedling stage, which typically occurs 3-4 weeks after planting, the young plants are establishing their root systems and beginning to form the taproot that will eventually become the edible carrot. The seedlings remain small during this period, with just a few true leaves and minimal root development.
Consistent, gentle watering remains important at this stage, as does protection from extreme weather conditions. If temperatures drop significantly, consider covering young seedlings with row covers or cloches to prevent cold damage. Similarly, during hot weather, providing some afternoon shade can help prevent seedling stress.
Stage 4: First Thinning
Once carrot seedlings have developed their first true leaves and reached about 2 inches in height, it’s time for the first thinning. This crucial step allows the remaining plants enough space to develop properly without competition for nutrients, water, and sunlight. Even if you’ve been careful with seed spacing during planting, thinning is usually necessary due to the high germination rate and small seed size.
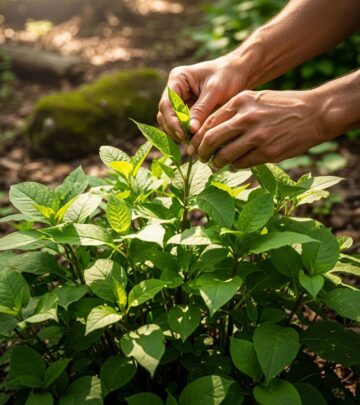
During the first thinning, which typically occurs 3-4 weeks after planting, carefully remove excess seedlings to leave approximately one plant every 1-2 inches. This can be done by gently pulling unwanted seedlings or snipping them at soil level with scissors to avoid disturbing the roots of neighboring plants. The thinned seedlings at this stage are usually too small to be worth saving for culinary use.
Thinning may seem counterintuitive, as you’re removing potential carrots, but it’s absolutely essential for proper development. Crowded carrots will compete for resources, resulting in stunted, misshapen, or forked roots that are less desirable for consumption.
Stage 5: Foliage and Root Development
After the first thinning, carrot plants enter a period of significant growth, developing more feathery foliage above ground while the taproot begins to thicken below. During this stage, which typically spans weeks 5-8 after planting, the plants establish a strong foundation for the remainder of their development cycle.
The ferny foliage will grow to reach heights of 8-12 inches, forming a basal rosette of leaves. This lush green growth serves as an energy factory for the plant, capturing sunlight and converting it to carbohydrates that fuel root development. Healthy foliage is a good indicator of healthy root development below ground.
Below the soil surface, the carrot root is beginning to take shape, elongating and gradually increasing in diameter. At this stage, consistent moisture becomes even more critical, as fluctuations can cause the roots to crack or develop irregular shapes. Aim for even, moderate soil moisture—neither waterlogged nor completely dry.
Stage 6: Second Thinning
Approximately 7-8 weeks after planting, when the carrot tops are well-established and the roots are beginning to form, it’s time for a second thinning. This final spacing adjustment ensures that each carrot has adequate room to reach its full size potential without competition from neighboring plants.
During this second thinning, remove additional plants to create a final spacing of one carrot every 2-4 inches, depending on the variety. Unlike the first thinning, these young carrots are perfectly edible and can be harvested as delicious baby carrots. This early harvest is one of the bonuses of proper thinning—you get to enjoy some of your crop while simultaneously improving growing conditions for the remaining plants.
When thinning, be careful not to disturb the roots of the carrots you plan to keep. Either pull unwanted plants very gently or snip the tops at soil level. After thinning, water the bed thoroughly to settle the soil around the remaining plants and help them recover from any minor root disturbance.
Stage 7: Maturation and Harvest
The final stage of carrot growth is maturation, when the roots reach their full size and develop their characteristic sweet flavor. Depending on the variety and growing conditions, carrots typically reach maturity between 50 and 100 days after planting. During this final stage, roots continue to grow and store additional sugars, improving their flavor profile.
Carrots are ready to harvest when they’ve reached the expected size for their variety. You can gently brush away some soil at the crown (where the greens meet the root) to check the diameter. Most carrots can be harvested when the shoulders are 3/4 to 1 inch in diameter, though this varies by type.
Interestingly, carrots taste sweeter when harvested after exposure to cold temperatures, as the plants convert stored starches to sugars in response to cold. Many gardeners delay harvesting part of their crop until after a light frost for this flavor enhancement, and carrots can even be left in the ground through winter in milder climates, as long as the ground doesn’t freeze solid.
To harvest, loosen the soil around the carrots with a garden fork, then gently pull the roots by their tops. If the greens break off, you can use a small digging tool to carefully loosen the soil and remove the carrot. After harvesting, remove the green tops if you won’t be using the carrots immediately, as the foliage continues to draw moisture from the roots, potentially causing them to become limp.
Optimal Growing Conditions for Carrots
Soil Requirements
Carrots thrive in loose, well-draining soil that allows their roots to develop properly. Heavy clay or rocky soil can cause misshapen or forked carrots. The ideal soil pH for carrots is between 6.0 and 6.8, slightly acidic to neutral. If your soil is compacted or heavy, consider growing shorter carrot varieties or creating raised beds with looser soil.
Temperature Preferences
As cool-season vegetables, carrots prefer soil temperatures between 55°F and 75°F for optimal growth. They can be planted as soon as soil temperatures reach 40°F in spring, and many varieties can withstand light frosts. However, temperatures consistently above 80°F can reduce growth, affect flavor development, and cause bitter or unpleasant tastes in the mature roots.
Water Requirements
Consistent moisture is essential for carrot development, particularly during germination and root formation. Irregular watering can lead to cracked or misshapen roots. Aim to provide about 1 inch of water per week, either from rainfall or irrigation. Mulching around plants can help maintain soil moisture and suppress weeds that compete for resources.
Common Problems and Solutions
Even with proper care, carrot growers may encounter various challenges throughout the growth cycle. Being aware of potential issues allows for prompt intervention to save your crop:
- Poor Germination: Usually caused by inconsistent moisture during the germination period. Keep the soil evenly moist until seedlings emerge.
- Forked or Misshapen Roots: Typically results from rocky soil or fresh manure. Prepare beds thoroughly before planting, removing rocks and using only well-composted organic matter.
- Cracked Roots: Caused by fluctuations in soil moisture. Maintain consistent watering practices, especially during root development.
- Carrot Flies: These pests lay eggs near carrot plants, and their larvae feed on the roots. Consider using floating row covers or planting aromatic herbs like rosemary or sage nearby as deterrents.
- Thin, Spindly Carrots: Often a result of insufficient resources or overcrowding. Ensure proper thinning and adequate access to sunlight, water, and nutrients.
Frequently Asked Questions (FAQs)
Q: How long does it take for carrots to grow from seed to harvest?
A: The entire growth cycle typically takes between 50 to 100 days, depending on the variety and growing conditions. Early varieties mature faster, while main crop types take longer but often produce larger roots.
Q: Can I grow carrots in containers?
A: Yes, carrots can be successfully grown in containers at least 12 inches deep. Choose shorter varieties for container growing, and ensure the container has adequate drainage holes and is filled with loose, fertile potting mix.
Q: Why are my carrot tops growing tall but the roots aren’t developing?
A: This could be due to several factors: overcrowding (insufficient thinning), too much nitrogen fertilizer (which promotes foliage growth at the expense of root development), or compacted soil preventing proper root formation.
Q: When is the best time to plant carrots?
A: Carrots can be planted in early spring as soon as soil temperatures reach 40°F, even before the last frost date. For a continuous harvest, consider succession planting every 2-4 weeks until mid-summer. In warmer climates, fall and winter plantings can also be successful.
Q: Do carrots need full sun to grow properly?
A: Carrots grow best in full sun but can tolerate partial shade, especially in hotter climates where afternoon shade might actually be beneficial during the warmest months.
By understanding the complete growth cycle of carrots and providing appropriate care at each stage, you can enjoy a bountiful harvest of these nutritious, versatile root vegetables. Whether eaten fresh from the garden, roasted as a side dish, or incorporated into soups and stews, home-grown carrots offer superior flavor and the satisfaction of having nurtured them from seed to table.
References
Read full bio of medha deb


