11 Secrets to Spectacular Anemones in Pots and Containers
Simple soil swaps and light tweaks can unleash dazzling color in your potted flowers.
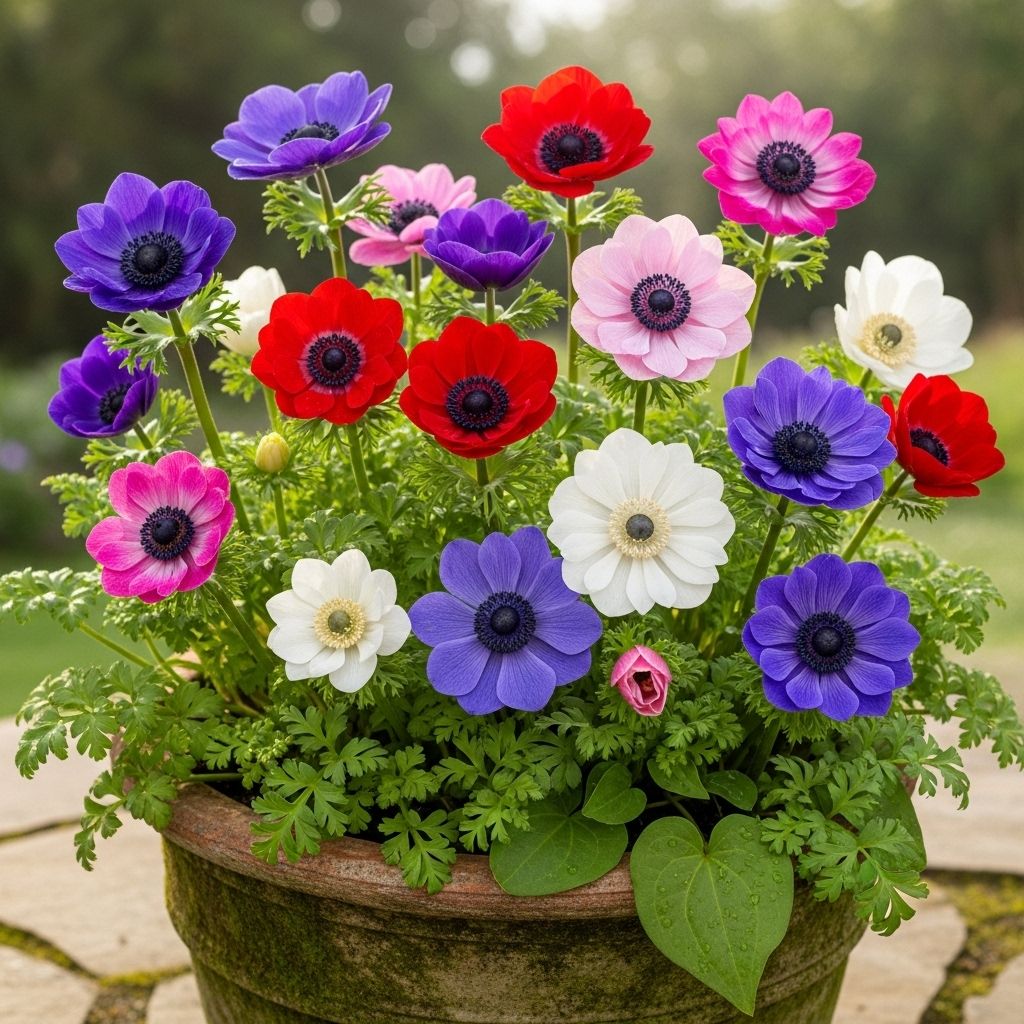
Growing anemones in containers is a rewarding way to enjoy their vibrant blooms, whether you crave elegant patio displays, cheerful balcony color, or easy-cut flowers for brightening your living space. This comprehensive guide reveals all the essential steps—from selecting the right pots and soil to expert planting advice and troubleshooting—so your anemones will flourish and return year after year.
Why Grow Anemones in Containers?
Anemones, sometimes called Grecian windflowers, are herbaceous perennials in the buttercup family (Ranunculaceae). Their stunning, poppy-like blooms appear in a rainbow of hues, including pink, blue, white, red, and lavender. While many garden enthusiasts plant anemones in flowerbeds, these beauties are equally at home in pots or window boxes. Here’s why:
- Versatility: Perfect for patios, balconies, or small gardens with limited soil space.
- Control: Container gardening lets you regulate soil composition, drainage, and water more precisely.
- Flavorful Color: Pots can be moved to maximize sun, offer continual blooms, or provide eye-catching arrangements for special events.
- Pest Management: Elevating plants off the ground helps deter some pests and diseases.
Let’s dive into the eleven proven tips every gardener should know for successful container-grown anemones.
1. Choose a Container With Good Drainage
Since anemones grow from corms (bulb-like underground structures), they’re very prone to rot in soggy conditions. Always use containers with adequate drainage holes. Avoid pots without drainage, as they trap excess water—leading to quickly rotting corms and root systems. Materials like terracotta or plastic work well, but the critical feature is drainage.
- For best results, select pots with at least one large hole or several smaller holes at the base.
- If placing indoors on surfaces you wish to protect, use a saucer underneath to catch draining water.
2. Fill With a Light, Well-Draining Potting Mix
Soil quality is a major factor in successful anemone growth. Use a high-quality potting mix that drains well, such as a peat-based or coco coir blend amended with perlite or coarse sand. Avoid dense garden soil or compost that tends to retain excess water.
- Some gardeners add a pinch of slow-release, balanced fertilizer (e.g., 10-10-10) to the mix.
- Avoid soils that are compacted or that turn soggy after watering.
3. Pre-Soak Anemone Corms Before Planting
Pre-soaking corms encourages even sprouting and robust root development. Here’s what to do:
- Place corms in a bowl of room-temperature water and soak for 4–6 hours.
- Handle corms gently, as over-soaking or rough treatment can cause early rot.
- Drain and allow to dry for a few minutes on a towel before planting.
Pre-soaked corms will appear plumper and are ready to root quickly in soil.
4. Plant at the Correct Depth and Spacing
Planting depth is crucial. Set anemone corms 1–2 inches deep, with the knobbly or pointy end facing down. For abundant displays in containers, anemones can be spaced more closely. Aim for 2–3 inches apart for a dense effect, or 6 inches if you prefer larger, solitary blossoms.
- For standard 10–15 liter pots, plant four–five corms per container. This ensures both visual fullness and enough space for each plant to grow strong.
5. Pick the Right Container Size
Though anemones have shallow root systems, containers that are too large can increase the risk of overwatering and root rot. Ideal sizes:
- 3-gallon (12-liter) pots are sufficient for several corms and easy handling.
- Larger pots (5-gallon+) are fine as long as you don’t water heavily and maintain good drainage. Avoid very deep or massive planters designed for trees or shrubs.
Tip: Small pots can be grouped for stunning displays and to maximize species diversity.
6. Position in Bright, Indirect Light
Anemones love light but not scorching, direct sunshine. Give containers 4–6 hours of morning sun or place in locations with dappled shade in hotter regions. South- or east-facing positions work best, especially for indoor settings.
- Too much direct sunlight may cause blooms to fade prematurely.
- Insufficient light leads to “leggy” plants with poor flower production.
7. Water Consistently—But Never Soggy
Proper watering balances moisture without creating soggy soil. Here’s what to remember:
- Water deeply after planting, then check soil moisture regularly.
- Allow the top inch of soil to dry out before watering again.
- Avoid letting pots stand in trays of water for prolonged periods; empty catch trays to prevent root rot.
- Watering frequency depends on location, container size, and temperature—more often in warm, breezy conditions and less in cool, shaded spots.
8. Fertilize for Healthier Blooms
During active growth, fertilize every 4–6 weeks with a balanced, water-soluble fertilizer (e.g., 10-10-10 NPK). Over-fertilizing can cause lush foliage at the expense of flowers, so stick to package directions.
- Some gardeners blend slow-release fertilizer pellets into the soil at planting time for low-maintenance feeding.
9. Protect From Severe Frost and Overheating
Anemones are resilient but dislike extreme cold or heat. In climates with harsh winters, move pots into a frost-free shed, porch, or garage during freezing spells. In very hot regions, shift containers into afternoon shade to prevent wilting or burned leaves.
- Mulch with straw or bark over the soil surface for extra cold protection.
- If growing indoors, keep away from hot radiators or heating vents.
10. Deadhead Spent Flowers for Prolonged Bloom
Remove faded or dead flower heads to encourage the plant to keep producing blooms. Use sharp, clean scissors or gardening snips to cut stems just above the lowest set of healthy leaves.
- Regular deadheading maintains plant vigor and appearance.
- Anemones grown for cut flowers can last 2–3 weeks in fresh water—cut early in the day for best vase life.
11. Watch for Pests and Avoid Overcrowding
Anemones in containers are less prone to pests than those grown in open soil, but watch for signs of aphids, powdery mildew, or fungal rot. Ensure air circulation between plants by not packing containers too densely.
- Remove any leaves showing yellowing or mold to stop disease spread.
- If aphids or spider mites appear, rinse foliage with a gentle stream of water or use an insecticidal soap labeled for flowers.
Best Anemone Varieties for Containers
While many species are well-suited to pots, some are especially popular among container gardeners. Consider these varieties:
- Anemone coronaria: Large, vibrant flowers from late winter to spring; excellent for cutting.
- Anemone blanda: Compact, daisy-like flowers in pastel shades, ideal for small pots or window boxes.
- Anemone hupehensis (Japanese anemone): Later blooming, taller; best for larger pots and partial shade.
Seasonal Timing: When to Plant Container Anemones
Plant anemone corms in autumn or very early spring for best results. Fall-planted corms tend to bloom earlier, usually in late winter or early spring. In cold regions, wait until after the last frost to move containers outside or start indoors for a head start.
Table: Quick Guide to Container Anemone Care
| Aspect | Recommended Practice |
|---|---|
| Soil | Light, airy, fast-draining potting mix |
| Pot Size | 3 – 5 gallons; not too deep |
| Depth | 1 – 2 inches deep |
| Spacing | 2 – 3 inches apart for dense flowering |
| Watering | Consistent, never soggy |
| Light | Morning sun or dappled shade |
| Feeding | Balanced fertilizer every 4–6 weeks |
Common Problems (and How to Solve Them)
- Yellowing Leaves: May indicate overwatering, root rot, or poor drainage. Check pot holes and soil mix.
- No Flowers: Can result from too little light, over-fertilization, or overcrowding.
- Stunted or Rotting Plants: Usually from soggy soil. Let upper soil dry before next watering.
- Leggy Growth: Move pots to a brighter spot for stronger, bushier plants.
Frequently Asked Questions (FAQs)
Q: Do anemones thrive year-round in containers?
A: Anemones are best grown as seasonal bloomers in pots. While many will return for several years, especially if containers are protected from extreme heat or frost, their prime bloom period is from late winter through spring. In regions with mild winters, they may persist longer.
Q: How do I overwinter anemones in pots?
A: Move pots to a frost-free, well-ventilated area, such as an unheated garage or shed. Let soil dry slightly—do not keep soggy—and do not fertilize when dormant.
Q: Can I start anemones indoors and transplant outside?
A: Yes! You can start corms in smaller trays or pots indoors by pre-soaking, then moving them into decorative containers after sprouting. Transplant outdoors after the last frost date.
Q: How often should I water container anemones?
A: Water when the top inch of soil feels dry. Reduce watering during periods of dormancy. Be vigilant about preventing standing water at the bottom of the pot.
Q: Can I mix anemones with other plants in one container?
A: Yes, provided the companion plants have similar light, water, and soil preferences. Good options include pansies, violas, or spring bulbs like tulips and daffodils.
Final Tips for Growing Beautiful Anemones in Containers
- Rotate pots every few weeks for even light and uniform growth.
- Harvest flowers when buds are halfway open for longest vase life.
- After flowering, allow foliage to die back naturally; this feeds next season’s growth.
- Replace potting soil every 2–3 years to maintain soil health and prevent diseases.
By following these practical steps and leveraging the secrets of experienced gardeners, anyone can grow lush, joyful anemones in pots or containers. With a little planning and attentive care, your anemones will reward you with a spectacular burst of color season after season.
References
Read full bio of Anjali Sayee

