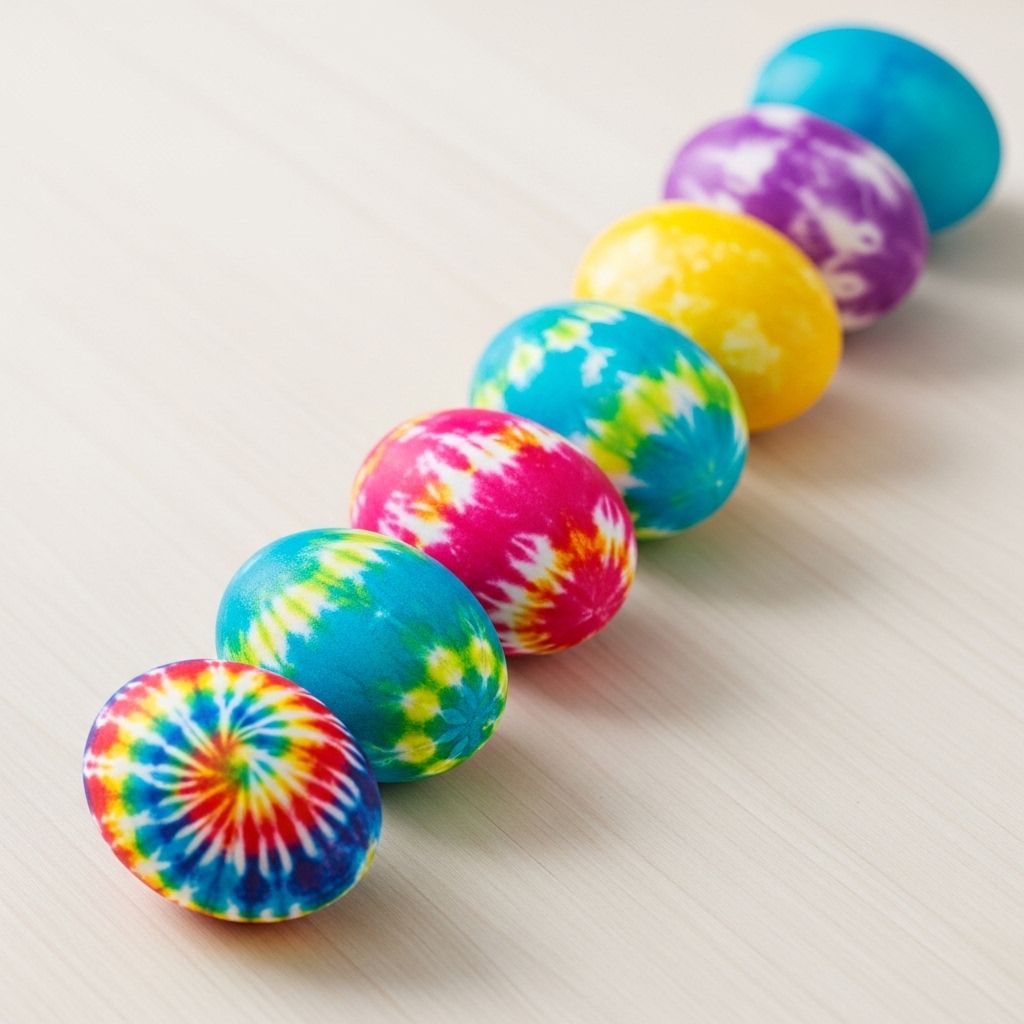
How to Make Stunning Tissue Paper Easter Eggs
Celebrate spring with a mess-free craft that turns simple supplies into colorful decor.

Add a splash of color to your Easter celebration with tissue paper Easter eggs. This easy and engaging craft uses bleeding tissue paper for a vibrant, tie-dye effect, making it the perfect holiday activity for kids and adults alike. Explore the simple steps, creative ideas, and top tips to make your own dazzling eggs for decoration or gifting.
Why Try Tissue Paper Easter Eggs?
- Simple and Mess-Free: No messy dyes or extensive setup—just tissue paper, water, and your imagination.
- Family Friendly: Suitable for all ages, including young children with supervision.
- Colorful Results: Create striking tie-dye effects and custom designs, every egg is unique.
- Versatile Display: Finished eggs make beautiful centerpieces, gifts, or festive decor.
What Is Bleeding Tissue Paper?
Bleeding tissue paper is a special craft paper that transfers its color when wet, similar to a dye. Unlike standard tissue, it produces vibrant and unpredictable patterns. When applied to eggs or cardstock, its colors magically blend and swirl, revealing intricate designs once dry. This unique property makes it ideal for Easter crafts, especially when you want to avoid traditional dye baths and complex processes.
Supplies You Will Need
- Eggs (hard-boiled or craft eggs—wooden, ceramic, or plastic)
- Bleeding tissue paper in assorted colors (ensure it is the bleeding type, not standard gift wrap)
- Spray bottle filled with water (for moistening tissue paper)
- Scissors (for cutting tissue paper into squares or strips)
- White oil pastel or crayon (optional, for pattern resist techniques on paper eggs)
- Baking sheet or tray (to protect surfaces and contain water)
- Paper towels or drying rack (for cleanup and drying)
- Optional: Paintbrush for smoothing tissue, disposable gloves to avoid stained hands, and vinegar if working with real eggs (see alternative method).
Step-by-Step Instructions
Step 1: Prepare Your Workspace
Lay down a protective surface with a tray, baking sheet, or newspapers. Gather all supplies so they are within easy reach before you begin. If making paper eggs, print or draw egg shapes on sturdy white cardstock and cut them out.
Step 2: Cut Your Tissue Paper
- Squares for Tie-Dye: Use scissors to cut the bleeding tissue paper into small squares (roughly 1-2 inches) for a classic tie-dye look.
- Strips or Shapes: Try strips for stripes or create circles/small accents for a collage effect. Pre-cut bleeding tissue paper is available for convenience.
Step 3: Add Decorative Designs (Optional)
If making paper eggs, use a white oil pastel or wax crayon to draw designs on the cardstock eggs. These lines will resist the dye, offering a subtle reveal of your artwork when the tissue paper is removed—a fun scientific twist for kids!
Step 4: Moisten the Eggs or Paper
- Egg Method: For real or craft eggs, lightly spray all sides with water using the spray bottle. Ensure the surface is slightly damp but not soaking.
- Paper Method: Place your paper egg flat on the tray and mist lightly with water. Don’t oversaturate, as this can cause curling or tearing.
Step 5: Apply Bleeding Tissue Paper
- Arrange tissue paper squares or strips onto the egg or paper, overlapping pieces for an even color transfer.
- For eggs, wrap or layer the tissue around the egg surface until largely covered.
- Mist each layer with water to ensure adhesion and color bleeding. For stubborn tissue, press down gently with a paintbrush.
- Experiment with color patterns: group similar shades for an ombre effect, mix contrasting hues for a rainbow, or layer randomly for a marbleized look.
Step 6: Let the Color Work Its Magic
Allow the covered eggs or cardstock to sit undisturbed. The longer the tissue stays on, the deeper the color transfer:
- Minimum time: 10 minutes for noticeable results.
- Best results: 1 hour or until fully dry if you want bold, vivid colors.
As the tissue paper dries, it may look a little wrinkled or patchy—this is normal and adds texture to the finished design.
Step 7: Peel and Reveal
- Carefully remove the tissue paper squares once dry. If stuck, peel gently to avoid tearing the egg or paper surface.
- Let your beautiful dyed creations air dry fully on a rack or towel.
For Real Eggs: Vinegar Tie-Dye Method
Some crafters prefer a method that involves vinegar for brighter, more durable color on real eggs:
- Wrap eggs in crumpled squares of bleeding tissue, then encase the egg in a coffee filter.
- Submerge the wrapped egg in a bowl of vinegar, then place on a rack to dry overnight.
- Remove outer papers to reveal brilliant, color-kissed eggs.
Creative Design Variations
- Stripes: Alternate strips of tissue for bold graphic lines.
- Pastels and Brights: Pair pastel shades with bold colors for soft gradients or sharp contrasts.
- Random Collage: Place tissue paper pieces loosely for a watercolor or tie-dye effect.
- Ombre: Gradually layer colors from light to dark.
- Resist Art: Use pastels or wax crayons to draw before coloring, creating custom patterns and doodles that show through.
Helpful Tips for Perfect Tissue Paper Eggs
- Ensure Saturation: Make certain the tissue is completely wet and lies flat against your surface for best color transfer.
- Work Quickly: Bleeding tissue dries fast; have tissue pieces prepared in advance for seamless coverage.
- Choose Bold Colors: Bright shades of bleeding tissue paper show up best—pastels can be subtle but lovely.
- Hands Safety: Wear gloves if you want to avoid colorful fingers.
- Test Papers: Always check packaging—only bleeding tissue paper releases dye; normal gift tissues will not work for this project.
- For Group Crafts: Pre-cut tissue paper and prepare trays or plates for each participant to simplify crafting for kids’ parties or classrooms.
Frequently Asked Questions (FAQs)
Can I use regular tissue paper instead of bleeding tissue paper?
No, only bleeding tissue paper releases dye when wet. Regular wrapping tissue won’t transfer color successfully.
Is this craft safe for children?
Yes! This is an excellent family craft, but younger children should be supervised with scissors and water. Disposable gloves are suggested to avoid skin stains.
What type of eggs can I use?
Bleeding tissue paper works on hard-boiled eggs (for edible displays), craft eggs (wooden, ceramic, or plastic), and cutout paper/cardstock for easy hanging decorations.
Will the color come off when handling the finished eggs?
Once dry, the dye is fairly stable, but can rub off slightly with repeated moisture or contact. For permanent keepsakes, spray with a clear acrylic sealer.
How do I display my finished tissue paper eggs?
- Fill a Easter basket for centerpieces.
- String paper eggs together as festive garland.
- Use as holiday table markers or place cards.
- Attach ribbon for hanging from branches or hooks.
Table: Tissue Paper Egg Craft Methods
| Surface | Best Method | Drying Time | Display Idea |
|---|---|---|---|
| Hard-Boiled Egg | Wrap with tissue, spray, let dry, peel | 1 hour | Easter basket mix |
| Cardstock Egg | Layer tissue, mist, let dry, peel | 1 hour or less | Garland, wall art |
| Craft Egg (Wood/Plastic/Ceramic) | Wrap or layer tissue, spray, let dry, peel | 1–2 hours | Decor bowl/filler |
Inspiration: More Easter Egg Craft Ideas
- Peek-a-Boo Clothespin Eggs: Paper eggs that reveal hidden creatures inside when opened.
- Marbled Paper Easter Eggs: Swirl paint on water and dip eggs for a stunning marble effect.
- Easter Coloring Pages: Decorate blank egg shapes with markers or watercolors for a quick, creative fix.
Troubleshooting & Expert Tips
- If your tissue doesn’t stick, add more water or use a brush for extra adhesion.
- Peeling too early may result in faint colors—wait until the tissue is fully dry for best vibrancy.
- If cardstock curls, press the dry eggs under a book for a flat finish.
- Small patches of missed color can be touched up by reapplying tissue and water in that area.
- Rinse hands promptly to prevent dye stains.
Conclusion
Tissue paper Easter eggs are a brilliant and customizable craft, bringing festive color and creativity to your celebrations. By following these steps and tips, you’ll create one-of-a-kind eggs that showcase the artistic flair of everyone involved. Whether you display them in a holiday centerpiece, string them as garlands, or use them as unique gifts, these eggs are sure to brighten any spring gathering.
References
Read full bio of medha deb


