How to Make Marbled Easter Eggs With Oil: A Step-by-Step Guide
Simple kitchen ingredients combine to create striking, swirl-patterned designs.

How to Make Marbled Easter Eggs With Oil
Transforming ordinary eggs into vibrant, marbled works of art is a beloved Easter tradition. Using a mixture of oil, water, food coloring, and vinegar, you can create stunning patterns that look intricate but are easily achieved at home. This comprehensive guide covers everything you need to know, from supplies and preparation to step-by-step instructions, decorating tips, scientific explanations, and frequently asked questions. Get ready to make your Easter celebration extra colorful!
Table of Contents
- Supplies Needed
- Preparation and Workspace Tips
- Step-by-Step Instructions
- Color Combinations & Decorating Ideas
- The Science Behind Marbled Eggs
- Displaying and Storing Marbleized Eggs
- Troubleshooting & Safety
- Frequently Asked Questions
Supplies Needed
- Eggs: Hard-boiled eggs or blown-out eggs for longer-lasting decorations.
- Food Coloring: Assorted colors; neon or pastel shades work especially well for striking effects.
- Vinegar: Distilled white vinegar to help the dye adhere to the eggshell.
- Oil: Vegetable, canola, or olive oil to create the marbled patterns.
- Water: Warm water for mixing with dyes.
- Bowls or Pie Plates: Low, shallow containers for mixing dye and rolling eggs.
- Plastic Cups: For base color dyeing stages.
- Forks or Spoons: For swirling oil and turning eggs.
- Gloves (optional): To prevent stained hands.
- Paper Towels: For drying eggs and protecting surfaces.
- Newspaper (optional): To cover countertops and catch spills.
- Crayons (optional): For drawing patterns on eggs before dyeing.
Preparation and Workspace Tips
Before beginning, ensure your workspace is clean, well-lit, and organized. Lay out newspaper or paper towels to absorb any spills and splashes. Dyeing eggs can get messy, so it’s best to wear old clothes and consider using gloves. If making eggs with children, gather all supplies and review the steps together.
Step-by-Step Instructions
Step 1: Dye the Base Color
- Fill plastic cups with 1 cup of very hot water.
- Add 3–4 drops of food coloring for each desired color.
- Add 1 teaspoon of distilled white vinegar and mix well.
- Place one egg into each cup and let sit for 2–3 minutes to absorb a light base color. For deeper colors, leave longer.
- Remove eggs using a spoon or tongs and place them on paper towels to dry thoroughly.
- Tip: Keep base shades light so marbling colors contrast beautifully.
Step 2: Prepare the Marbling Bath
- Pour about 2 cups of warm water into a shallow bowl or pie plate.
- Add 1 tablespoon of distilled white vinegar and stir until combined.
- Add 15–20 drops of your chosen food coloring (one or two contrasting colors work best).
- Stir the mixture well. For deeper color intensity, use more drops.
- Add 1 tablespoon of oil (vegetable, olive, or canola). Use a fork to gently swirl the oil over the surface. The oil should remain in distinct patches, forming the eventual marble effect.
Step 3: Marble the Eggs
- Drop a dyed, dried egg into the marbling bath.
- Using a fork, spoon, or gently with your gloved fingers, quickly roll the egg around the bowl, making sure it moves through both the colored water and the surface oil patches.
- Continue swirling until the egg is coated in a marbled pattern and you’re satisfied with the look (usually 30–60 seconds).
- Remove the egg and carefully pat dry using paper towels, wiping away any excess oil but keeping the sheen.
- Repeat: Change colors or perform additional rolling in different marbled baths for multilayered effects, allowing eggs to dry between rounds.
Step 4: Let Eggs Dry and Display
- Place finished eggs on a double layer of paper towels and allow them to dry for at least 30 minutes.
- Arrange eggs in a basket, on an egg rack, or any spring-themed table centerpiece for maximum impact.
Color Combinations & Decorating Ideas
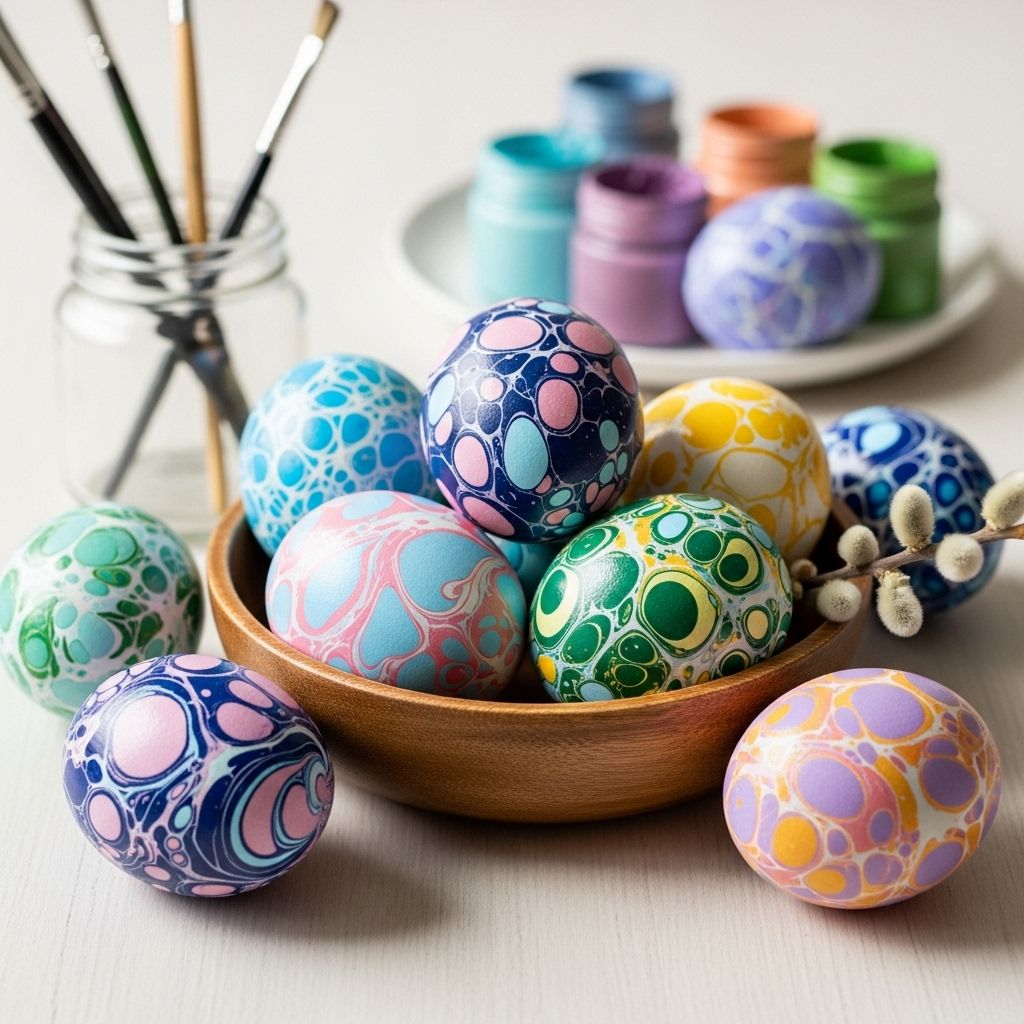
- Try base tints of pastel blue, pink, or yellow, then marble with bolder neon or dark hues for gorgeous contrasts.
- Limit the number of colors per bath to 1–2; too many colors can make eggs look muddy or brownish.
- Draw designs on eggs with crayons or wax pencils before base dyeing to create resist effects.
- Use a color wheel to teach kids about mixing colors and experimenting with combinations.
- For a ‘galaxy’ or ‘space’ theme, use navy, purple, pink, and a hint of gold or silver marbling.
- Layer marbling baths for more intricate patterns, allowing eggs to dry between each layer.
- Display eggs in glass bowls or clear containers to emphasize the marbled patterns and sheen.
| Base Color | Marbling Bath Colors | Effect |
|---|---|---|
| Pastel Pink | Neon Purple, Violet | Striking, bold contrast |
| Mint Green | Pale Blue, Turquoise | Soft, aquatic look |
| Sunny Yellow | Orange, Red | Warm, energetic vibes |
| Lavender | Silver, Navy | Elegant, cosmic |
| White | Rainbow mixed | Classic marbled multicolor |
The Science Behind Marbled Eggs
This craft is a playful introduction to chemistry fundamentals:
- Oil and water do not mix, due to differences in molecular structure—oil is less dense and floats on the water’s surface.
- Vinegar is used because most food dyes are acid-based, helping color adhere to the eggshell.
- When the egg is rolled through a mixture containing both oil and dye, portions of the shell are blocked by oil, leaving a marbleized effect as only some areas absorb color.
- Blending science and art, this activity can facilitate learning about density, solubility, and color theory.
Displaying and Storing Marbleized Eggs
- Showcase finished eggs in baskets lined with shredded paper, glass jars, or egg holders for an elegant centerpiece.
- Hard-boiled eggs should be refrigerated after decorating and can keep for up to 5 days; avoid leaving them unrefrigerated for more than 2 hours.
- Blown-out eggs can last for years as keepsakes—store gently wrapped in tissue paper in a dry, protected box.
- If gifting, arrange eggs in cartons lined with tissue or shredded Easter grass.
Troubleshooting & Safety Tips
- If marbling looks uneven, check that the eggs are completely dry from base dyeing and that oil isn’t overmixed into the water.
- For lighter or patchy marbling, add more oil or more drops of coloring to the bath.
- Gloves are recommended if you wish to avoid stained hands; food coloring is washable but can linger.
- All ingredients used are food-safe, but if you use blown-out eggs for display, do not consume them afterward.
- Clean up spills promptly—food coloring can stain surfaces and fabrics.
Frequently Asked Questions (FAQs)
Q: Can I use brown eggs instead of white eggs?
A: Yes! Brown eggs develop deeper, richer marbling tones and are ideal for jewel-like effects. The process is identical.
Q: Can I skip the vinegar?
A: Vinegar helps the dye adhere to the eggshell and produces brighter colors. Without it, eggs may develop softer, muted hues and the color may not bond as well.
Q: Is it safe to eat the eggs after dyeing?
A: If using only food-safe dyes and keeping eggs properly refrigerated, marbled eggs are safe to eat. Do not consume eggs that have been left out at room temperature for over 2 hours, or blown-out eggs intended for decoration.
Q: How can I intensify the marbled pattern?
A: Increase the amount of oil or food coloring in the marbling bath, roll the egg gently through distinct oil patches, and repeat marbling steps with new colors if desired.
Q: What edible oils work best?
A: Vegetable, canola, and olive oil all produce excellent marble patterns. Each gives a slightly different sheen; experiment to discover your favorite look.
Creative Extensions
- Make galaxy eggs by layering deep navy, purple, and silver food coloring in oil baths.
- Host an Easter egg science experiment—see how marbling patterns change with different ratios of oil to dye.
- Use marbled eggs as place cards by adding name tags on toothpicks.
- Try wax resist patterns before base dyeing for hidden messages or detailed designs.
- Make a bouquet by inserting egg picks and arranging marbled eggs in a vase for unique spring decor.
Safety and Environmental Tips
- Dispose of used dye baths responsibly; pour down the drain with plenty of water.
- Use natural food coloring (from beet juice, turmeric, or spinach) for a more eco-friendly craft.
- Save and reuse marbled eggshells as garden compost (if not using synthetic dyes).
Celebrate Easter With Creativity
Marbled Easter eggs created with oil are a visually stunning, educational, and fun addition to springtime festivities. This craft is perfect for families, classrooms, and makers of all ages, offering endless opportunities for creativity and learning. Try classic combinations or invent your own; every egg is a unique masterpiece!
References
Read full bio of medha deb


