DIY Pounded Flower Art: Transforming Blooms into Beautiful Mother’s Day Crafts
Capture fleeting flower hues in delicate prints to create lasting botanical mementos.

DIY Pounded Flower Art: Turn Nature’s Beauty into Lasting Mother’s Day Memories
Pounded flower art, also known as hammered flower prints, is a simple yet stunning craft that uses the natural pigment from fresh blooms to create beautiful botanical images on paper or fabric. Perfect for Mother’s Day, this project combines creativity, nature appreciation, and heartfelt gifting. Whether you’re looking for a meaningful keepsake or a fun activity to enjoy with loved ones, pounded flower art offers an accessible, rewarding experience for crafters of all levels.
What is Pounded Flower Art?
Pounded flower art is a nature-based craft that involves using fresh flowers and leaves to transfer their vibrant colors and outlines onto surfaces like watercolor paper or fabric through gentle hammering. This technique relies on the flowers’ natural pigments, resulting in unique, organic prints without the need for paint or ink. Each piece reflects the shape, color, and texture of the botanicals used, making every creation one-of-a-kind.
Materials You’ll Need
- Fresh flowers and greenery – Choose blooms with rich pigments and flat faces, such as pansies, violets, daisies, or marigolds. Leaves and stems can also add interesting shapes.
- Watercolor paper or natural fabric (cotton, linen) – Sturdy, absorbent surfaces work best for capturing the flower pigments.
- Hammer – A flat-faced hammer (household claw or ball-peen) provides the best pressure and coverage.
- Paper towels, parchment or wax paper – Used to protect the surface and help contain the flower dyes.
- Tape (washi or masking tape) – Holds flowers in place to prevent shifting while pounding.
- Cutting board or hard surface – Provides a stable base for hammering.
- Tweezers – For removing small plant debris after pounding.
- Fine tip drawing pen or colored pencils (optional) – Add artistic details or outlines once the print dries.
- Acrylic spray sealer (optional) – Protects and preserves the finished artwork.
- Alum (optional; for fabric projects) – Helps fabric absorb pigments and maintain color vibrancy.
Step-by-Step Guide: Making Pounded Flower Art
Step 1: Select and Prepare Your Blooms
- Choose fresh, vibrant flowers and leaves. Avoid wilted or dried materials, as they won’t transfer color effectively.
- For richer colors, try blooms like pansies, violets, petunias, and marigolds. Dark-pigmented flowers yield more vivid prints.
- If you’re uncertain about color transfer, test a petal or leaf on a scrap piece of paper or fabric.
- Trim stems close to the flower heads to ensure a flat surface for hammering.
Step 2: Arrange Your Flowers on the Surface
- Place your watercolor paper (cut to desired size, e.g., 5×7 inches) or prewashed, ironed fabric on a hard, protected surface, such as a wooden cutting board.
- Arrange the flowers face down in your chosen pattern, leaving space to avoid overlap when flattening.
- Secure flowers with washi or masking tape, especially for thick blooms or those with raised centers, to prevent shifting during hammering.
Step 3: Cover and Begin Hammering
- Place a paper towel, parchment, or wax paper over the arranged flowers to protect both the surface and your hammer.
- Use the flat side of the hammer to gently pound the flowers, starting from the edges and moving toward the center. Apply even, gentle pressure to avoid tearing the paper or fabric.
- As you hammer, watch for dyes seeping through – you can lift one edge of the protective paper to check progress. Add more paper towel layers if needed to better contain the pigments.
- Focus on each section, ensuring all flower parts make good contact with the surface. Some flowers (such as pansies) release pigment quickly, while others (like marigolds) require more force and time.
Step 4: Reveal and Clean Your Print
- Once sufficient pigment has transferred and you’re happy with the impression, carefully lift the paper towel and tape.
- Peel flowers or leaves away to reveal the print beneath. Use tweezers to remove any remaining bits of petal or plant material.
- If small debris remains, gently brush the area with a clean paper towel once the print is dry.
Step 5: Add Artistic Details (Optional)
- Once the print is fully dry (typically about 30 minutes), add outlines, details, or highlights with a fine tip pen or colored pencils.
- This step can transform your print from abstract to whimsical and personalized, emphasizing unique flower shapes or adding calligraphic touches.
Step 6: Seal and Display Your Art (Optional)
- To preserve your pounded flower art, spray the print with clear acrylic sealer (preferably outdoors or in a well-ventilated area). This adds contrast and protects the colors from fading.
- Display as a card, bookmark, wall art, or framed gift – pounded flower prints make thoughtful, handmade presents for Mother’s Day or any special occasion.
Special Techniques: Pounding Flowers on Fabric
While paper is the most accessible base for this art, using fabric can open creative possibilities for more durable projects like banners, napkins, or tote bags. Here’s how to adapt the process for natural fabrics:
- Prewash and iron your fabric to ensure a smooth surface.
- Prepare a mordant bath by dissolving 2 teaspoons of alum powder in 1 gallon of warm water. (Wear gloves and a mask, and work in a ventilated space.)
- Soak fabric for 20–30 minutes; wring out and let air dry. Do not rinse after soaking.
- Iron fabric again if needed.
- Lay out flowers as before, cover with paper towel or parchment, and gently pound.
- Once dry, heat set the design: cover with parchment and press with an iron on the highest recommended setting (no steam) for your fabric type.
- Display or use your botanical textile creation as desired.
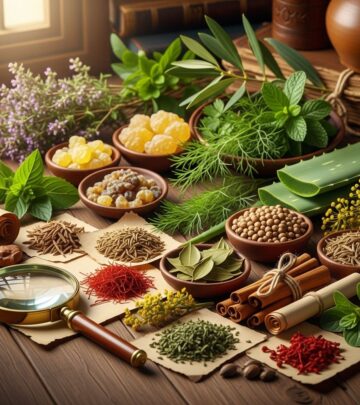
Choosing Flowers for the Best Results
Not all flowers or leaves yield the same quality of prints. The key is selecting botanicals with vibrant pigments and relatively flat profiles. Here’s a helpful guide to flower selection:
| Flower/Leaf Type | Pigment Transfer | Recommended? |
|---|---|---|
| Pansies, Violas | Excellent (deep purples, blues, yellows) | Highly recommended |
| Marigolds | Moderate (bright oranges, yellows) | Recommended |
| Petunias | Excellent (rich reds, purples) | Highly recommended |
| Daisies | Low (white petals, greenish stems) | Less effective |
| Leaves (Maple, Oak) | Varies (greens) | Works well, test beforehand |
Always experiment with a few test prints to discover which flowers in your region work best!
Creative Ideas and Variations
With basic pounding techniques mastered, branch out and explore additional creative applications:
- Mother’s Day cards: Print on folded watercolor paper, add hand-lettered greetings, and share with loved ones.
- Bookmarks: Cut prints into strips, laminate for durability, and gift to book lovers.
- Framed wall art: Arrange prints in matching frames for a fresh, nature-inspired gallery.
- Fabric banners and napkins: Use pounded flower art to personalize table décor or linen keepsakes.
- Gift tags: Small squares or circles of pounded flower art make exquisite tags for presents.
- Journaling: Incorporate prints into nature journals to record and celebrate seasonal blooms.
Expert Tips for Successful Flower Pounding
- Use fresh, moist flowers: Freshness ensures the best pigment transfer. Dry or wilted blooms give pale results.
- Test before committing: Try a petal or leaf on scrap paper to gauge color and saturation.
- Pound gently: Overzealous hammering may tear paper or fabric. Use steady, even taps to build up pigment without damaging the base.
- Experiment with tape: Use low-tack tape to keep flowers in place. For thicker flowers (like marigolds), trim away excess base or tape down carefully.
- Layer flower prints: Repeat the process to build multi-dimensional, layered looks. Let design dry fully between layers.
- Be patient during cleanup: Allow prints to dry so pigments set before brushing away debris.
- Seal for longevity: Use acrylic spray to prevent fading and enhance depth, especially if displaying artwork in direct sunlight.
Frequently Asked Questions (FAQs)
Q: What types of paper work best for flower pounding?
A: Watercolor paper (ideally 140 lb or heavier) is recommended for its absorbency and durability. Thicker cardstock is also suitable, but may not capture as much pigment.
Q: Can I use artificial flowers?
A: No, only fresh, real flowers contain the natural pigments needed for this printing technique. Artificial or silk flowers will not transfer color.
Q: Will my flower prints fade over time?
A: Yes, natural pigments may fade, especially when exposed to sunlight. To minimize fading, seal your print with acrylic spray and display away from direct light.
Q: How do I prepare fabric for pounding flowers?
A: Use a mordant bath (such as alum) for natural fabrics. This helps absorb and retain dyes from the flowers. Prewash and dry fabric before pounding, and heat set designs with an iron for longevity.
Q: What if my flowers don’t transfer well?
A: Try testing different flower varieties, increasing pressure while pounding, or layering prints by repeating the process. Not all flowers have strong pigments; experimentation is key.
Q: Can children do this craft?
A: Yes, with supervision. Children love the hands-on process, but care should be taken with hammers and cleanup. Choose soft mallets and adult guidance for safety.
Q: Is this craft eco-friendly?
A: Flower pounding uses natural materials and minimal chemical processes. Discarded plant material can be composted, making it a sustainable crafting option.
Safety and Cleanup Recommendations
- Work on a solid, protected surface to avoid damaging tables.
- Use gloves and a mask when handling alum or other mordants.
- Clean tools immediately after use to prevent dye buildup.
- Compost leftover plant bits and responsibly recycle paper towels.
Conclusion: Making Keepsakes that Celebrate Spring and Mothers
DIY pounded flower art is more than just a craft—it’s a celebration of nature, creativity, and heartfelt connection. With simple supplies, a dash of imagination, and the guidance above, you can transform living blooms into cherished keepsakes for Mother’s Day and beyond. Explore different flowers, experiment with patterns, and share your creations with friends and family for lasting memories rooted in beauty and care.
References
- https://onelittleproject.com/flower-pounding/
- https://www.firstdayofhome.com/flower-pounding/
- https://www.youtube.com/watch?v=GVJZADFocbE
- https://thecraftedlife.com/diy-hammered-flower-art/
- https://www.youtube.com/watch?v=Hi9ylRX2Bq0
- https://gardentherapy.ca/hammered-flower-print-cards/
- http://invitationtothebutterflyball.blogspot.com/2010/04/flower-pounding-cards-tutorial.html
- https://fanningsparks.com/flowers-and-a-hammer/
Similar Articles


Read full bio of Sneha Tete


