The Ultimate Guide to Making Peach Crisp at Home
Achieve a golden oat topping and sun-kissed fruit filling for pure summer bliss.
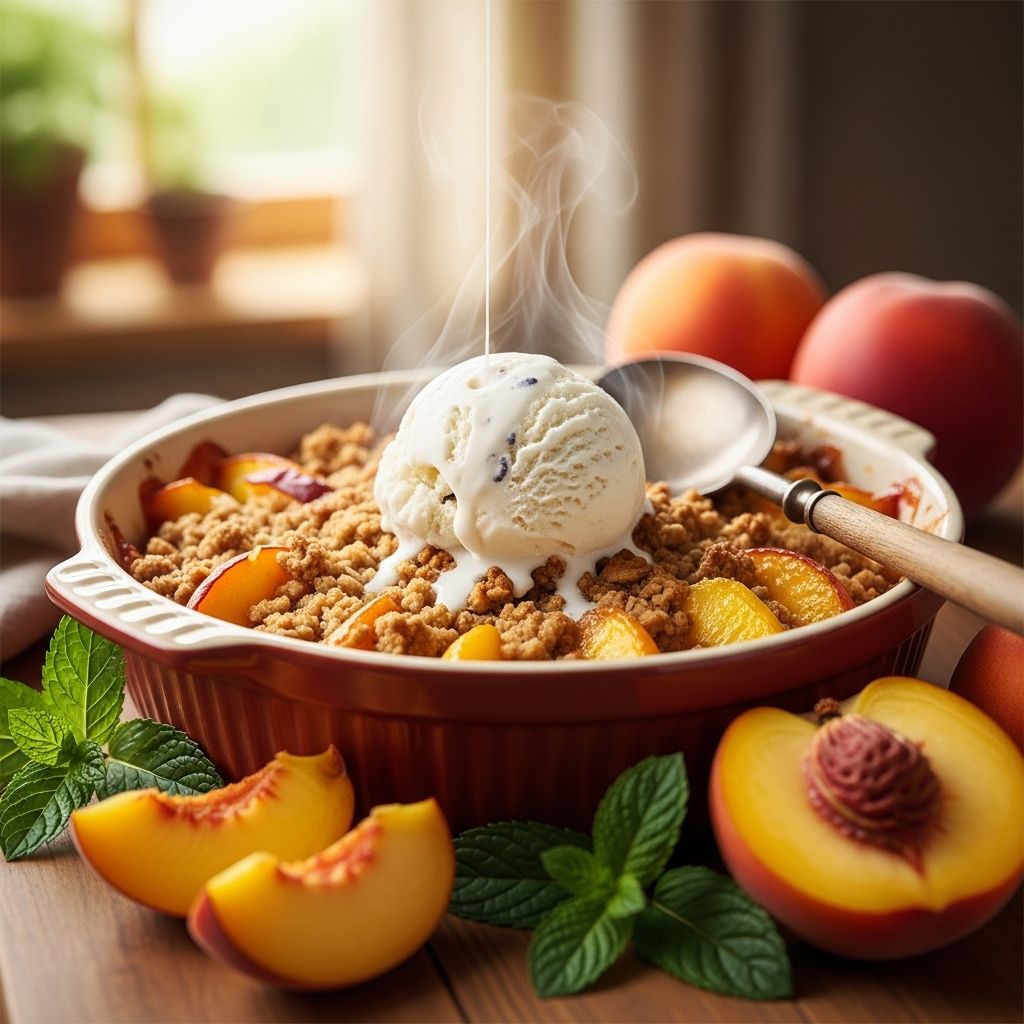
Peach crisp is a celebrated classic in summer desserts, renowned for its satisfying contrast—a bubbling, fragrant peach filling topped by a golden, crunchy, oat-crumb topping. While relatively simple, true excellence in peach crisp lies in the finesse of its components: perfectly ripe peaches, a topping both crisp and tender, and just the right balance of sweetness and spice. This guide walks you through all aspects of making peach crisp, from selecting fruit to baking and serving, inspired by expert-tested approaches to deliver the best results for your table.
Why Peach Crisp Deserves a Spot on Your Table
Unlike a pie, which demands patience with pastry, or a cobbler, which relies on biscuit technique, a crisp offers immediate and gratifying rewards. The oat topping melds crunch with chew, while the fruit underneath delivers brightness and comfort. It’s forgiving, scalable, and accessible—requiring little more than a bowl, a pan, and a summer glut of peaches.
- Effortless preparation: Minimal tools and easy assembly for quick results.
- Diverse serving options: Enjoy warm from the oven or cold as leftovers.
- Versatility: The basic method suits nearly any stone fruit and adapts well to seasonal variations.
Key Ingredients for the Best Peach Crisp
Ingredient quality is paramount for fruit-forward desserts. Here’s what you’ll need and how each contributes:
| Ingredient | Role in Recipe | Tips |
|---|---|---|
| Ripe Peaches | Main filling; provides sweetness and acidity | Use freestone, firm but ripe peaches for best texture |
| Granulated Sugar | Sweetens and balances tartness | Adjust quantity to fruit’s natural sweetness |
| All-Purpose Flour | Thickens the fruit juices | Substitute cornstarch for a clear finish |
| Lemon Juice | Enhances bright flavor, prevents browning | Freshly squeezed is best |
| Rolled Oats | Provides texture and structure in topping | Avoid instant oats; old-fashioned style preferred |
| Butter | Binds topping, adds rich flavor | Cold, unsalted butter for proper texture |
| Brown Sugar | Deepens sweet flavor; drives caramelization | Provides subtle molasses notes |
| Spices (Cinnamon, Nutmeg) | Warm flavor supporting the fruit | Optional; use to taste |
How to Choose and Prepare Peaches
The texture and flavor of your filling start with your peaches. Freestone varieties generally work best—they’re easy to pit and slice. While some recipes call for peeling, peach skins soften during baking and add subtle texture and color.
- To peel or not to peel? Skins don’t detract from the final dish and save prep time. If preferred, blanch peaches to slip skins easily.
- Pitting and slicing: Slice peaches into uniform pieces for even baking—about 1/2-inch slices work well.
- Fresh vs. Frozen: Fresh peaches are ideal in season; off-season, good-quality frozen peaches also yield excellent results. Thaw and drain before use.
Assembling Your Crisp: Step-by-Step
Success hinges on evenly distributing fruit and topping. Here’s how to build the perfect crisp:
- Mix the filling: Toss peaches in lemon juice, sugar, and flour until all slices are coated.
- Prepare the topping: In a separate bowl, combine oats, flour, brown sugar, and any spices. Cut in cold butter using a pastry blender or your fingertips until the mixture forms large, clumpy crumbs.
- Layer in baking dish: Spread peach mixture evenly in a baking dish. Scatter topping uniformly over fruit, ensuring some clumps for varied texture.
- Bake until golden: Place crisp in the center of a preheated oven. Bake until topping is crisp and filling is bubbling—usually 40–45 minutes.
Tips for Achieving a Perfect Topping
A truly satisfying crisp has a topping that’s crunchy, not hard or chewy. For the best results:
- Use cold butter for a crumbly, crisp bite—room-temperature butter may yield a greasy or cakey texture.
- Do not overmix after adding butter; aim for pea- to hazelnut-sized clumps.
- If you prefer a more tender topping, add a sprinkle of baking powder.
- Make-ahead tip: Prep topping in advance and refrigerate until ready to use.
Customizing Your Peach Crisp
Make your crisp unique by switching up fruit, adding nuts, or adjusting sweeteners and spices. Here are some popular variations:
- Fruit additions: Mix in berries (such as raspberries or blueberries), nectarines, or apricots for a mixed fruit crisp.
- Nutty crunch: Add chopped pecans or almonds to the oat topping.
- Spice profile: Try cardamom or ginger for warmth and complexity.
- Sweeteners: Swap part of the sugar with honey or maple syrup.
- Gluten-free adaptation: Replace flour with certified GF flour blends and ensure oats are gluten-free.
Baking Techniques and Troubleshooting
For the most reliable results, follow these time-tested baking tips:
- Oven placement: Bake on the center rack for even heat.
- Bubbly filling: Wait for visible bubbling around the edges—critical for a thick, jammy consistency.
- Prevent burnt topping: If topping browns too quickly, tent loosely with foil mid-way.
If your crisp is:
- Runny: May need longer baking; ensure thickener is evenly distributed.
- Dry: Reduce topping or layer more fruit; peaches with low moisture may require added lemon juice.
Serving Suggestions
Peach crisp shines both fresh from the oven and at room temperature. Here are some ways to serve it:
- Top warm crisp with vanilla ice cream or whipped cream.
- Serve leftovers chilled or gently reheated for breakfast with yogurt.
- Pair with a drizzle of salted caramel for a decadent twist.
Storage and Make-Ahead Tips
Peach crisp keeps well for several days. For best quality:
- Store covered in the fridge for up to 3 days.
- Reheat in a low oven or microwave; re-crisp topping briefly under broiler if desired.
- Freeze unbaked crisp tightly wrapped; bake from frozen, extending time slightly.
Nutritional Snapshot
Peach crisp is a treat, but can be tailored to dietary goals. Here’s a general overview per serving for a classic crisp:
| Nutrient | Amount (approximate) |
|---|---|
| Calories | 250–350 |
| Fat | 8–12g |
| Sugar | 25–35g |
| Protein | 3–5g |
| Fiber | 3–5g |
Frequently Asked Questions (FAQ)
Q: Can I make peach crisp ahead of time?
A: Yes! You can refrigerate assembled but unbaked crisp for up to a day. Bake just before serving for maximum freshness, or reheat gently to revive the topping.
Q: Can I use canned peaches?
A: Canned peaches are an option for off-season baking. Drain well, and reduce added sugar if using peaches in syrup for best results.
Q: Can I freeze peach crisp?
A: Both baked and unbaked crisp can be frozen. Wrap tightly and freeze for up to 3 months. Bake directly from frozen, adding 10–15 minutes to baking time.
Q: How do I prevent a soggy topping?
A: Ensure topping ingredients are cold and crumbly. For extra crispness, use a wider baking dish with more surface area.
Q: What’s the difference between a crisp, a crumble, and a cobbler?
A: A crisp contains oats and sometimes nuts for texture, a crumble is similar but often omits oats, and a cobbler has a pastry or biscuit topping.
Expert Tips for the Perfect Peach Crisp
- Select ripe, aromatic peaches: The essence of the crisp is in the fruit—firm, fragrant, and juicy peaches shine.
- Adjust sugar to taste: Taste your fruit; if it’s especially sweet, reduce sugar for balance.
- Let crisp cool briefly: A short rest after baking helps juices thicken for neater servings.
- Add a pinch of salt: Salt enhances flavor and balances sweetness in the crisp topping.
Conclusion: Elevate Your Summer Baking
Peach crisp brings together the best of summer: juicy fruit and homey comforts. With the insights above, you’re equipped to tailor every step—from fruit selection to topping assembly and serving. Whether as a casual dessert, a celebratory treat, or a sweet finish to a family dinner, peach crisp delivers summery satisfaction with minimal fuss and maximum flavor. Happy baking!
References
Read full bio of Sneha Tete


