How to Build the Ultimate Grilled Vegetable Board
Charred veggies in bold hues meet an irresistible selection of dips for all tastes.

Grilled vegetable boards capture the spirit of casual, festive summer dining. With vibrant colors, smoky flavor, and the irresistible variety of dips and sauces, this spread is both a showstopper and a nod to plant-based eating. Whether you’re hosting a backyard party or looking for a new way to enjoy seasonal veggies, a grilled vegetable board is the ultimate centerpiece. Here’s how to make your own, from choosing produce and prepping marinades to assembling the platter and pairing with bold dips.
Why Grilled Vegetable Boards Are the Perfect Entertaining Food
Beyond their visual appeal, grilled vegetable boards are:
- Flexible: Use the vegetables you love or what’s in season. Budget-friendly and endlessly adaptable.
- Make-Ahead Friendly: Prep much of it ahead, including dips and some of the vegetables.
- Diet-Inclusive: Perfect for vegetarians, vegans, and gluten-free guests—just mind the dips you serve.
- Crowd-Pleasing: Bold colors, textures, and savory grill notes attract everyone, even meat lovers.
- Interactive & Fun: Guests can pick, dip, and assemble their own plates—ideal for parties and potlucks.
Choosing the Best Vegetables for Grilling
The most successful vegetable boards have a mix of shapes, flavors, and colors. Variety not only makes the platter pretty, but ensures a range of char and textures. Here are some top choices for grilling:
| Vegetable | Tips for Grilling |
|---|---|
| Zucchini & Summer Squash | Slice lengthwise into 1/2-inch planks; quick cook and stay juicy. |
| Eggplant | Cut into thick rounds or lengthwise; brush generously with oil to keep tender. |
| Bell Peppers | Core and quarter; their skin blisters beautifully on the grill. |
| Mushrooms (Portobello, Cremini, Button) | Leave small mushrooms whole; Portobellos can be sliced or grilled whole for bold flavor. |
| Asparagus | Trim ends; grill whole and perpendicular to the grates. |
| Onions | Cut into thick rounds. Sweet onions like Vidalia or red onions work well. |
| Carrots | Peeled and halved lengthwise; pre-blanch for tender results if thick. |
| Cherry Tomatoes | Thread on skewers; grill briefly until blistered. |
| Broccolini or Broccoli Florets | Toss in oil; grill in a grilling basket to avoid lost pieces. |
| Green Beans, Snap Peas | Quick to cook and give nice crunch. |
Pro Tip: Opt for vegetables with firm texture and low moisture. Use a variety of sizes and shapes for visual appeal.
How to Prep Vegetables for Grilling
Proper prep sets you up for even, flavorful grilling.
- Wash and dry all vegetables thoroughly.
- Cut uniformly so pieces cook at the same rate: thick rounds, strips, or spears work well.
- Oil generously: Toss pieces in olive oil and salt to help prevent sticking and promote browning.
- Marinate for Extra Flavor: Mix vegetables with herbs, garlic, citrus, or vinegar marinades. Let sit for 20 minutes to an hour for deeper flavor.
- Pre-cook dense veggies: For thick carrots or potatoes, blanch or steam briefly before grilling to ensure tenderness.
Essential Equipment for Grilling Vegetables
Grilling vegetables is mostly straightforward, but you’ll find better results with the right tools:
- Grill basket or vegetable tray: Prevents smaller or more delicate items from falling through grates.
- Tongs: Essential for flipping and moving vegetables without tearing them.
- Skewers: Great for cherry tomatoes, mushrooms, and small veggies.
- Large sheet tray or platter: For assembling your finished board and bringing veggies from grill to table.
Step-by-Step Guide: Grilling Every Vegetable to Perfection
Grilling times vary by vegetable. Use direct, moderately high heat for most, aiming for a mix of deep grill marks and tender, juicy centers.
- Zucchini & Squash: 3-4 minutes per side; look for distinct grill marks and just-tender flesh.
- Bell Peppers: 4-5 minutes per side until skins are blistered and flesh is just softened.
- Eggplant: 4-5 minutes per side; brush with extra oil if looking dry.
- Asparagus: 2-3 minutes until crisp-tender and bright green.
- Onions: 4-6 minutes per side, until lightly charred and sweet-smelling.
- Mushrooms: 2-4 minutes per side; Portobellos may take a minute or two longer.
- Carrots/Root Veggies: 4-7 minutes per side after pre-blanching.
- Broccolini/Green Beans: 3-5 minutes in a basket, tossing occasionally.
- Cherry Tomatoes: 2-3 minutes on skewers, until blistered and starting to split.
Grilling Tips:
- Don’t overcrowd the grill—leave space for flipping.
- Close the lid to help tenderize dense pieces.
- Taste as you go: some vegetables are best with a little crunch left.
- Let rest briefly before arranging on the board for the juiciest results.
Sauces & Dips: The Secret to an Extraordinary Board
Dipping sauces turn grilled vegetables into a feast. Aim for at least two to three contrasting dips, from creamy and rich to zesty or herbal. Here are some favorites:
- Hummus (classic or flavored): Dreamy with charred squash, eggplant, or peppers.
- Tzatziki: Yogurt, cucumber, garlic, and herbs—cooling with grilled onions or carrots.
- Romesco: A Spanish dip of roasted peppers, almonds, and smoked paprika for bold, nutty flavor.
- Green Goddess: Avocado or mayo-based with mixed herbs.
- Baba Ghanoush: Smoky, creamy eggplant for dipping or draping over roasted veg.
- Lemon Tahini Sauce: Bright, nutty, and perfect for drizzle.
- Pesto (classic or vegan): Punchy basil, arugula, or even carrot-top versions.
What others are reading


Serving Suggestion: Decant dips into small bowls clustered on the board. Garnish with fresh herbs, a swirl of olive oil, or chopped nuts for visual flair.
How to Build and Present Your Grilled Vegetable Board
Assembling the board is where creativity shines. Here’s a simple process for wow-worthy presentation:
- Choose a Platter or Board: Use a wooden cutting board, a rimmed sheet pan, or a large tray with sides.
- Arrange Dips First: Place bowls of dips, sauces, or spreads spaced apart—these are your anchors.
- Group by Color and Shape: Fan, stack, or pile vegetables in sections; place similarly colored veggies apart for contrast.
- Add Texture: Layer with extras like toasted baguette slices, pita chips, olives, or nuts for interest.
- Finish with Garnishes: Sprinkle with fresh herbs, lemon wedges, and flaky salt just before serving.
Entertaining Tip: For larger gatherings, make multiple small boards for easier circulation, or supplement with grilled breads.
Flavor Combos and Extras: Making Your Board Unforgettable
- Fresh Citrus: Lemon or lime wedges brighten any grilled veggie.
- Herbs: Dill, parsley, cilantro, mint, and basil add a fragrant finish.
- Cheese: Feta, goat cheese, or halloumi invite a rich, tangy bite (optional for plant-based spreads).
- Pickles or Quick Pickled Veg: Provide tart crunch between bites of smoky vegetables.
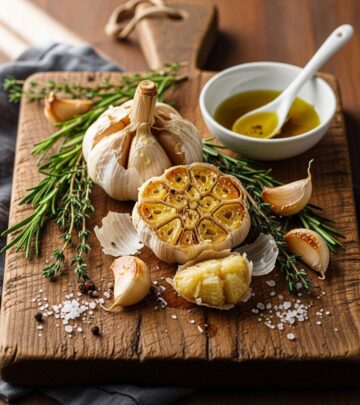
- Roasted Garlic or Nuts: For another layer of umami and crunch.
Expert Tips for Success
- Prep in Advance: Make sauces, cut veggies, and pre-cook denser pieces the morning of your event.
- Grill Just Before Serving: Vegetables taste best slightly warm, so plan your timing accordingly.
- Keep It Casual: Don’t stress over perfect grill marks or symmetry—rustic is beautiful!
- Let Guests Assemble: Serve with plates and let everyone build their own combos with dips and toppings.
Frequently Asked Questions (FAQs)
Q: Can I grill vegetables in advance?
A: Yes! Most grilled veggies hold well at room temperature for a few hours. For best flavor and color, grill close to serving time and serve slightly warm or at room temp.
Q: Can I make a grilled vegetable board without an outdoor grill?
A: Absolutely! Use a grill pan, broiler, or even a cast iron skillet for similar results if you’re cooking indoors.
Q: What about leftovers?
A: Toss leftovers into salads, pasta, grain bowls, or in sandwiches—grilled vegetables maintain their flavor and texture even after chilling.
Q: What meats or proteins can I add for non-vegetarian guests?
A: Pair your board with grilled halloumi, tofu, or sliced chicken, steak, or shrimp on the side for a more substantial spread.
Recipe: Basic Grilled Vegetable Board
Serves 6-8 as an appetizer or 4-6 as a light meal
- 2 medium zucchini, sliced lengthwise
- 1 red bell pepper, cored and quartered
- 1 yellow bell pepper, cored and quartered
- 1 small eggplant, sliced into 1/3″ rounds
- 8 oz mushrooms, trimmed or sliced
- 1 bunch asparagus, trimmed
- 2 carrots, halved lengthwise
- 1 small red onion, thickly sliced
- 1 pint cherry tomatoes (on skewers)
- 1/4 cup olive oil
- Kosher salt and black pepper
- 2-3 dips or spreads (see suggestions above)
- Lemon wedges, fresh herbs, flaky salt (for garnish)
Instructions:
- Preheat your grill: Set for medium-high heat (gas or charcoal).
- Prepare vegetables: Toss with olive oil, salt, and pepper. Marinate for 15-30 minutes if desired.
- Grill in batches: Place vegetables (grouped by size/density) on the grill. Cook, turning as needed, until tender and charred (see grilling guide above).
- Rest and arrange: Transfer to a platter, let cool slightly, and arrange around bowls of dips.
- Garnish and serve: Finish with herbs, citrus, flaky salt, and a drizzle of olive oil. Serve with bread or pita as desired.
Conclusion
A well-composed grilled vegetable board isn’t just a side dish—it’s a celebration of summer’s bounty, a palette of colors and textures, and a convivial centerpiece for any gathering. With smart prep, a few crowd-pleasing dips, and variety in veggies and garnishes, you can craft a platter that’s as nourishing as it is festive. Enjoy the compliments—and the leftovers!
References
Similar Articles
Read full bio of medha deb


