Mastering Your Broiler: Essential Home Cooking Techniques
Transform ordinary recipes into restaurant-style dishes with fast, intense radiant heat.
Mastering the Home Broiler: Techniques for Better Meals
Harnessing the power of your home broiler unlocks rapid, high-heat cooking that creates flavorful crusts and caramelization in minutes. Although broiling is often misunderstood or underused, learning to wield it safely and effectively transforms your kitchen routines and results. This comprehensive guide covers everything you need to know, from broiler basics to safety, equipment, and expert cooking strategies.
What Is Broiling?
Broiling is a dry-heat cooking method where food is exposed directly to intense, radiant heat from above—usually generated by an electric or gas-powered heating element in your oven’s ceiling. This process quickly browns, crisps, and cooks the surface of foods, making it ideal for melting cheese, finishing casseroles, caramelizing vegetables, browning chicken, and even cooking steaks. The broiler’s heat closely mimics the effect of a restaurant salamander grill or an open-flame grill, without requiring outdoor equipment.
Broiling vs. Baking vs. Grilling
| Method | Heat Direction | Typical Temperature | Primary Use |
|---|---|---|---|
| Broiling | Top (Radiant) | 500–600°F+ | Browning, finishing, quick cooking |
| Baking | All around (Ambient) | 300–475°F | Even, slower cooking |
| Grilling | Bottom (Direct) | 500–700°F | Outdoor charring, grilling flavors |
Broiling is a go-to technique for quick caramelization and finishing touches, filling the gap between baking and outdoor grilling.
First Steps: Know Your Broiler
Home ovens generally offer one of three broiler setups:
- In-Oven Broilers: Located at the top of the main oven cavity, these are directly above your oven racks. Most modern electric and many gas ranges use this setup.
- Broiler Drawers: Found at the bottom of many gas ovens, this compartment below the main oven space delivers radiant heat from above as well.
- Portable Oven Broilers: Some countertop toaster ovens have broil settings, though usually with less power.
To identify your broiler type, look for a distinct heating element at the oven’s top or check your appliance’s manual. Note that broilers may differ in intensity, size, and control. Not all can regulate temperature—some are simply “on” or “off.” Understanding your particular setup is the foundation for consistent, safe broiling.
Essential Pre-Broiling Checklist
- Read your oven’s manual for specific broiling instructions and limitations.
- Test broiler function: Watch for evenness and any weak spots by broiling bread on a sheet pan and observing how it browns.
- Familiarize yourself with the distances from rack to broiler element; this will inform how you position your food for optimal results.
Choosing the Right Cookware
High, direct heat demands proper cookware. The best options for broiling are designed to withstand temperatures of 500°F or higher. Using the wrong materials can result in warping, melting, or exposure to unsafe fumes.
Best Cookware Materials for Broiling
- Uncoated, Heavy-Duty Metal Sheet Pans: Standard half-sheet or quarter-sheet pans made from aluminum or stainless steel are ideal. They conduct heat evenly and resist warping under high temperatures.
- Cast Iron Skillets and Griddles: Exceptionally broiler-safe, these are perfect for steaks, chops, or dishes needing excellent heat retention.
- Broiler-Safe Baking Dishes: Stoneware, enamel-coated cast iron (e.g., most Le Creuset), and some glass dishes labeled specifically as broiler-safe can be used. Always confirm manufacturer’s guidance.
- Wire Racks: Placing food on a broiler-safe wire rack above a pan encourages airflow and even browning.
What to Avoid
- Nonstick Pans: Most traditional nonstick coatings degrade or emit fumes at high temperatures. Even “high-temp” coatings are unreliable above 500°F.
- Plastic Handles or Trims: Any pan or dish with plastic parts is usually unsafe for broiler use.
- Thin, Warped, or Disposable Equipment: These can’t withstand broiler heat and may result in uneven cooking or fires.
Proper Broiler Setup
Success with broiling involves strategic pan positioning and food placement. Your goal is to achieve fast browning without burning or undercooking the inside.
Adjusting Rack Position
- Close Distance: Placing your food 4–6 inches beneath the broiler maximizes browning—ideal for thin cuts or melting cheese quickly.
- Moderate Distance: For thicker cuts or delicate foods, use the center rack (6–8 inches away) to allow more gentle heating.
- Lower Racks: For very thick or easily burnt items needing a slower broil, lower the rack further.
Always preheat your broiler for at least 5 minutes for consistent, immediate radiant heat.
Using Rims and Racks
- Line sheet pans with foil for easier cleanup (but only if the foil is kept flat to avoid grease fires).
- Use a broiler pan with a slotted rack (if available) to catch drips and promote crisp exteriors.
- Place food in a single layer for even exposure to the heat.
Broiling Safety: Essential Practices
Broilers can overwhelm your kitchen quickly if not used correctly. Adhering to safety fundamentals eliminates most risks:
- Never leave the broiler unattended. Broilers can scorch food or start fires in seconds, especially when cooking with oil, fatty meats, or bread products.
- Watch for smoke. Excessive smoking indicates either burning food, excess fat dripping onto pans, or something in your oven beginning to ignite.
- Keep a fire extinguisher handy and know how to use it. Never throw water on a grease fire.
- Ensure your oven is clean. Remove built-up grease or food residue before broiling to minimize smoke and fire hazards.
- Do not block oven vents or leave oven door open unless manual specifies. Some ovens require closing the door during broiling, while others (especially gas) may need to be kept ajar for air flow.
- Use oven mitts and broiler-safe utensils. The cookware and racks will become extremely hot.
Top Tips for Broiling Success
Refined broiling technique involves more than just cranking the oven. These professional kitchen rules will help you achieve perfect results every time:
- Preheat Broiler and Pans: A hot broiler and a hot cooking surface give immediate sear and proper browning.
- Pat Food Dry: Moisture creates steam and prevents browning; dry surfaces caramelize faster and more evenly.
- Oil the Food, Not the Pan: Brushing oil on food ensures it browns and crisps. Oiling the pan alone risks smoking or burning.
- Season Generously: Salt, spices, or marinades added just before broiling improve flavor and crust development.
- Monitor Doneness Closely: Use a timer, visual cues, and (where safe) an instant-read thermometer to avoid overcooking or burning.
- Flip or Move Food: For thicker cuts or uneven broilers, flipping food partway or rotating pans helps achieve uniform browning.
- Rest After Broiling: Particularly for steaks or chops, allow meat to rest a few minutes to redistribute juices before cutting.
Clever Uses for Your Broiler
While broilers shine at melting and browning, their versatility extends across many kitchen tasks:
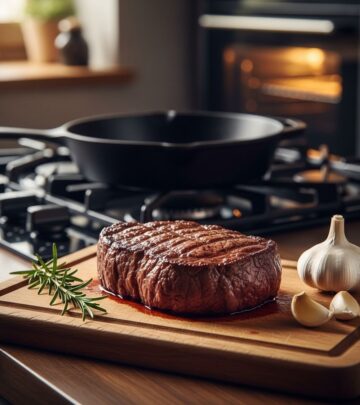
- Steaks and Chops: Achieve classic steakhouse crusts—dry, oil, and broil close to the heat, flipping as needed.
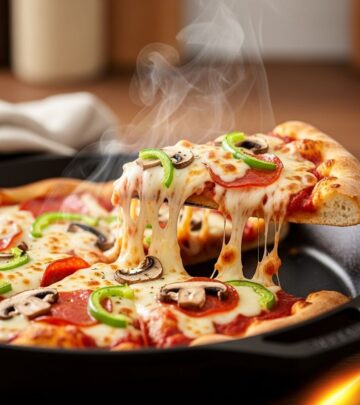
- Melting Cheeses: Perfect for topping French onion soup, nachos, or gratins with bubbling browned cheese.
- Crisping Breadcrumb Toppings: Broil mac and cheese, casseroles, or pasta bakes for a golden crunch.
- Toasting and Caramelizing: Broil bread for bruschetta, caramelize sugar on desserts, or finish roasted vegetables with color.
- Roasting Peppers and Charring Vegetables: Blacken pepper skins for easy peeling or char-skinned vegetables for smoky flavors.
Common Mistakes and How to Avoid Them
- Using the Wrong Cookware: Non-broiler-safe pans may warp, melt, or produce dangerous fumes.
- Neglecting Rack Position: Food placed too far from the broiler may dry out before browning; too close and it may burn outside while raw inside.
- Forgetting to Preheat: Skipping proper preheating results in limp, pale surfaces or unevenly cooked food.
- Overloading the Pan: Crowding limits exposure to radiant heat and reduces browning.
- Leaving Unattended: This is the single most common cause of ruined dishes and oven fires when broiling.
Frequently Asked Questions (FAQs)
Q: Can I use parchment paper under the broiler?
A: No. Parchment paper is not safe for broiler use, as it can ignite at high temperatures. Use foil or a broiler-safe pan instead.
Q: Why does my broiler smoke so much?
A: Excessive smoke usually comes from fat dripping onto hot surfaces, built-up oven residue, or using oils and foods with low smoke points. Always clean your oven and use appropriate oils for broiling.
Q: What temperature does a home broiler reach?
A: Most home broilers operate between 500°F and 600°F, though some may be hotter or cooler depending on the model. Actual performance can vary, so observe your results and adjust rack positions accordingly.
Q: Should I leave the oven door open or closed while broiling?
A: Follow your oven manual. Some electric ovens specify keeping the door ajar for air flow; most gas ovens require it mostly closed. When in doubt, check manufacturer instructions for safety.
Q: Is broiling safe for all foods?
A: Not all foods are well-suited. Thin cuts, vegetables, bread, and small pieces work best. Dense roasts or extremely thick items need indirect heat before finishing under the broiler.
Broiler Cooking Quick Tips and Troubleshooting
- Preheat long enough—at least five minutes—for even heat.
- Monitor frequently; check progress through the oven window or by briefly opening the door if safe.
- Rotate the pan if browning is uneven.
- Let thick proteins rest after broiling for juiciness.
- Wipe out spills and crumbs quickly (when safe) to prevent smoke or fire in future sessions.
When used with care, the broiler delivers unmatched flavor and speed, turning weeknight meals and special dishes into standout successes with minimal effort. Experiment with new dishes, stay safe, and keep a close eye—your broiler is the unsung hero of the kitchen.
References
Read full bio of Sneha Tete


