Ladyfinger Recipe: Step-By-Step Guide To Light Sponge Biscuits
Discover the step-by-step process to make classic homemade ladyfingers—light, airy, and ideal for tiramisu, trifle, and more.
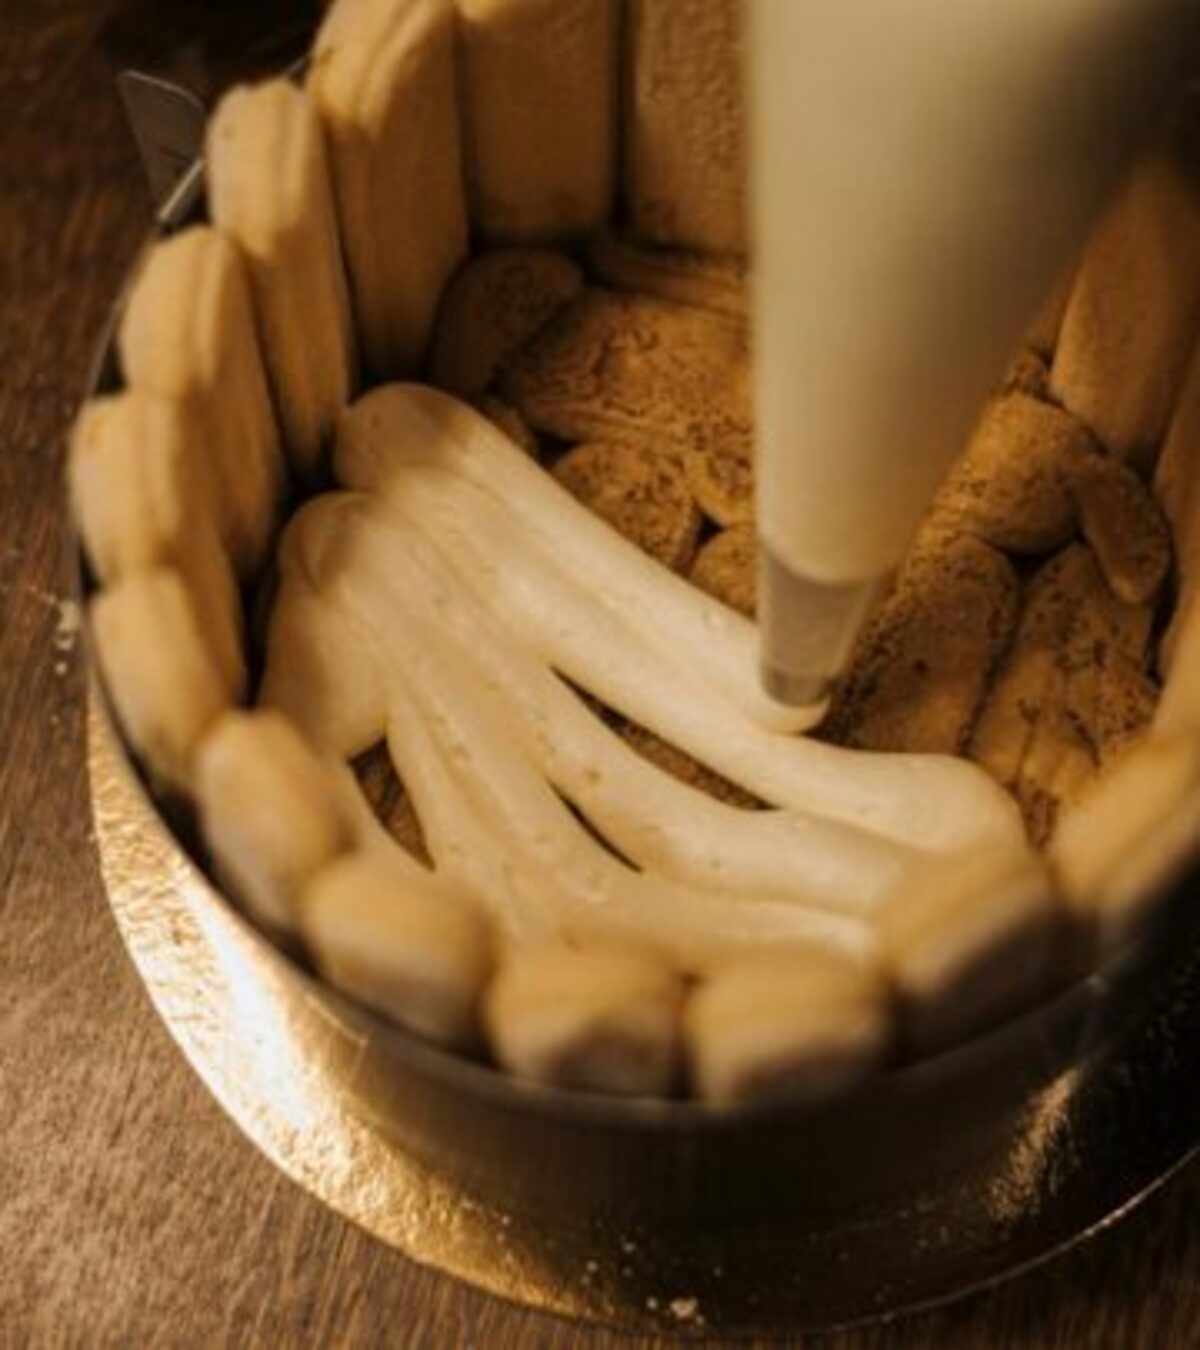
Homemade Ladyfingers: The Classic Sponge Biscuit
Ladyfingers, also known as savoiardi or sponge fingers, are classic, delicate cookies recognized for their airy, light texture and a slight crisp on the outside. They play a fundamental role in iconic desserts such as tiramisu and trifles, and they are beloved around the world for both their flavor and versatility. Whether enjoyed as a snack with tea or coffee, or used as the backbone for layered desserts, mastering homemade ladyfingers will elevate your baking repertoire.
What Are Ladyfingers?
Ladyfingers are long, finger-shaped sponge biscuits distinguished by their soft, airy interiors and crisp golden exteriors. These cookies are made by carefully folding beaten egg whites into a sweetened yolk mixture and gently piping the batter onto a baking sheet before baking. Once cooled, they can be enjoyed plain or used in various recipes.
- Alternate names: Savoiardi, sponge fingers, boudoir biscuits.
- Origin: Italy, with widespread use in European desserts.
- Key traits: Airy, light, absorbent (ideal for soaking up flavors in desserts).
Ingredients for Homemade Ladyfingers
A traditional ladyfinger recipe uses minimal ingredients, resulting in their signature texture and flavor. Here’s what you’ll need:
- 4 large eggs, separated (room temperature preferred)
- 2/3 cup granulated sugar
- 1 cup all-purpose flour (or cake flour for a lighter crumb)
- Powdered sugar (for dusting)
- (Optional) Pinch of salt and a splash of vanilla extract for added depth
These pantry staples come together quickly for a batch of homemade ladyfingers that will rival any bakery version.
Step-by-Step Instructions: Making Ladyfingers
To achieve the perfect ladyfingers, attention to technique is key—especially when incorporating the beaten egg whites. Follow this method for the best results:
- Preheat and Prepare: Heat your oven to 400°F (200°C). Line two baking sheets with parchment paper and lightly dust with powdered sugar.
- Whip the Egg Whites: In a clean, dry bowl, beat the egg whites with an electric mixer until soft peaks form. Gradually add half the sugar and continue to beat until glossy, stiff peaks form.
- Prepare Egg Yolk Mixture: In a separate bowl, beat the egg yolks with the remaining sugar (and vanilla, if using) until thick and pale. This may take several minutes.
- Combine: Gently fold the whipped egg whites into the yolk mixture using a silicone spatula. Be careful not to deflate the batter; use broad, sweeping motions.
- Add the Flour: Sift the flour over the mixture and gently fold in until just incorporated. Avoid over-mixing to maintain the batter’s lightness.
- Pipe the Batter: Transfer the batter to a piping bag fitted with a 1/2-inch round tip. Pipe 4-inch-long strips onto the prepared baking sheets, leaving space between each strip as they will expand.
- Dust and Bake: Sift powdered sugar liberally over the piped batter. Bake for 8–12 minutes, or until the cookies are set and the edges are golden brown. The cookies should spring back slightly when touched.
- Cool and Store: Allow the ladyfingers to cool completely on the baking sheet—they will firm up as they cool. Carefully remove with a thin spatula.
Tips for Perfect Ladyfingers
- Eggs should be at room temperature; they whip up with greater volume and stability.
- Be gentle when folding to retain air in the batter. Overmixing will deflate the eggs, resulting in dense cookies.
- For a crisper finish, dust with a little extra powdered sugar before baking.
- If you don’t have a piping bag, a zip-top bag with the corner snipped works in a pinch.
- To prevent sticking, use parchment paper and a light dusting of flour or powdered sugar underneath.
Ladyfingers FAQ
- Can I freeze ladyfingers? Yes! Once cooled, layer ladyfingers in an airtight container with parchment between layers. Freeze for up to 2 months. Thaw at room temperature before using.
- Can I use cake flour instead of all-purpose flour? Yes, cake flour yields an even lighter, softer texture. Substitute cup-for-cup if desired.
- Are these ladyfingers gluten-free? The standard recipe uses wheat flour. For gluten-free, substitute a 1:1 gluten-free baking blend.
- Why did my ladyfingers deflate? This is often caused by overmixing or not whipping the egg whites enough. Handle the batter gently and avoid overfolding.
Serving and Using Ladyfingers
Ladyfingers are integral to many beloved desserts. Their absorbent texture makes them ideal for soaking up coffee, liqueur, or fruit juices in layered treats. Here are some classic uses:
- Tiramisu: Dip ladyfingers briefly in espresso and layer with mascarpone cream.
- Trifle: Layer with custard, fruit, and whipped cream for a stunning centerpiece.
- Charlotte: Line a mold with ladyfingers filled with mousse or Bavarian cream.
- Cheesecake Base: They serve as a unique alternative to graham cracker or cookie crusts.
- Standalone snack: Enjoy with tea or coffee, lightly dusted with powdered sugar.
Ladyfingers vs. Other Sponge Cakes
| Characteristic | Ladyfingers | Genoise Sponge | Pound Cake |
|---|---|---|---|
| Texture | Light, airy, slightly crisp | Light, but not crispy | Dense, buttery |
| Shape | Finger-like, individual cookies | Round/cake layers | Loaf or bundt |
| Primary Use | Tiramisu, trifle, charlotte | Cakes, roulades | Stand-alone cake |
| Key Ingredients | Eggs, sugar, flour | Eggs, sugar, flour, butter | Eggs, sugar, butter, flour |
Variations on Classic Ladyfingers
While the classic ladyfinger is made simply with eggs, sugar, and flour, you can easily tailor the cookies to your taste:
- Citrus zest: Add lemon or orange zest to the yolk mixture for a refreshing twist.
- Chocolate: Fold in a tablespoon of sifted cocoa powder with the flour.
- Spiced: A whisper of cinnamon, nutmeg, or cardamom adds warmth and interest.
- Nutty: Replace part of the flour with finely ground nuts for a richer flavor.
Storing and Preserving Fresh Ladyfingers
Homemade ladyfingers are best enjoyed fresh, but they can be stored for later use:
- At room temperature: Store cooled ladyfingers in an airtight container for up to 2 days.
- Frozen: Place in a freezer bag, removing as much air as possible. Freeze for up to 8 weeks. Thaw before use for best texture.
Expert Tips for Perfect Results
- Weigh ingredients for accuracy and consistent results.
- Pipe evenly for even baking—use a ruler to guide if needed.
- Ladyfingers will soften quickly after assembly in desserts. If using for tiramisu, don’t over-soak in coffee or syrup; a quick dip is plenty.
- Try baking one sheet at a time to ensure even browning and oven temperature consistency.
Frequently Asked Questions (FAQs)
Q: Can I make ladyfingers without a mixer?
A: Yes, but it requires significant whisking by hand to achieve the stiff peaks in the egg whites and the thick, pale yolk mixture. Electric mixers are recommended for best results.
Q: How do I get my ladyfingers to hold their shape?
A: Use room temperature eggs, beat the whites until stiff, and pipe the batter with a steady, even pressure. Dusting with powdered sugar before baking also helps maintain shape and promotes a crispy crust.
Q: My ladyfingers are too soft—how can I crisp them up?
A: After baking, turn off the oven and leave the ladyfingers inside with the door slightly open for a few minutes to dry them out further. Store only when fully cool and crisp.
Q: Are homemade ladyfingers better than store-bought?
A: Homemade ladyfingers are fresher and typically lighter and more flavorful than store-bought varieties, which can be stale or overly dry. Plus, you can customize the texture and flavor to your liking.
Summary
Homemade ladyfingers are one of the most rewarding basics in the baker’s toolkit. With just a few ingredients and careful technique, you can create airy, delicate sponge fingers perfect for tiramisu, trifles, and countless desserts. Their versatility and irresistible texture make them a staple for both casual bakers and dessert enthusiasts alike.
References
Read full bio of medha deb










Community Experiences
Join the conversation and become a part of our empowering community! Share your stories, experiences, and insights to connect with other beauty, lifestyle, and health enthusiasts.