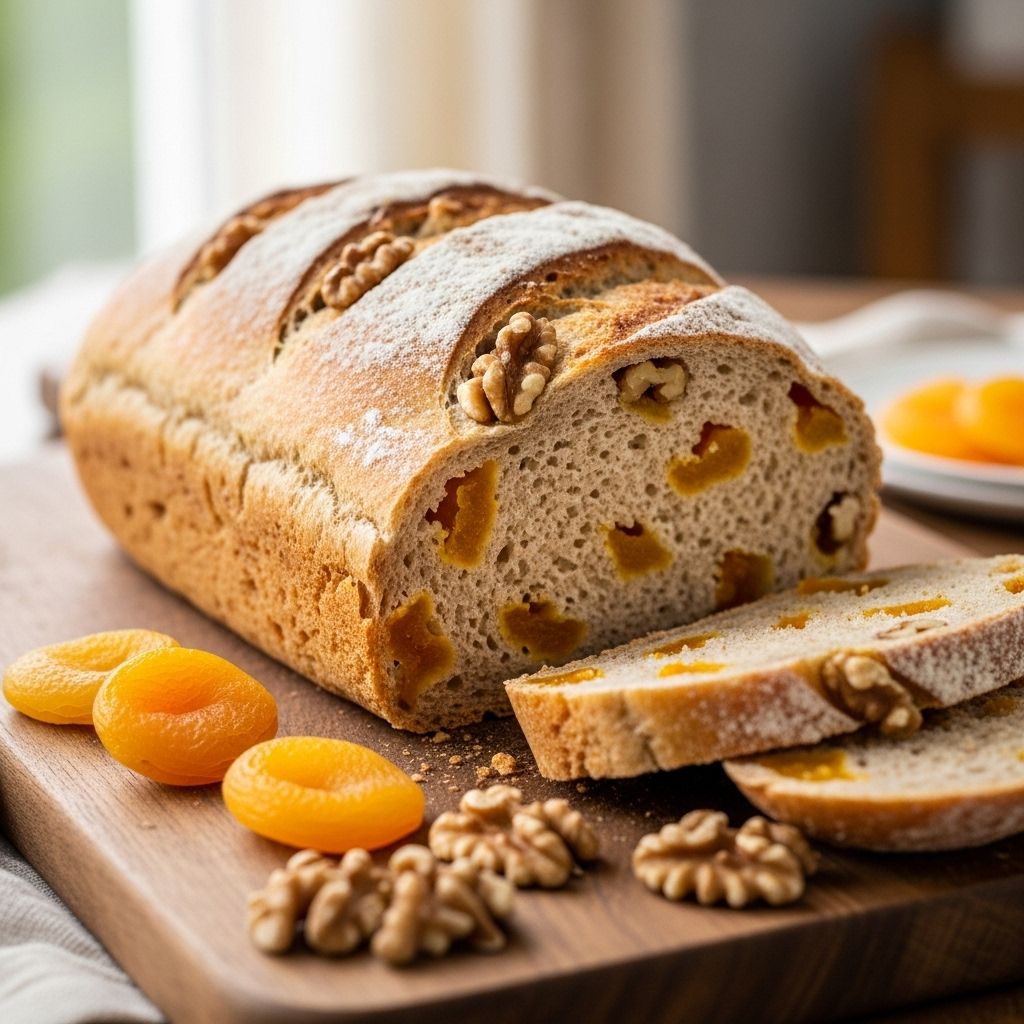
Apricot Walnut Whole Wheat Bread: Wholesome Baking for Every Kitchen
A nourishing loaf where sweet fruit bursts meet nutty crunch in each bite.

Baking bread at home is a deeply satisfying kitchen project, and making apricot walnut whole wheat bread brings together the hearty goodness of whole grains, the natural sweetness of dried fruit, and the rich, toasty crunch of walnuts. This recipe yields a fragrant, tender loaf ideal for breakfast, snacks, or light meals. Whether you’re new to baking or have years of practice, this loaf delivers on both flavor and technique—showcasing why wholesome breads deserve a permanent place in every baker’s repertoire.
Why Bake Apricot Walnut Whole Wheat Bread?
Homemade bread offers unrivaled freshness, and when you use whole wheat flour, you boost your daily intake of fiber, minerals, and robust flavors. Adding chopped dried apricots gives the loaf vibrant bursts of tart sweetness, while walnuts provide satisfying texture and a boost of healthy fats and protein.
- Flavor: A perfect blend of sweet, nutty, and earthy notes.
- Nutrition: Packed with whole grains, dried fruit, and nuts.
- Versatility: Delicious toasted with butter, spread with jam, or served alongside cheese.
- Celebration of Craft: Each step—from mixing to baking—invites you into a time-honored kitchen tradition.
Key Ingredients and Equipment
To achieve an exceptional whole wheat loaf studded with apricots and walnuts, focus on ingredient quality and proper handling of the dough.
Essential Ingredients
- Whole Wheat Flour: Opt for stone-ground for richer flavor and nutrition.
- Bread Flour: Provides gluten strength for a taller, lighter texture.
- Toasted Walnuts: Bring out natural oils and intensify flavor by roasting before chopping.
- Dried Apricots: Chop into small pieces for even distribution and balance of sweetness.
- Instant Yeast: Speeds the fermentation process and builds structure.
- Honey or Maple Syrup: Adds natural sweetness; optional for depth.
- Olive Oil or Neutral Vegetable Oil: Contributes tenderness and inhibits staling.
- Salt: Highlights flavors and improves gluten strength.
- Water: Hydrates the flour and activates yeast.
Recommended Equipment
- Mixing Bowls: Large and medium, for mixing and autolysing dough.
- Stand Mixer: Helpful for kneading, but not required—this dough can be mixed by hand.
- Bench Scraper: Useful for shaping and handling sticky dough.
- Loaf Pan: For shaping a classic sandwich-style loaf.
- Cooling Rack: For proper air circulation post-baking.
- Sharp Serrated Knife or Lame: For scoring the top before baking.
- Kitchen Scale: For measuring ingredients accurately, especially the flour.
Understanding the Baking Process
This recipe uses a straight dough method—a single mix, knead, first proof (fermentation), shaping, and second rise before baking. The addition of fruit and nuts presents specific challenges: they must be incorporated evenly without breaking down the dough structure, and timing is crucial to prevent them from absorbing too much moisture or interfering with gluten development.
Key Steps in the Process:
- Autolysis: Hydrating the flour with water before adding salt and yeast encourages gluten formation and a more extensible dough.
- Kneading: Develops gluten for a sturdy, chewy loaf. Whole wheat absorbs more water and requires a slightly longer knead for strength.
- Fermentation: The first rise allows flavor to develop and structure to form.
- Folding in Fruit & Nuts: Incorporate apricots and walnuts gently at the end of kneading or just before the first proof. This prevents smearing or crushing the ingredients.
- Shaping: A firm but gentle touch ensures uniform crumb and attractive appearance.
- Second Rise: Also called “proofing,” this step allows the loaf to reach optimal volume for baking.
- Baking: Steam in the oven (optional but recommended) yields the best crust. Bake until well-browned and aromatic.
Step-by-Step Recipe Instructions
Prepare Ingredients: Toast walnuts in a 350°F oven for 7–10 minutes. Chop dried apricots and cooled walnuts.
Mix Dough: In a large bowl, combine whole wheat flour, bread flour, and water. Stir until no dry spots remain. Cover and let stand for 20–30 minutes (autolyse).
Add Yeast and Salt: Sprinkle instant yeast and salt over the dough. Mix thoroughly with a stand mixer or by hand until dough forms a rough ball.
Incorporate Sweetener and Oil: Drizzle in honey or syrup and oil. Continue kneading for 4–6 minutes in a stand mixer or 8–10 minutes by hand until the dough is smooth and flexible. It should pass the “windowpane test.”
Add Fruit & Nuts: Gently knead in chopped apricots and walnuts by hand or on low mixer speed just until evenly distributed.
First Rise: Place dough in a lightly oiled bowl. Cover and let rise in a warm spot until doubled, about 75–90 minutes.
Shape the Loaf: Gently deflate dough and shape into a tight log. Transfer to a greased loaf pan.
Second Rise: Cover and let the shaped loaf rise until it just domes over the edge of the pan, 40–60 minutes.
Preheat Oven: Set oven to 425°F (218°C). Place a pan of water on the lower rack (for steam if desired).
Score and Bake: Use a sharp serrated knife to make a single slash down the center of the loaf. Bake for 15 minutes, then reduce heat to 375°F (190°C) and bake for 20–30 minutes more, until deeply golden and loaf sounds hollow when tapped.
Cool Completely: Let loaf cool on a wire rack for at least one hour before slicing. This helps set the crumb and prevents gumminess.
Tips for Success and Troubleshooting
- Weigh Your Ingredients: Whole grains and dried fruit can vary in density; precise measurement ensures consistent results.
- Don’t Overload with Add-Ins: Too many nuts or apricots can make the loaf crumbly or dense. Stick close to the recommended amounts the first time.
- Knead Gently with Fillings: Once fruit and nuts go in, switch to gentle folding rather than aggressive kneading to avoid tearing the dough.
- Monitor Hydration: Whole wheat absorbs more water, so add extra a tablespoon at a time if dough seems dry.
- Check for Doneness: Internal temperature of finished bread should reach 200–205°F (93–96°C).
- Let Cool Before Slicing: Slicing hot bread releases steam and can make the texture gummy—patience pays off.
Serving and Storage Suggestions
This bread is excellent freshly sliced with salted butter or a drizzle of honey. It’s also a great foundation for sandwiches with tangy cheeses or roasted turkey, and makes exceptional toast.
- Storage: Store cooled loaf, tightly wrapped, at room temperature for up to three days.
- Freezing: Slice and freeze in a well-sealed bag for up to one month. Toast directly from the freezer as needed.
- Pairings: Try with sharp cheddar, creamy brie, or Greek yogurt for a nourishing snack.
Ingredient Substitutions and Variations
This loaf is adaptable; here are some suggested swaps for an equally delicious result:
- No Walnuts? Substitute with pecans, hazelnuts, or sunflower seeds.
- No Apricots? Use dried cherries, cranberries, or golden raisins.
- Sweetener: Maple syrup or agave nectar can stand in for honey, or use brown sugar for a slightly deeper note.
- Add Spices: Sprinkle in a teaspoon of cinnamon or ginger for a warmly spiced version.
- Dairy-Free: The recipe is naturally dairy-free but be sure to select unrefined oils and check your ingredients as needed.
Nutrition Information (Approximate per Slice)
| Nutrient | Amount |
|---|---|
| Calories | 150 |
| Protein | 5g |
| Total Fat | 5g |
| Saturated Fat | 0.5g |
| Carbohydrates | 24g |
| Fiber | 3g |
| Sugars | 6g |
| Sodium | 210mg |
*Values are approximate and will vary based on brands and actual measurements used.
Frequently Asked Questions (FAQs)
Q: Can I make this bread 100% whole wheat?
A: Yes, but be aware the loaf may be denser and require slightly more water. Extra kneading helps develop enough gluten for structure.
Q: How do I keep dried fruit from burning on top?
A: Press any exposed pieces gently into the dough before baking, or tent the loaf with foil if they begin to darken too quickly.
Q: Is it possible to mix this bread by hand?
A: Absolutely. Whole wheat doughs require a bit more elbow grease, but a sturdy spoon and your hands are all you need.
Q: Can I make this bread ahead of time?
A: Yes! The baked loaf freezes beautifully for up to a month. Alternatively, after the first rise, you can refrigerate the dough overnight for better flavor development; shape, proof, and bake the next day.
Q: What’s the best way to toast walnuts for baking?
A: Spread walnut pieces in a single layer on a baking sheet and toast at 350°F for 7–10 minutes, stirring once. Let them cool completely before adding to dough.
Conclusion
Making apricot walnut whole wheat bread turns humble ingredients into a showstopping, fragrant loaf that’s nourishing and satisfying. With a few simple tips, careful attention to dough structure, and a spirit of home-baked adventure, you’ll enjoy a bread that is as rewarding to bake as it is to eat. Experiment with different fruits, nuts, and spices to put your personal spin on this classic bake.
Read full bio of Sneha Tete


