How to Make the Ultimate Sunny-Side-Up Eggs Breakfast Pizza Recipe
Elevate your mornings with this flavorful, easy-to-follow sunny-side-up eggs breakfast pizza recipe perfect for any time of day.

How to Make the Ultimate Sunny-Side-Up Eggs Pizza
If you love the idea of starting your day with a combination of eggs, cheese, and a crisp crust, a sunny-side-up eggs breakfast pizza is the perfect solution. This crave-worthy recipe brings together satisfying morning favorites and classic pizza flavors—a delightful meal for breakfast, brunch, or even dinner. Here, you’ll find everything you need: from ingredient prep to expert tips and tasty variations that will make this pizza a true standout in your kitchen lineup.
Why You’ll Love Sunny-Side-Up Eggs Pizza
- Versatile Meal: Ideal for breakfast, brunch, or late-night dinners.
- Customizable: Easily adapted with your favorite veggies, meats, or cheeses.
- High in Protein: Eggs and cheese deliver a protein-packed dish to keep you energized.
- Easy & Quick: Ready in under 30 minutes with minimal prep.
- Instagram-Worthy Presentation: The golden yolks atop bubbling cheese make for a showstopper look on any table.
Ingredients: What You’ll Need
- 1 ball fresh pizza dough (store-bought or homemade)
- 1 tbsp extra-virgin olive oil
- 3-4 large eggs (room temperature recommended)
- 1 cup shredded mozzarella cheese
- 1/2 cup shredded sharp cheddar cheese
- 1/4 cup cooked smoked ham or bacon, cut into strips (optional for added flavor)
- 1/2 cup sliced mushrooms
- 1/4 cup diced red bell pepper
- 1/4 cup sliced green onion or chives
- Kosher salt & ground black pepper
- Pinch of pink salt (optional, for top of the egg)
- 2 tbsp fresh basil or parsley, chopped (for garnish)
- 2-3 cloves garlic, minced
- Cornmeal or parchment paper (for dusting the baking sheet)
Step-by-Step Instructions
- Preheat & Prep:
Set your oven to 450°F (232°C). If using store-bought dough, allow it to rest at room temperature for 20 minutes—this makes it easier to stretch and results in a crispier crust.
Line a large cookie sheet or pizza pan with parchment paper or dust with cornmeal for a crisp base. - Shape the Dough:
Stretch or roll out the pizza dough into an 11-12-inch round. Place onto the prepared pan. If needed, rim the dough slightly at the edges to contain toppings. - Flavor the Base:
Brush with olive oil and sprinkle minced garlic over the dough.
Season lightly with kosher salt. - Add Cheese & Toppings:
Sprinkle mozzarella and cheddar evenly. Distribute the ham/bacon, mushrooms, red pepper, and green onion (reserving a bit for final garnish). - Par-Bake:
Bake for 6-8 minutes until the cheese starts to bubble but hasn’t browned, and the crust begins to firm. - Add Eggs:
Carefully crack eggs into small bowls, then pour each egg gently onto the pizza, spacing them out. For a classic look, create small wells in the cheese with the back of a spoon before adding eggs. Season eggs with salt and fresh pepper. - Finish Baking:
Return pizza to oven. Bake for an additional 7-10 minutes, watching closely. The whites should be set but yolks runny and golden. If you like yolks slightly more set, add 1-2 minutes more. - Garnish & Serve:
Remove pizza from oven. Sprinkle fresh herbs on top. Slice, serve, and enjoy while the yolks are still runny!
Expert Tips for Perfect Results
- Room-Temperature Eggs: This helps the eggs cook quickly without overbaking the crust.
- Create Wells for Eggs: Prevents the egg whites from spreading too thin and makes a visually attractive pizza.
- Don’t Overload with Toppings: Less is more—this prevents soggy crust and ensures even cooking.
- Use Pre-Cooked Meats: Raw bacon or ham releases moisture; cook them first to avoid a watery pizza.
- Check Frequently: Egg doneness can vary; keep an eye after adding eggs to avoid overcooking the yolks.
Recommended Tools
- Large cookie sheet or round pizza pan
- Parchment paper or cornmeal (for crisp bottoms)
- Rolling pin (optional, for easier dough stretching)
- Pastry brush (for oiling the dough)
Nutrition Snapshot
| Nutrient (Per Serving) | Estimated Value |
|---|---|
| Calories | 330-360 |
| Protein | 18-22 g |
| Carbohydrates | 28-32 g |
| Total Fat | 14-17 g |
| Sodium | 700-800 mg |
Nutrition will vary based on the dough and exact toppings used.
Easy Variations & Swaps
- Veggie Lovers: Add spinach, sautéed kale, cherry tomatoes, or artichokes.
- Southwest-Style: Swap cheddar for pepper jack, sprinkle on black beans and sliced jalapeños, and serve with salsa.
- Greek-Inspired: Use crumbled feta, olives, roasted red pepper, and a sprinkle of oregano.
- Crust Options: For a gluten-free version, try cauliflower pizza crust or use whole-wheat pita as the base.
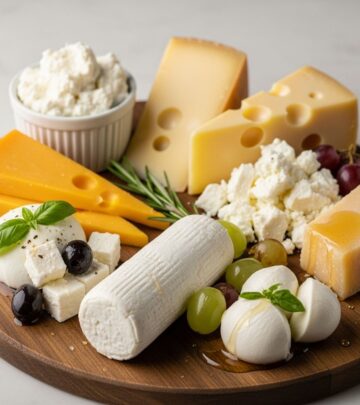
- Cheese Choices: Substitute smoked mozzarella, provolone, or even goat cheese for varied flavors.
- Meat-Free: Omit ham or bacon; add extra colorful veggies for a vegetarian option.
Make-Ahead and Freezing Tips
- Make-Ahead Dough: Prepare pizza dough up to 3 days in advance and store in the fridge, or freeze for up to 1 month.
- Prep Toppings Early: Chop all veggies & cook meats 1-2 days ahead for quick assembly.
- Reheating: Pizza is best fresh, but leftovers can be reheated in a skillet over medium-low heat until warm—this helps keep the crust crispy and the yolk luscious.
- Freezing: You can freeze a par-baked pizza (before eggs are added) for up to 2 months. To finish, thaw, add eggs, and bake as directed.
Serving Ideas & Pairings
- Classic Brunch: Pair with a green salad or mixed fruit for a balanced meal.
- Quick Dinner: Serve alongside roasted vegetables or a grain salad.
- Crowd Pleaser: Cut pizza into small wedges and serve as an appetizer at brunch gatherings.
- Personal Pizzas: Divide dough into smaller rounds so each guest can choose their toppings and egg styling.
Seasonal Twist: Spring Herb Infusion
For a vibrant upgrade, blend fresh basil, parsley, or cilantro with olive oil, garlic, salt, and black pepper to make a quick herb sauce. Drizzle over pizza after baking for a fresh, aromatic finish. This bright, fragrant condiment pairs beautifully with runny egg yolks and bubbling cheese.
Frequently Asked Questions (FAQs)
Q: Can I use a store-bought pizza crust for this recipe?
A: Yes, store-bought pizza dough or pre-baked crusts work great for convenience, just adjust baking time as needed for pre-baked options.
Q: How do I keep the egg yolks from overcooking?
A: Add the eggs partway through baking, and watch closely during the last few minutes. Remove promptly once whites are set and yolks are still glossy.
Q: Is it safe to eat runny yolks?
A: Yes, provided you use fresh, high-quality eggs and bake until the whites are fully set. If you prefer, you can cook longer for firm yolks.
Q: Can I make this recipe vegetarian or dairy-free?
A: Absolutely. Use vegetables instead of meats, and select dairy-free cheese alternatives for a suitable version.
Q: What’s the best way to store leftovers?
A: Allow pizza to cool, then store in an airtight container in the refrigerator for up to 2 days. For best texture, reheat slices in a skillet or toaster oven rather than a microwave.
Troubleshooting & Pro Tips
- Eggs Slide Off? Create shallow wells in the cheese so each egg stays in place.
- Soggy Crust? Pre-bake the dough briefly before adding toppings, and do not overload with vegetables that release moisture.
- Crust Burning? Reduce oven temperature slightly and use the middle rack to prevent over-browning.
- Eggs Undercooked? Turn on broiler for the last minute (watch carefully!) for extra heat on top without drying out the pizza.
Ingredient Substitution Table
| Ingredient | Substitute Ideas |
|---|---|
| Pizza Dough | Whole-wheat, gluten-free or premade crusts, naan, pitas |
| Mozzarella Cheese | Provolone, gouda, smoked mozzarella, plant-based cheese |
| Bacon/Ham | Vegetarian bacon, cooked sausage, or omit altogether |
| Fresh Herbs | Oregano, thyme, arugula, chives |
Final Thoughts
This sunny-side-up eggs breakfast pizza offers the best of both worlds: the classic comfort of pizza with the sunny, hearty flavor of a brunch favorite. Whether you’re looking for a new weekend tradition or a quick crowd-pleaser, this recipe provides endless customizations to inspire every home cook. Don’t be afraid to get creative—mix and match your favorite add-ins for a pie that’s uniquely yours, and enjoy every yolky, cheesy bite.
References
- https://notentirelyaverage.com/breakfast-pizza-recipe/
- https://www.youtube.com/watch?v=wFnBNGtovfs
- https://www.goodnes.com/recipes/sunny-side-pizza/
- http://www.grouprecipes.com/134366/sunny-side-up-pizza.html
- https://www.prevention.com/weight-loss/diets/a20454413/breakfast-pizza-recipe-from-the-south-beach-diet/
- https://cheftini.com/sunny-side-up-breakfast-pizza/
- https://msmarket.coop/recipe/sunny-side-up-breakfast-pizza/
Similar Articles


Read full bio of Sneha Tete


