How to Season Cast Iron: A Complete Guide for Lifelong Cookware
Master the essential art of seasoning your cast iron cookware for a non-stick, rust-resistant, and flavorful cooking experience.

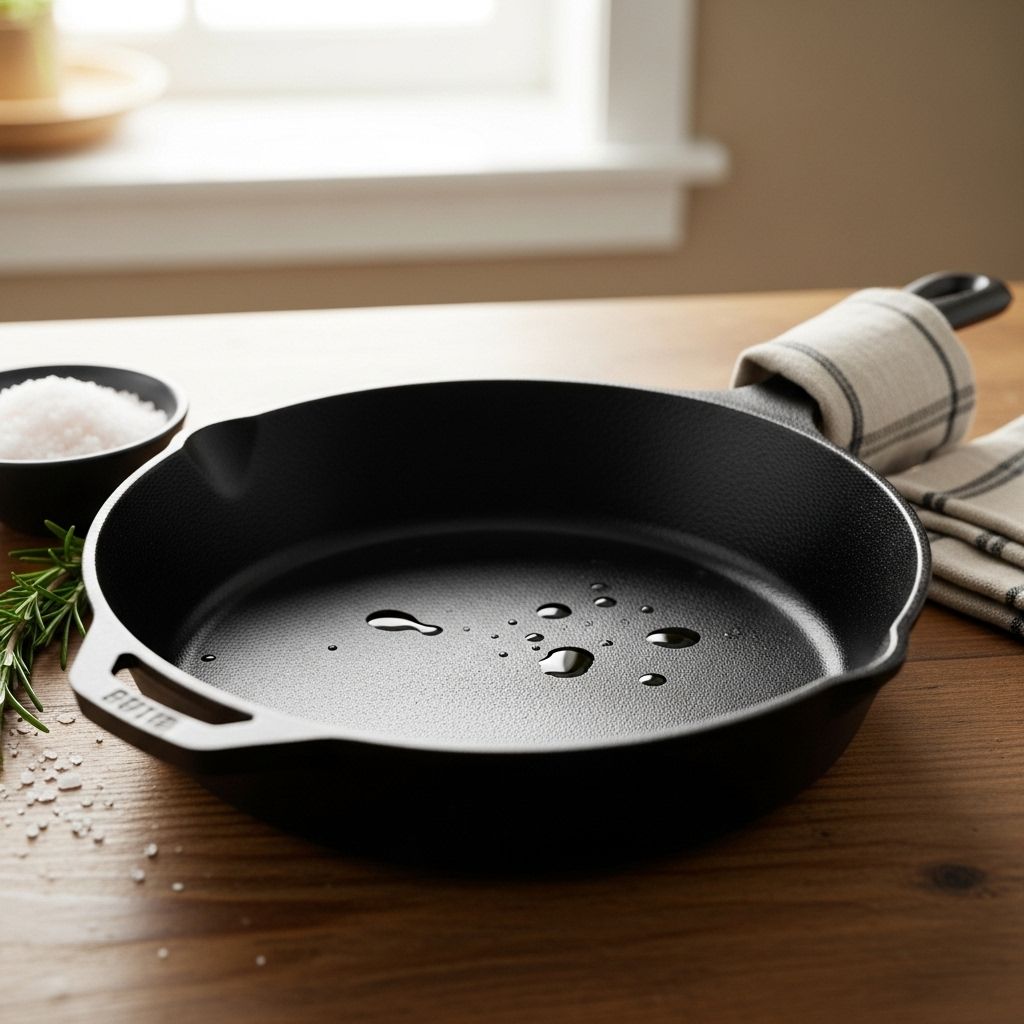
Cast iron cookware holds legendary status in kitchens all over the world. Its unbeatable heat retention and cooking performance have allowed skillets, pans, and Dutch ovens to be passed down through generations. However, this unique cookware requires special care—namely, seasoning. Whether you’ve just bought your first cast iron skillet or you’re looking to revive a family heirloom, mastering the seasoning process is essential for a smooth, non-stick, and rust-proof surface.
What Does Seasoning Cast Iron Mean?
Despite the familiar-sounding name, seasoning in the context of cast iron is not about spices or herbs. It’s a vital maintenance step that involves heating oil or fat on the cookware to a high temperature, causing a chemical reaction called polymerization. During polymerization, the fat dries and forms a hard, protective layer that gives cast iron its signature shiny, black, non-stick surface that resists rust and improves with use.
- Polymerization: The oil or fat is heated and bonds to the metal, forming a hard, slick coating.
- Non-Stick Surface: Proper seasoning makes cast iron perform almost like a non-stick skillet, without synthetic coatings.
- Rust Prevention: The seasoning layer provides a barrier, so water and air can’t reach the iron and cause rust.
Why Seasoning Is Essential for Cast Iron
Seasoning might sound like a simple process, but it’s the difference between a rusty, sticky skillet and one that effortlessly cooks eggs and pancakes. Here are the five biggest reasons you must keep your cast iron seasoned:
- Rust-Prevention: Seasoning seals out moisture and oxygen, preventing rust formation that can ruin pans.
- Smooth, Non-Stick Cooking Surface: A well-seasoned cast iron allows for easy food release and cleaning.
- Flavor Protection: Properly seasoned surfaces don’t leach metallic flavors into delicate dishes.
- Easier Cleaning: Less stuck-on food means less scrubbing and easier cleanup after meals.
- Generational Longevity: Routine seasoning enables cast iron cookware to last, and even improve, for decades.
What You Need to Season Cast Iron
Before you start, gather these straightforward tools and materials:
- Dish soap (for initial cleaning before you season)
- Non-abrasive sponge or brush
- Clean cloths or paper towels
- High smoke-point oil or shortening (suggestions below)
- Aluminum foil or sheet pan (to catch oil drips if baking)
- An oven fitted with racks
Best Oils for Seasoning Cast Iron
The type of oil you choose is important for the seasoning’s durability. You want an oil or fat that:
- Is refined (to avoid burning or stickiness)
- Has a high smoke point (usually above 375°F/190°C)
- Is easily accessible and affordable
| Type of Oil/Fat | Smoke Point (°F) | Pros | Cons |
|---|---|---|---|
| Canola Oil | 425 | High smoke point, neutral flavor, affordable | None significant |
| Safflower Oil (High-Oleic) | 510 | Very high smoke point, durable finish | Can be hard to find |
| Vegetable Oil | 400-450 | Common, neutral, solid finish | Can be sticky if over-applied |
| Shortening (e.g., Crisco) | 360 | Traditional, easy to spread | Lower smoke point |
| Lard | 370 | Traditional, imparts some flavor | Can go rancid if not used often |
| Flaxseed Oil | 225 | Dries hard, thin layers make a fine initial base | Low smoke point, expensive |
| Olive Oil | 350 | Tasteful for flavor, accessible | Low smoke point, not ideal for high-heat seasoning |
In general, canola oil or high-oleic safflower oil are excellent choices for most situations, but use what you have available as long as it isn’t prone to burning or going rancid quickly.
Step-by-Step: How to Season Cast Iron the Right Way
Follow these detailed instructions to transform your skillet into a slick, rust-resistant pan ready for years of happy cooking.
- Preheat your oven: Set your oven between 350°F and 450°F, depending on the oil’s smoke point. Let it come to full temperature before you start baking the pan.
- Wash the skillet: For initial seasoning, it’s fine to use warm, soapy water with a non-abrasive sponge to remove any manufacturing residue or rust. Rinse well.
Note: For routine cleaning after seasoning, avoid soap and use only hot water. - Dry thoroughly: Dry the pan right away with paper towels or a clean cloth. Any lingering moisture can lead to rust. For full dryness, heat the skillet briefly over a stove burner to evaporate leftover water.
- Apply a thin layer of oil or shortening: Pour a teaspoon of your chosen oil onto the pan. Using a folded paper towel, rub it across every part—inside, outside, handle, and under the base.
Tip: After the initial coating, wipe away any excess oil so the surface looks shiny but not greasy—too much oil causes a sticky film. - Bake the skillet upside down: Place a sheet of aluminum foil or a sheet pan on the lowest rack to catch drips. Put the oiled skillet upside down on the middle oven rack. This prevents oil from pooling inside the pan and ensures an even coating.
- Bake for one hour: Let the cookware bake, undisturbed, for about an hour. This allows the oil to fully polymerize and bond to the iron.
- Cool gradually: Turn off the oven when baking is done, but leave the skillet inside to cool down with the oven. This prevents thermal shock and helps the seasoning set.
- Repeat if necessary: New pans or those recovering from rust may need two to three rounds of seasoning for a truly smooth, glassy surface. Season, cook a meal, clean, then repeat the seasoning steps for best results.
Essential Tips and Troubleshooting for Perfect Cast Iron Seasoning
Even seasoned cooks can run into problems with their cast iron. Here’s how to get the best results:
- Thin layers only: Too much oil makes pans sticky or uneven. Buff well so the pan looks barely wet before baking.
- Always dry thoroughly: Moisture = rust. Heat the pan on the stovetop before oiling to ensure it’s bone dry.
- Catch drips: Always use a foil or sheet pan below in your oven to prevent messes from falling oil.
- Baking temperature: Use a temp suited to your oil’s smoke point. Most oils work at 350–450°F.
- Repeat process: Especially for old, rusty, or raw cast iron, multiple rounds create the smoothest surface.
How to Fix Common Seasoning Problems
- Sticky Finish: Caused by excess oil or too short baking time. Scrub off gunk and start with a thinner layer next time.
- Rust Spots: Means water wasn’t fully dried or seasoning is incomplete. Scrub rust, dry fully, and re-season.
- Flaking/Peeling: Often from too thick oil or not baking long enough; strip off flakes, clean thoroughly, and season again in thin layers.
Routine Cast Iron Maintenance After Seasoning
The beauty of cast iron is that it gets better the more you use and care for it. Here’s how to keep your surface smooth, non-stick, and rust-free:
- Clean right after use: Wipe out food debris with a spatula. For stuck-on bits, scrub gently with salt and a damp cloth or soft brush—never use steel wool unless you’re removing old seasoning.
- Skip the soap and dishwasher: Soap can degrade seasoning; always hand-wash without harsh detergents.
- Dry thoroughly each time: Heat over a burner or towel dry to avoid lingering moisture.
- Treat with a light oil: After cleaning and drying, rub a drop of oil on the inside to maintain seasoning and keep the skillet glossy.
Restoring and Re-Seasoning Older or Rusted Cast Iron
If your pan is rusty or the surface is patchy, don’t despair! Cast iron is almost always salvageable:
- Remove rust: Scrub with steel wool or a scouring pad and warm water until all rust is gone. Dry thoroughly.
- Strip old, flaking seasoning: Use a lye bath or oven self-clean cycle for pans requiring a total reset. Always use caution and proper ventilation.
- Wash with soap: It’s okay to use dish soap once before re-seasoning; rinse and dry well before oiling.
- Reseason full process: Follow the complete step-by-step method above, repeating thin oil applications and baking until a solid, glossy surface forms.
Frequently Asked Questions About Cast Iron Seasoning
Q: How do I know if my cast iron needs seasoning?
A: If food starts to stick, you see dull spots, rust, or metallic flavors, it’s time to re-season.
Q: Can I use butter or coconut oil to season cast iron?
A: Technically yes, but these fats have lower smoke points and can go rancid quickly. Stick with unsaturated oils with high smoke points for best results.
Q: Is it necessary to season pre-seasoned cast iron?
A: Yes, even pre-seasoned pans benefit from additional seasoning before first use and as you cook—they arrive with a thin protective layer but can be improved.
Q: Can I season cast iron on the stovetop?
A: Stove seasoning works in a pinch, but oven seasoning provides a more even coat, especially on the pan’s underside and handle.
Q: What if my cast iron gets rusty?
A: Scrub off rust with steel wool, dry thoroughly, and repeat the seasoning process. Minor rust is rarely fatal to cast iron.
Why Properly Seasoned Cast Iron Is Worth the Effort
A lovingly seasoned cast iron skillet delivers unmatched flavor, enduring performance, and so much versatility—from stovetop to oven, and even open flame. Better yet, it’s a sustainable alternative to synthetic non-stick cookware. Treat your cast iron right, and it will be at the heart of your kitchen for years to come.
Quick Recap: Key Cast Iron Seasoning Takeaways
- Seasoning is the polymerization of oil for rust-resistance and non-stick cooking
- Use a thin, even layer of high smoke-point oil
- Bake upside down, ideally at 350–450°F for an hour, and cool in the oven
- Repeat for new or heavily used pans to build layers of protection
- Maintain by cleaning gently, drying thoroughly, and reapplying a touch of oil
- Almost any cast iron can be rescued with proper re-seasoning
With a little care and knowledge, your cast iron pan will only get better with time—so season it today, and keep on cooking!
References
- https://www.prevention.com/food-nutrition/a34717079/how-to-season-cast-iron/
- https://grow.ifa.coop/outdoor-cooking/seasoning-cast-iron
- https://girlcarnivore.com/how-to-season-cast-iron/
- https://www.prevention.com/food-nutrition/a20486754/what-not-to-cook-with-cast-iron/
- https://www.prevention.com
- https://blog.mountainroseherbs.com/how-to-season-cast-iron-cast-iron-conditioner-recipe
- https://www.instructables.com/Iron-Skillet-Seasoning-Modification/
Read full bio of Sneha Tete


