Common Apple Pie Mistakes and How to Avoid Them
Master the art of apple pie with pro tips for every step, from choosing apples to achieving the perfect golden crust.
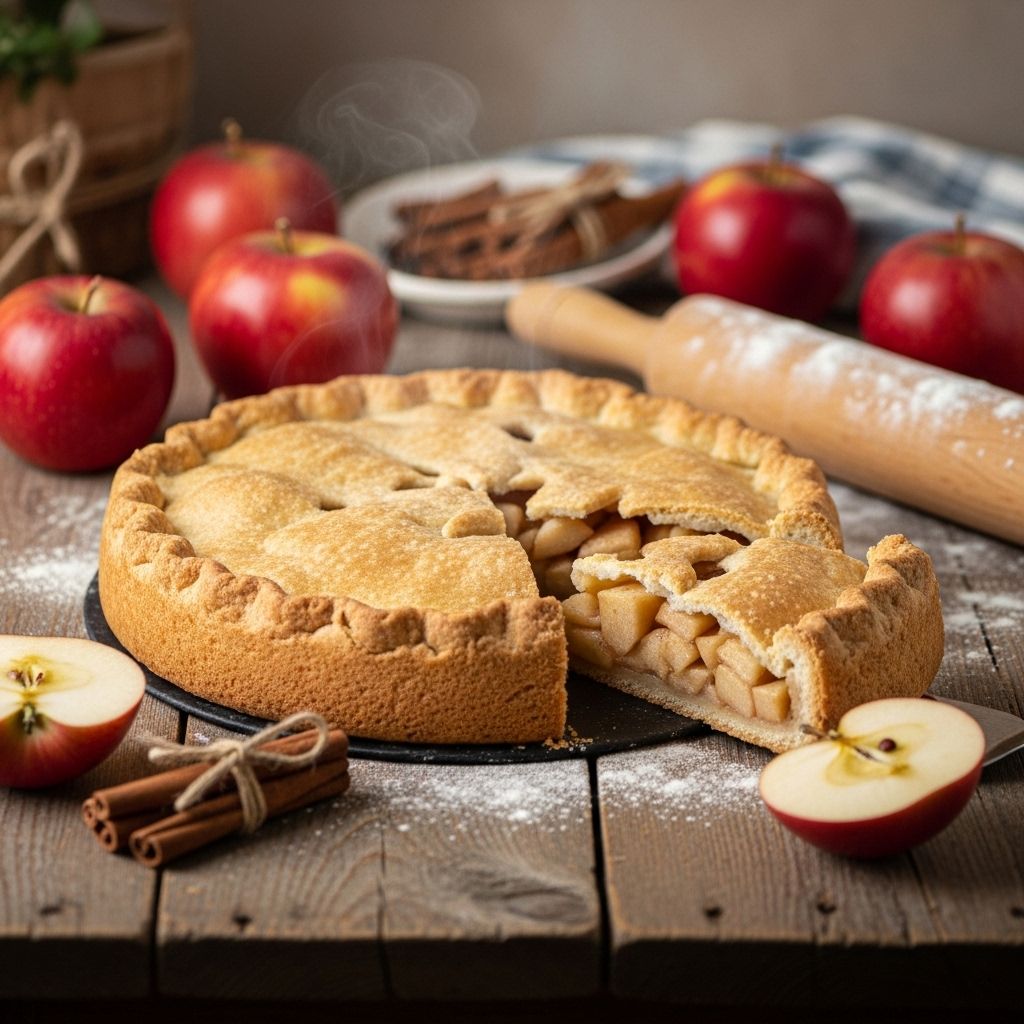
There’s nothing more comforting than the aroma of a freshly baked apple pie wafting from the oven. Yet for many home bakers, the promise of a golden, flaky pastry encasing tender, flavorful apples often ends in disappointment. Whether it’s a soggy bottom, mushy filling, or a gaping void beneath the top crust, apple pie can be tricky to master. Fortunately, with a bit of insider knowledge and some practical techniques, you can sidestep the most frequent apple pie mistakes and deliver a dessert that’s as impressive as it is delicious.
Contents
- Choosing the Wrong Apples
- Unevenly Slicing Apples
- Incorrect Amount of Filling
- Skipping the Thickener
- Forgetting to Vent the Top Crust
- Not Pre-Cooking the Filling
- Using Warm or Soft Butter
- Skipping the Chill Step
- Overworking the Dough
- Baking on the Wrong Oven Rack
- Eating the Pie Too Soon
- Frequently Asked Questions
1. Choosing the Wrong Apples
The foundation of any great apple pie is the apples themselves. Not every variety is suitable for baking. Some apples break down into a mushy paste, while others retain their shape and offer a pleasant balance of sweetness and tartness.
Best apples for pie:
- Granny Smith: Crisp, tart, holds shape beautifully.
- Honeycrisp: Juicy, sweet-tart, excellent structure.
- Braeburn: Firm, balanced flavor, resists turning to mush.
- Jonathan, Jonagold, Cortland: Also good choices when mixed with firmer varieties.
Pro Tip: For depth of flavor and a more interesting texture, use a mix of two or more apple varieties in your pie. Avoid softer apples like Red Delicious, Fuji, or McIntosh as your primary choice, as they can make the filling mushy and formless after baking.
2. Unevenly Slicing Apples
Uniform apple slices bake evenly and yield the most satisfying texture. When apples are cut unevenly, some pieces will become too soft while others remain undercooked and crunchy—resulting in a pie with an inconsistent filling.
To achieve consistent slices:
- Use a very sharp knife or a mandoline slicer for even thickness.
- Aim for slices about ¼ inch thick—not too thin, not too chunky.
- Be cautious using a mandoline—always use the protective guard and keep it away from young helpers.
3. Incorrect Amount of Filling
If you overload your pie with apples, the crust can burst or bake unevenly. Too little filling, and you’ll be left with a disappointing hollow under the crust.
- Most 9-inch pies require about 6 to 8 cups of sliced apples (roughly 2 to 2.5 pounds after peeling and coring).
- When in doubt, measure by cups or weight rather than the number of individual apples, as apple sizes vary.
- Fill your crust slightly higher than the edge, as apples will shrink during baking.
4. Skipping the Thickener
Without a proper thickener, your pie filling risks becoming a soupy, runny mess that can also make your crust soggy. Apples release a lot of juice when baked, so adding a thickening agent is crucial.
Common thickeners:
- Cornstarch: Consistently reliable and doesn’t impart flavor.
- Tapioca starch: Works well for a clearer filling.
- All-purpose flour: Traditional but can slightly cloud the filling.
- Instant tapioca: Good for very juicy apples, but must be finely ground.
Tip: Thoroughly toss the apple slices with sugar and the chosen thickener before adding to the crust. This ensures even distribution and optimal set once baked.
5. Forgetting to Vent the Top Crust
Failing to cut air vents in the top crust is a classic beginner mistake. As apples cook, they release steam. Without somewhere to escape, this steam creates a gap under the crust—or worse, causes the filling to leak out the edge or make the crust soggy.
- Always cut 4 to 5 slits, each 2 inches apart, in the top pastry before baking.
- Get creative: use a fork, sharp knife, or decorative small cookie cutters for fun air vents.
- Lattice crusts naturally vent well and look beautiful.
Good venting prevents both “pie gap” and weepy, steamed crusts.
6. Not Pre-Cooking the Filling
Baking a pie with raw apples is traditional, but expect more significant shrinkage and a higher chance of a large air pocket forming beneath the top crust (the dreaded “pie gap”).
- Pre-cooking the filling shrinks apples in advance, reducing voids under the crust.
- It ensures a more even texture and prevents the apples from releasing too much juice during baking.
- Caramelizing the apples first with sugar, cinnamon, and lemon not only enhances flavor but also offers better control over the sweetness and spicing of the finished pie.
If you prefer to bake with raw apples, just be sure to mound the filling and vent the crust very well. For a professional touch, sauté apples with butter, sugar, and spices just until they start to soften, then cool before assembling your pie.
7. Using Warm or Soft Butter in the Crust
Butter temperature dramatically affects your pie’s texture. For a flaky, tender crust, butter must be cold.
- Warm or soft butter melts into the flour and yields a tough, dense crust.
- Cut cold butter into cubes and refrigerate it until needed.
- Work quickly when making the dough, using a pastry blender, fork, or your fingertips to disperse butter into pea-sized bits within the flour.
- Chill all crust ingredients and even your mixing bowl prior to starting in warm kitchens.
Bonus tip: Chilling the assembled crust in the refrigerator for at least 30 minutes before rolling or baking helps lock in that desired flakiness.
8. Skipping the Chill Step
Many bakers rush from preparing the dough to rolling it out and baking, but chilling is critical.
- Resting the dough in the refrigerator for at least 30 minutes relaxes the gluten, making it easier to roll.
- Chilled pastry bakes up crisper and less prone to shrinking in the oven.
Once the pie is fully assembled, chill it again for an additional 15 to 30 minutes. Cold dough prevents the butter from melting prematurely, creating pockets of steam that produce that sought-after flakiness in the crust.
9. Overworking the Dough
A light hand makes the best pies. Over-mixing or over-handling the dough results in too much gluten development, yielding a crust that is tough rather than tender.
- Mix just until the dough holds together. It’s okay if you see small pockets of butter or notice streaks of flour.
- Resist the urge to knead or “fix” imperfections—rustic-looking, irregular dough often bakes up best.
- Roll between two sheets of parchment paper if needed to prevent sticking and reduce added flour.
10. Baking on the Wrong Oven Rack
The position of your pie in the oven matters a lot. Baking apple pie on the top rack can result in a pale, soggy bottom crust, while the edges over-brown.
- Always bake pies on the lower oven rack. This allows heat to reach the bottom crust for optimal browning and crispness.
- Consider a preheated pizza stone or heavy baking sheet underneath your pie plate to encourage even more heat transfer.
- Check your pie during baking; if the top is browning too quickly, loosely tent with foil to prevent burning while the bottom continues to crisp.
Bonus: More Pro Tips for a Perfect Pie
- Brush the top crust with an egg wash (1 egg beaten with 1 tbsp water or milk) for a shiny, golden finish.
- Sprinkle coarse sugar over the egg wash before baking for beautiful sparkle and a satisfying crunch.
- Use a metal or cast iron pie plate for superior heat conduction and a crisper crust (avoid glass if possible).
- If you’re worried about excess juices, dust the bottom crust with a teaspoon of cornstarch or breadcrumbs before adding filling to absorb moisture.
- Let your pie cool for at least 3 hours before slicing—this allows the filling to set and prevents a runny mess.
11. Eating the Pie Too Soon
It’s hard to resist a warm pie fresh out of the oven. However, slicing too soon lets the hot filling run everywhere and prevents the flavors from settling. Let the pie cool completely—ideally 3 to 4 hours—before serving. For best slicing and presentation, serve at room temperature or lightly warmed.
Apple Pie Troubleshooting Table
| Mistake | Result | How to Fix or Prevent |
|---|---|---|
| Wrong apple type | Mushy or tasteless filling | Use firm, tart apples like Granny Smith or Honeycrisp, or a mix |
| Uneven slices | Irregular texture: some soft, some hard apples | Slice apples uniformly with a mandoline or sharp knife |
| Incorrect filling amount | Hollow domes or overflowed juices | Use about 6–8 cups of sliced apples; slightly mound the filling |
| No thickener | Runny, liquidy filling | Add cornstarch, flour, or tapioca to the fruit |
| No venting | “Pie gap” or soggy crust | Cut 4–5 vents in top crust or use lattice |
| Skipping pre-cook (optional) | Large air pocket under crust | Pre-cook apples briefly to reduce shrinkage |
| Warm butter in dough | Tough, greasy crust | Use cold butter and refrigerate the dough |
| No chilling after shaping | Shrunken, misshapen crust | Chill dough before and after shaping |
| Overworking dough | Dense, chewy pastry | Mix and roll just enough to combine; dough should remain a bit streaky |
| Wrong oven rack | Soggy bottom or burnt edges | Bake on the lower oven rack with a preheated stone or sheet |
| Cutting too soon | Messy, runny slices | Allow pie to cool 3–4 hours before slicing |
Frequently Asked Questions (FAQs)
Q: What apples should I avoid for pie?
A: Avoid soft-fleshed apples like Red Delicious and McIntosh as they break down quickly during baking and make the filling mushy.
Q: How do I prevent a soggy bottom crust?
A: Use a thickener in the filling, bake on the lower oven rack (with a pizza stone or sheet underneath), and consider dusting the bottom with a bit of cornstarch or breadcrumbs before adding fruit.
Q: Why did my pie develop a large gap under the crust?
A: This often happens when apples shrink during baking. Try pre-cooking apples to reduce volume loss and be sure to cut vents in the top crust for steam to escape.
Q: Do I need to use egg wash on my pie?
A: An egg wash isn’t required, but it gives your pie a beautiful golden shine. Brush the top with lightly beaten egg and sprinkle with sugar for best results.
Q: How long should my pie cool before cutting?
A: Let it cool at least 3 hours to allow filling to set and avoid a runny mess. Warm slices are fine, but piping-hot pies won’t hold their shape.
References
Read full bio of medha deb

