How to Successfully Transplant Tree Seedlings: A Step-by-Step Guide
Learn essential steps, tips, and techniques to transplant tree seedlings for healthy, long-term growth and thriving landscapes.

nn
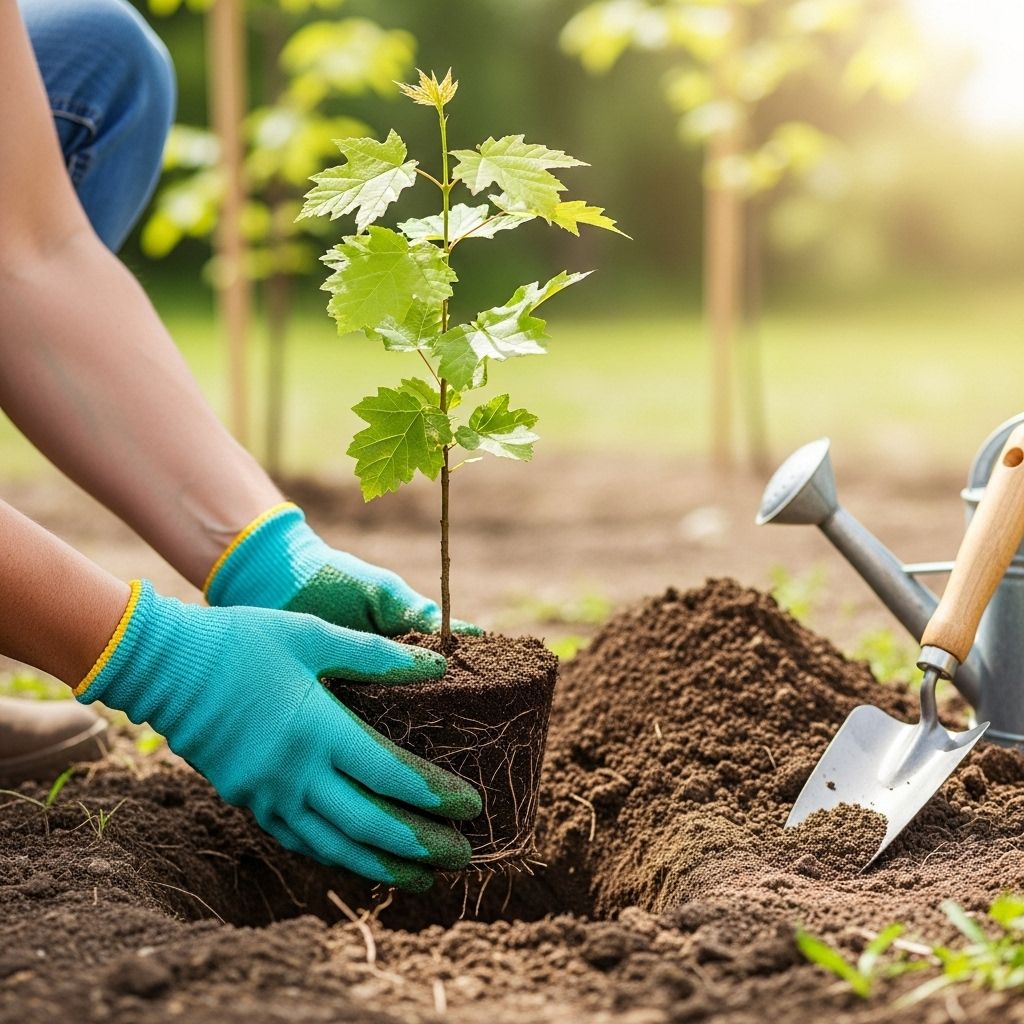
Transplanting tree seedlings is a crucial gardening skill that can have a long-term impact on the success and vitality of your trees. Whether you’re moving wild saplings, nursery-grown seedlings, or home-propagated trees, the process requires thoughtful timing, careful preparation, and attentive aftercare. This comprehensive guide covers every step you need to ensure your transplanted seedlings thrive, from choosing the right moment and site to aftercare strategies for healthy establishment.
nn
Why Transplant Tree Seedlings?
n
Tree seedlings are often started in nurseries, pots, or overcrowded patches with the intention of being relocated to their permanent spots for optimal growth. Transplanting allows you to:
n
- n
- Give each tree the space and resources it will require to mature.
- Promote straight, healthy root and trunk development without competition.
- Enhance landscape planning and ecosystem restoration projects.
- Save wild seedlings from construction or adverse locations.
n
n
n
n
nn
When to Transplant Seedlings
n
Timing is one of the most important factors for transplant success. Optimal periods are:
n
- n
- Early Spring: Just as the ground thaws but before trees have leafed out. Seedlings are still dormant and can focus energy on root recovery.
- Late Fall: After leaves have fallen, the tree is going dormant, reducing stress as root systems settle in before winter.
n
n
n
Avoid transplanting during hot weather or in the midst of active growth, as this raises the risk of transplant shock and desiccation.
nn
Choosing the Right Site
n
Successful transplantation starts with selecting an appropriate and strategic site:
n
- n
- Evaluate the sunlight requirements of the tree species (full sun, partial shade, etc.).
- Assess soil drainage—well-draining soils prevent waterlogging and root rot.
- Ensure the space allows for the mature canopy and root spread.
- Check for shelter from wind and avoid frost pockets or highly exposed sites.
n
n
n
n
n
Improper site selection often leads to stunted growth, disease, or even seedling death.
nn
Preparing the Seedling for Transplanting
n
Preparation reduces stress and increases the seedling’s chances of thriving:
n
- n
- Water thoroughly: The seedling should be hydrated in the 24 hours prior to moving.
- Harden off indoor-grown seedlings: Gradually introduce them to outdoor conditions over a week to reduce shock.
- Check for root health: Roots should be well developed but not root-bound.
n
n
n
nn
Tools and Supplies
n
- n
- Spade or shovel
- Bucket for water
- Compost or organic mulch
- Measuring tape or stick
- Gloves
- Securing stakes (for tall or exposed sites)
n
n
n
n
n
n
nn
Digging Up the Seedling
n
The method of lifting the seedling is critical for root integrity:
n
- n
- Dampen the soil beforehand to reduce root tearing.
- Dig a wide circle around the seedling’s stem—at least 6-12 inches from the trunk for small saplings, or wider for larger roots.
- Gently loosen the soil, lift the root ball with as much soil as possible, and avoid breaking major roots.
- Immediately cover roots in damp burlap or place in a bucket to keep them moist if there’s any delay in transplanting.
n
n
n
n
nn
How to Prepare the Planting Hole
n
Proper hole preparation sets the stage for robust growth:
n
- n
- The hole should be twice to three times the width of the root ball but no deeper than the root ball’s height.
- Loosen compacted soil around the perimeter to facilitate root expansion.
- Mix excavated soil with a small amount of compost only if nutrients are severely lacking—in most cases, use native soil.
- Do not add heavy fertilizers to the hole, as this can burn roots and disrupt soil balance.
n
n
n
n
nn
| Factor | Recommended Approach |
|---|---|
| Width | 2–3 times diameter of root ball |
| Depth | Equal to root ball height (never deeper) |
| Soil Type | Mainly native soil, little to no amendment |
| Drainage | Ensure no standing water; adjust location if site is soggy |
nn
Planting the Seedling: Step-by-Step
n
- n
- Soil Moisture Check: Moisten the planting hole before inserting the seedling to help roots establish quickly.
- Position the Seedling: Set the seedling so the top of the root ball is level with, or slightly above, surrounding soil. Planting too deep causes root suffocation and rot.
- Orient Roots: Fan roots outward gently, trimming only damaged tips as needed.
- Backfill Carefully: Refill the hole with native soil, lightly tamping as you go to remove air pockets but avoiding compaction.
- Water In: As you fill the hole halfway, pour water in to settle the soil around the roots. Repeat after finishing backfill for maximum soil-root contact.
- Avoid Fertilizer: If possible, skip fertilizers at this stage—focus on healthy soil, not fast growth.
n
n
n
n
n
n
nn
Mulching and Protection
n
Proper mulching improves moisture retention and temperature balance, while protecting from weeds:
n
- n
- Apply a 2–3 inch layer of organic mulch (wood chips, shredded bark, or compost) around the base of the seedling.
- Leave a gap of at least 2 inches from the trunk to prevent rot and rodent damage.
- Mulch should extend as wide as the canopy or drip line, if possible.
n
n
n
n
For areas with wildlife or in exposed conditions, consider staking the seedling or using tree guards to prevent mechanical injury and browsing.
nn
Aftercare: Watering, Shading, and Monitoring
n
Transplanted seedlings are vulnerable for weeks or even months. Essential aftercare includes:
n
- n
- Consistent Watering: Keep the soil evenly moist (not soggy) for the first growing season. Deep watering is preferred over light, frequent irrigation.
- Check Soil Moisture: Use your finger or a moisture meter at least weekly to ensure the root zone isn’t dry.
- Temporary Shading: For sun-sensitive or recently moved seedlings, provide partial shade with cloth or branches for a week or two.
- Weed Control: Remove competing grass and weeds within the mulched area by hand or with gentle cultivation.
- Monitoring: Regularly inspect for pests, disease, and signs of transplant shock (wilting, yellowing leaves, or stalled growth).
n
n
n
n
n
nn
Common Mistakes to Avoid
n
- n
- Planting too deep: Causes poor oxygen availability and rot.
- Using excessive amendments or fertilizer: Discourages root spreading into native soil, causing stunted growth.
- Neglecting air pockets: Leads to root dieback; eliminate with water and proper tamping.
- Poor site selection: Wrong location can doom even healthy seedlings.
- Inadequate watering: Both over- and under-watering can kill young trees.
- Improper mulching: Mulch piled against trunk promotes rot and pests.
n
n
n
n
n
n
nn
Tips for Long-Term Success
n
- n
- Protect from wildlife: Use fencing or guards to prevent deer, rabbit, or rodent damage.
- Check for root health annually: Gently probe around the base if you suspect girdling or poor development.
- Prune only if necessary: Remove only dead or damaged branches in the first year; delay structural pruning until establishment.
- Maintain mulch: Refresh mulch annually while keeping it clear of the trunk.
- Observe growth: Note annual height and leaf development to track seedling progress.
n
n
n
n
n
nn
Frequently Asked Questions (FAQs)
nn
Q: When is the ideal time of year to transplant tree seedlings?
n
A: The best times are early spring just before leaf-out or late fall after dormancy onset. Avoid hot, dry summer periods for the highest survival rates.
nn
Q: How can I prevent transplant shock in my seedlings?
n
A: Prepare both the seedling and the site ahead of time, keep roots moist, minimize handling, shade in the first days, and provide consistent watering until established.
nn
Q: Should I add fertilizer or compost to the planting hole?
n
A: Only amend if native soil is extremely poor; otherwise, use native soil to encourage roots to expand outward. Avoid strong fertilizers at transplant time.
nn
Q: Do all seedlings need to be staked?
n
A: Most seedlings don’t need staking unless planted in windy, exposed sites or if the stem is tall and unable to support itself upright. Use flexible, wide ties to avoid girdling stems.
nn
Q: How often should newly transplanted tree seedlings be watered?
n
A: Water deeply 1–2 times weekly in the absence of rain. The goal is consistent moisture—not letting the soil dry out, but avoiding waterlogged conditions as well.
nn
Key Takeaways for Seedling Transplant Success
n
- n
- Time your transplant for dormancy (early spring or late fall) for minimal stress.
- Choose a site with compatible sun, space, and drainage features.
- Dig wide, shallow holes and plant at the correct depth for the species.
- Use mulch wisely and keep up with watering and weed control during the seedling’s establishment phase.
- Monitor and protect your seedling from pests, animals, and extremes, adjusting care as needed through the first year.
n
n
n
n
n
nn
With the right preparation and ongoing attention, your tree seedlings will develop strong root systems and robust growth, contributing long-lasting health and beauty to your landscape or restoration project.
n
References
- https://www.youtube.com/watch?v=Ca6kvgD_k9A
- https://joegardener.com/video/how-to-plant-a-tree-the-right-way-7-steps-for-getting-it-right-every-time/
- https://www.youtube.com/watch?v=_eAZO4Q9fl4
- https://treecanada.ca/article/how-to-best-prepare-newly-planted-trees-for-winter/
- https://www.treehuggerpod.com/episodes/tree-planting-drones
- https://gardenprofessors.com/save-the-planet-learn-how-to-plant-a-tree/
Read full bio of medha deb


