How to Start Sowing Early and Extend Your Growing Season
Kickstart your garden with early sowing techniques to enjoy longer harvests, robust plants, and a thriving green space.

Gardeners eager to achieve abundant harvests and early blooms can take advantage of starting seed sowing before the traditional spring rush. By mastering the techniques of early seed starting, you can extend your growing season, promote vigorous plants, and enjoy the satisfaction of nurturing crops from seed through maturity. This article offers a comprehensive, practical guide on the benefits of early sowing, step-by-step methods, vital tools, and key tips for robust garden success from the very beginning of the season.
Why Start Sowing Seeds Early?
Traditional gardening wisdom advises waiting until the first real signs of spring before sowing seeds outdoors. However, many seasoned gardeners advocate for early seed sowing—typically in January or February—to gain a valuable head start. Here’s why you might want to begin your gardening efforts ahead of schedule:
- Longer Harvest Period: Early sowing offers crops and flowers a chance to establish and mature several weeks sooner, allowing more time for harvests and enjoyment before the season’s end.
- Avoid Late-Season Pests and Diseases: Plants that mature earlier may avoid the peak times for serious pests and plant diseases active later in the summer or fall.
- Increased Yields: A prolonged growing season can result in more abundant yields for crops and more successive bloom cycles for flowers.
- Better Crop Planning: With your first crops established early, you’ll have flexibility for succession planting and fitting in additional rounds of fast-growing vegetables or flowers.
- Early Fresh Produce: Homegrown vegetables can be harvested much sooner in the season, satisfying cravings for fresh food after winter.
The Challenges of Early Sowing
While the rewards are considerable, early sowing is not without its obstacles. Cooler winter and early spring temperatures mean that:
- You must start seeds indoors or in controlled environments, since most seeds cannot germinate in frozen or cold soil.
- Plants will require careful transition and acclimatization (hardening off) before planting outdoors.
- Managing adequate light and warmth can become an extra consideration when growing seeds inside a home with limited daylight hours.
Nonetheless, with some planning, equipment, and patience, these hurdles can be easily managed.
Essential Equipment and Set Up for Early Seed Sowing
To successfully sow seeds ahead of the traditional gardening season, you’ll need a few fundamental tools and supplies. Here are the main components for an effective early seed-starting setup:
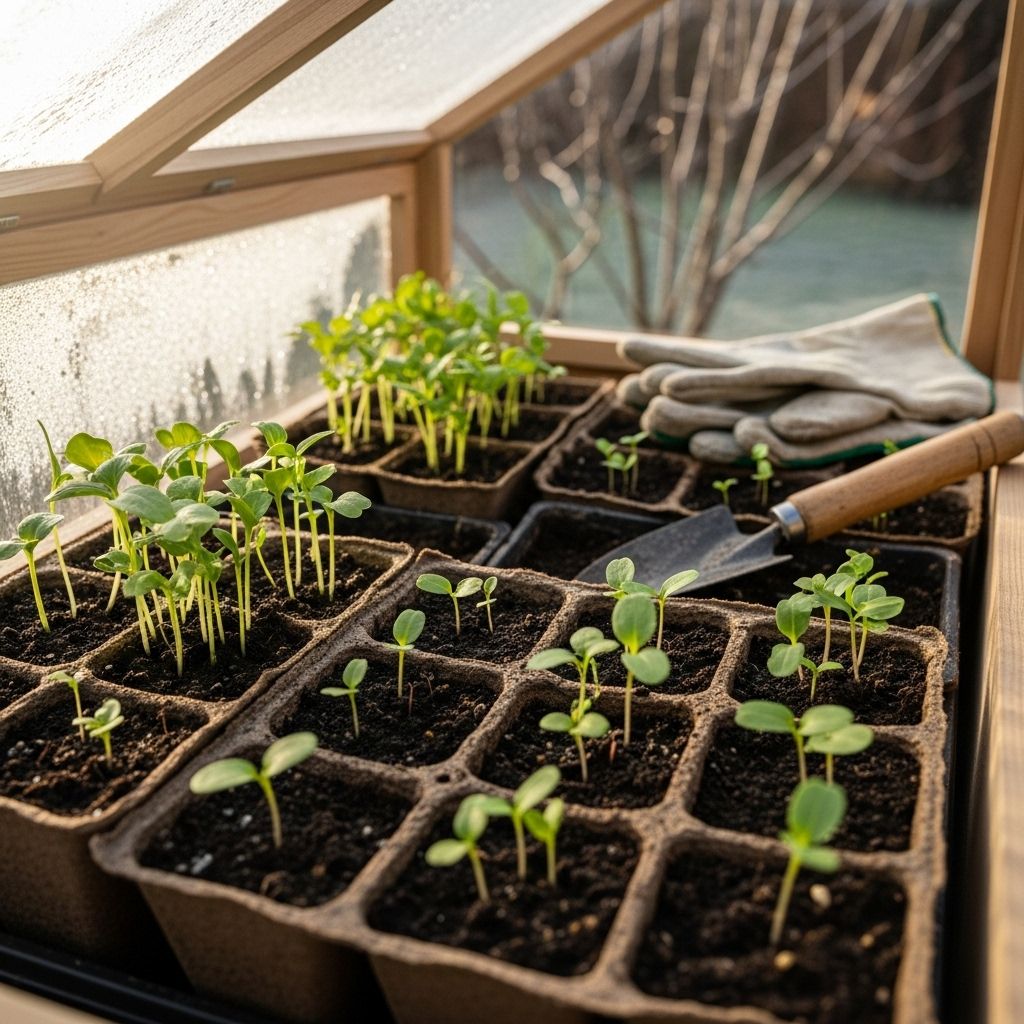
- Seed trays or small pots: These containers offer a controlled environment for individual seeds or clusters, facilitating easier transplanting later.
- Heated propagator or seedling heat mat: Seeds require a specific temperature range—often between 64°F and 71°F (18°C to 21°C)—for optimal germination. A heated propagator or a portable heated seed tray helps maintain steady warmth regardless of fluctuating room temperatures.
- Quality compost or seed starting mix: Always choose a fresh, sterile blend rather than last year’s leftover soil. This reduces the chance of introducing diseases or pests and provides consistent nutrients for seedlings.
- Grow lights or sunny window: During winter, natural daylight hours are short, and light intensity may be insufficient for strong plant growth. Consider LED grow lamps to supplement or replace window sunlight, ensuring seedlings get 12–16 hours of light daily.
- Greenhouse disinfectant and cleaning supplies: Avoid contamination and damping off (a common seedling disease) by disinfecting all trays, pots, and propagators before each use.
- Watering can or mister: Watering should be gentle and consistent, keeping the soil moist but never saturated or dry.
Checklist: Preparing to Sow Seeds Indoors
- Wash and disinfect all seed trays, pots, and equipment.
- Select a high-quality seed starting mix, preferably a sterile, peat-free formula for healthy root development.
- Label all pots and trays clearly with plant variety and sowing date.
- Set up your heated propagator or heat mat and confirm it holds the target temperature range.
- Install grow lamps if natural light is lacking; aim for at least 12 hours of bright, indirect light per day.
Best Seeds and Crops for Early Sowing
Not every plant is well-suited for early indoor sowing. The following categories respond best to an accelerated start:
- Vegetables: Tomatoes, peppers, eggplants, onions, celery, celeriac, leeks, and brassicas (such as broccoli, cabbage, and kale).
- Herbs: Parsley, basil, chives, and dill are popular, especially if you use them fresh in spring and summer recipes.
- Annual Flowers: Sweet peas, petunias, marigolds, larkspur, snapdragons, and many others can be started indoors for early garden color.
- Perennials: Some perennials benefit from early sowing; check plant-specific guidelines.
Research your chosen varieties for specific timing, as some (like brassicas) can be susceptible to certain early spring pests or may prefer a slightly later sowing window to avoid issues like cabbage root fly.
Table: Best Sowing Periods for Popular Crops
| Crop | Best Indoor Sowing Time | Notes |
|---|---|---|
| Tomatoes | Jan – Feb | Needs warmth and strong light. Harden off before transplanting. |
| Broccoli/Kale | Feb – Mar | Tolerates chill; start indoors or in greenhouse. |
| Onions/Leeks | Jan – Mar | Slow to grow. Start very early for full bulbs. |
| Sugar Snap Peas | Early Mar (indoors or as soon as ground thaws outdoors) | Can be sown outdoors if soil is workable. |
| Sweet Pea Flowers | Feb | Can handle cool temps; likes an early start. |
Step-by-Step: How to Start Sowing Early Indoors
- Fill containers: Fill trays or small pots with fresh seed starting mix, leaving a half-inch below the rim to prevent spillover during watering.
- Sow seeds: Check the size requirements for each seed. Small seeds can be sprinkled thinly on the surface, while larger seeds should be planted at a depth approximately twice their size. Gently press seeds into the soil and lightly cover as instructed on the packet.
- Moisten soil: Mist or gently sprinkle with water until the mix is uniformly damp but not soggy.
- Cover and maintain warmth: Place trays in a heated propagator or on a heat mat, or cover with a humidity dome to maintain even moisture and temperature.
- Provide light: As soon as seeds germinate and seedlings emerge, move trays to a brightly lit area or under grow lights to prevent weak, leggy growth.
- Thin seedlings: Once the first true leaves appear, thin out weaker seedlings to allow space for healthy plants to develop.
- Monitor moisture: Check soil daily, watering lightly as needed to prevent dryness but avoid waterlogging.
- Start feeding: When seedlings develop their second set of true leaves, begin feeding with a dilute, balanced organic fertilizer if the seed mix is not pre-fertilized.
Tips for Success: Growing Healthy Seedlings Indoors
- Use only fresh seeds as older ones may have weaker germination rates.
- Keep temperatures stable—avoid drafts and sudden temperature drops near windows or doors.
- Cleanliness is crucial: Disinfect all reused containers or tools to prevent disease.
- Label everything clearly as seed trays of similar crops look alike in the seedling stage.
- Don’t overcrowd: Overcrowding can cause disease and weak plants. Thin seedlings early, following packet instructions.
- Gradually adjust watering: Seedlings are sensitive to both over- and under-watering.
- Pre-plan for space needs: As seedlings grow, they may need repotting into larger containers before going outside.
Transitioning Plants Outdoors: Hardening Off
When your seedlings are well-grown and the risk of frost has passed, it’s time to prepare them for life outside. This process, known as hardening off, gradually acclimatizes tender plants to external conditions:
- Start slow: Place young plants outdoors for 2-3 hours per day in dappled sunlight, sheltered from wind and rain.
- Increase exposure: Each day, extend their outdoor period by an hour and slowly introduce more direct sunlight.
- Monitor for stress: Keep a close eye on leaves for wilting or signs of sunburn. If weather turns chilly, pause the process temporarily.
- Full days outdoors: After a week or more, and when nighttime temps stay above freezing, seedlings can be planted out.
Environmental Benefits of Early Sowing
Starting seeds early doesn’t just benefit your garden’s productivity—it’s also an environmentally friendly practice:
- Reduces reliance on commercial seedlings that are often grown with synthetic inputs or shipped long distances, saving energy and resources.
- Increases plant diversity in home gardens, supporting local pollinators and beneficial insects as well as providing habitat.
- Encourages organic gardening: By raising your own transplants from untreated, heirloom, or organic seeds, you can avoid exposure to harmful pesticides and synthetic growth compounds often used in large-scale plant nurseries.
- Cultivates resilience: Home-sown plants are more likely to adapt well to your garden’s specific microclimate, improving their survival and reducing the need for chemical interventions.
Common Mistakes to Avoid When Sowing Seeds Early
- Sowing too early without adequate light: Seedlings can turn weak and leggy if started before daylight hours increase, or without supplemental lights.
- Using old pots or soil: Diseases and pests can linger. Always start with clean, refreshed materials.
- Poor labeling: Unlabeled trays spell confusion, leading to mishandling or poor spacing upon transplant.
- Neglecting temperature and moisture control: Seeds and seedlings are extremely sensitive during the first stages of life; invest time in careful monitoring.
- Skipping hardening off: Suddenly moving plants from cozy indoor conditions outdoors can shock or kill them.
Frequently Asked Questions (FAQs)
Q: Which vegetables benefit most from early sowing?
A: Tomatoes, peppers, eggplants, onions, leeks, broccoli, and cabbage all benefit from a head start when sown indoors during late winter. Some flowers, like sweet peas and snapdragons, also thrive when started early.
Q: How do I know when to move seedlings outdoors?
A: Wait until all danger of frost is past and seedlings are well rooted, sturdy, and acclimatized. Use a gradual hardening off process to adjust plants to outdoor conditions.
Q: Can I start seeds early on a windowsill without extra equipment?
A: It’s possible for some crops, but light intensity on windowsills is often insufficient during winter. Grow lights and heated mats greatly improve germination and growth rates for most seeds started early indoors.
Q: What are the main risks if I sow too soon?
A: Leggy, weak seedlings from insufficient light, as well as running out of space if plants mature too quickly indoors and cannot be transplanted due to lingering cold outside.
Q: Should I use old seeds or fresh packets for early sowing?
A: Always start with fresh, high-quality seeds for best germination and strong seedling growth. Old seeds may have reduced viability.
Summary and Next Steps
Early seed sowing is an empowering technique that extends the gardening season, enhances garden yield, and gives gardeners a head start on spring. It requires attention, patience, and the right tools, but with care and planning, anyone can enjoy robust results. Experiment with a few varieties each year, refine your growing set-up, and enjoy the rewards of a longer, more productive garden season.
References
- https://www.greenmatters.com/p/sowing-seeds-early
- https://growingwithplants.com/2021/02/winter-seed-sowing-pros-and-cons/
- https://iowawhitetail.com/community/threads/direct-seeding-tree-planting.52921/
- https://www.treehelp.com/pages/how-to-grow-a-tree-or-shrub-from-seed
- https://www.youtube.com/watch?v=CuHnXxLoNtw
Read full bio of Sneha Tete


