How to Make Compost in Weeks: Mastering Hot Composting
Accelerate your soil enrichment—transform kitchen and yard waste into rich compost in just weeks with a hot composting system.

How to Make Compost in Weeks with Hot Composting
Composting is central to ecological gardening, but traditional methods can take months to yield usable soil amendment. Hot composting is a game-changing technique, enabling the production of nutrient-rich compost in a matter of weeks rather than several months. By managing heat, aeration, and moisture, you unlock accelerated decomposition and reduce waste efficiently.
What is Hot Composting?
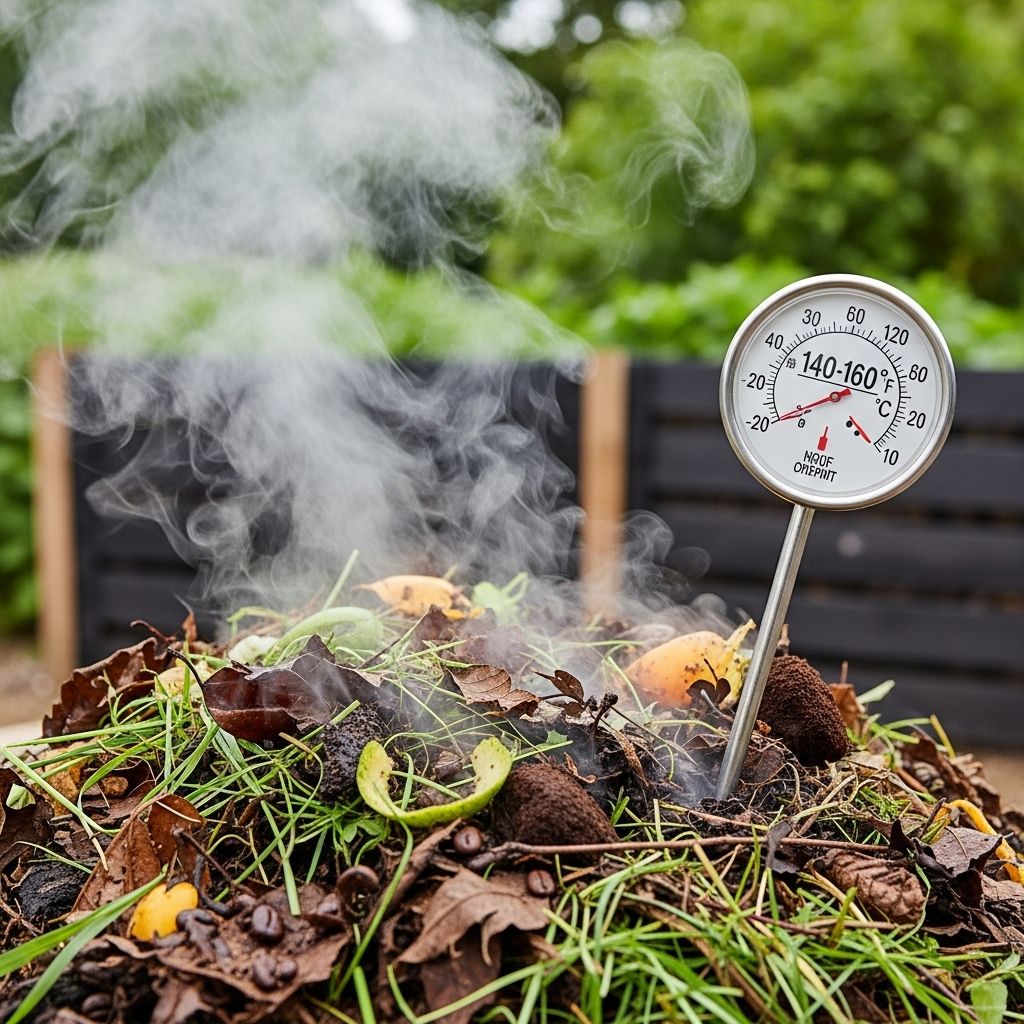
Hot composting refers to a specific method of composting that optimizes microbial activity, resulting in rapid decomposition of organic matter and substantially higher pile temperatures—often reaching 130–160°F (55–70°C). This sustained heat quickly breaks down materials and eradicates weed seeds and pathogens, making the resulting compost cleaner and safer for garden use.
- Rapid decomposition: Finished compost in 30–90 days, compared to 6–12 months with passive (cold) composting.
- Odor and pest reduction: The high temperature minimizes common composting nuisances.
- Cleaner product: Sufficient heat effectively kills most weed seeds and plant diseases.
How Does Hot Composting Work?
The key to hot composting is controlling the pile’s temperature, moisture, carbon-to-nitrogen ratio, and oxygen levels. When organic materials are mixed in the correct proportions and regularly turned to maintain aeration, heat-loving (thermophilic) microbes become active and rapidly break down the organic matter.
- Carbon-rich “browns” (dead leaves, straw, shredded cardboard) provide cellulose for microbes.
- Nitrogen-rich “greens” (kitchen waste, grass clippings, fresh plant trimmings) supply protein for cell growth.
- Oxygen is maintained by creating bulk and air pockets, and by turning the pile frequently.
- Moisture control: The pile should be as damp as a wrung-out sponge; too wet and it goes anaerobic, too dry and decomposition halts.
Decomposition mostly occurs on the surface of materials—chopping and shredding increases efficiency by exposing more surface area to microbial action.
Hot Composting vs. Cold Composting
| Feature | Hot Composting | Cold Composting |
|---|---|---|
| Time to Completion | 30–90 days | 6–12 months |
| Temperature | 130–160°F (55–70°C) | Ambient, often below 104°F (40°C) |
| Pathogen & Weed Seed Reduction | High (kills seeds, pathogens) | Low |
| Effort Required | Frequent turning, monitoring | Minimal turning, less monitoring |
| Suitable Waste Types | More types, including cooked food, some meats | Fewer types, avoid proteins/meats |
The Benefits of Hot Composting
- Speedy results: Hot composting can yield ready compost in a fraction of the normal time, sometimes as quickly as a month.
- Enhanced sanitation: Destroys weed seeds, harmful pathogens, and many pests, producing a cleaner and safer soil amendment.
- Versatility: The process can handle a wider range of organic waste, including paper products and smaller bones.
- Reduced landfill waste: Diverts food and garden waste from landfill, cutting your carbon footprint.
- Enriched soil: The nutrient and humus-rich compost supports healthier plants and improves challenging soils, like heavy clay.
Many gardeners enjoy the process as a rewarding hobby that teaches you about soil science and environmental stewardship.
Potential Downsides of Hot Composting
- Extra effort: Frequent monitoring, temperature checks, turning, and maintaining correct ratios are required.
- Initial expense: Hot compost bins (designed for insulation and aeration) are pricier than basic cold bins.
- Space requirements: Hot composting needs a larger pile (often 1 cubic yard minimum) to reach and sustain high temperatures.
- Indoor limitations: While technically possible indoors, odors, pests, and heat mean it’s far better suited outdoors.
Step-by-Step Guide: Making Hot Compost at Home
- Choose a Composter: Select a bin or build a pile at least 3 x 3 x 3 feet for best heat retention. Insulated designs like HOTBIN increase efficiency.
- Gather Materials:
- Browns: dry leaves, sawdust, cardboard, straw
- Greens: grass clippings, vegetable scraps, coffee grounds, plant trimmings
- Avoid large bones, oyster shells, fatty waste
- Build the Pile: Alternate layers of browns and greens, aiming for a roughly 3:1 ratio (carbons to nitrogens).
- Maintain Moisture: Moisten layers as you build so they’re evenly damp, but not soggy.
- Monitor Temperature: Use a compost thermometer—ideally internal temps should be 130–160°F. If the pile dips below 110°F, it needs turning or more greens.
- Turn Often: Aerate the pile at least once a week, or when temperatures fall. This provides oxygen and mixes fresh material for microbes.
- Adjust as Needed: If the pile is too wet, add more dry browns. If it’s too dry, add water and more greens. Chop materials for faster breakdown.
- Finish: After 30–90 days, the compost should be dark, crumbly, and have an earthy smell. Let it cure for a few weeks before garden use.
Indoor Composting: Is Hot Composting Possible Inside?
While hot composting is optimized for outdoor conditions due to the need for high volume and heat retention, indoor composting is possible with certain electric composters. These devices heat and break down kitchen scraps quickly and with limited odor, but most use dehydration, not true thermophilic composting. True microbial breakdown with high heat and sustained aeration still requires larger bins or outdoor piles.
Tips for an Efficient Hot Compost System
- Maintain a minimum pile size for strong heat retention (at least 1 cubic yard).
- Use a thermometer and record readings to track microbial activity.
- Chop or shred inputs for faster microbial access.
- Mix up the pile when it cools, usually once per week.
- Add a variety of materials: balance kitchen and garden waste, including shredded documents and wood chips for moisture and aeration control.
- Keep moisture “just right”: Add water if dry, add dry browns if too wet.
- Use insulation or a dedicated hot compost bin to sustain high temperatures, especially in cooler climates.
Compost Troubleshooting: Common Problems & Solutions
- Odors or pests: Usually means improper C:N ratio or insufficient aeration. Add more browns and turn the pile.
- Slow decomposition: Check moisture and temperature, chop inputs, and increase aeration.
- Too wet: Add shredded cardboard, leaves, or straw. If it’s soggy for long periods, it may go anaerobic (smelly and slimy).
- Temperature drop: Add fresh greens, chop material, and turn the pile to revive aerobic activity.
- Missed weeds or seeds: Ensure temperatures consistently reach above 140°F to reliably kill unwanted seeds and pathogens.
Environmental Advantages of Hot Composting
Hot composting contributes significantly to environmental sustainability by:
- Reducing landfill waste: Diverts organic material from garbage streams.
- Enriching the soil: Peat-free compost supports plants and soil structure without harming peatlands.
- Cutting greenhouse gases: Composting at home reduces transportation and landfill emissions.
- Supporting biodiversity: Healthy compost improves soil microbial diversity and garden health.
Frequently Asked Questions (FAQs) about Hot Composting
Q: How long does hot composting take?
A: Typically, you can expect finished compost between 30 and 90 days, depending on pile management and materials used.
Q: Can I compost cooked food scraps in a hot compost bin?
A: Yes. Hot compost bins—especially sealed, insulated systems—efficiently break down cooked food, small bones, and tougher garden wastes. Large bones, fatty meats, and oily foods should still be avoided.
Q: Does hot composting require specialized equipment?
A: While you can build a hot compost pile with basic tools, insulated bins like the HOTBIN or Aerobin make the process much easier and more reliable, especially in colder climates or urban spaces.
Q: Is the resulting compost safe to use directly in gardens?
A: Yes. After proper curing, hot compost is rich in nutrients, largely free of pathogens and weed seeds, and ideal for garden beds, lawns, and containers.
Q: What’s the best material ratio for hot composting?
A: Start with roughly three parts carbon-rich material (dry leaves, cardboard) to one part nitrogen-rich material (kitchen scraps, grass clippings) for optimal microbial activity and heat generation.
Summary Table: Key Steps to Successful Hot Composting
| Step | Action | Purpose |
|---|---|---|
| Gather Materials | Collect balanced greens & browns | Provide nutrients & structure |
| Build Pile | Layer ingredients, moisten pile | Encourage microbial growth |
| Monitor Temperature | Use thermometer weekly | Keep pile in thermophilic range |
| Turn & Aerate | Mix weekly or as needed | Supply oxygen, increase speed |
| Adjust Moisture | Add water or browns | Prevent sogginess/anaerobic state |
| Harvest Compost | After 30–90 days | Enrich garden soil |
Ready, Set, Compost: Your Path to Soil Health
With attention to heat, aeration, and balance, hot composting offers a fast, clean, and enriching method to recycle waste and build healthy soil. Whether you are a soil science enthusiast or a beginner aiming for sustainable gardening, mastering hot composting transforms both your waste management and your garden’s productivity.
References
- https://www.compostguy.co.uk/blog/what-is-hot-composting
- https://www.gardeningknowhow.com/composting/hot-composting
- https://hotbincomposting.com/blogs/get-composting/why-choose-hot-composting
- https://www.epa.gov/recycle/composting-home
- https://www.craftycabbage.com/2022/03/hot-composting-1.html
- https://compost.css.cornell.edu/physics.html
- https://freckledcalifornian.com/2021/08/01/hot-composting-a-step-by-step-guide/
Read full bio of medha deb


