How to Make Naturally Dyed Easter Eggs: Vibrant Eco-Friendly Colors from Your Kitchen
Discover vibrant, non-toxic Easter egg colors using natural ingredients and kitchen staples with this eco-friendly DIY guide.

How to Make Naturally Dyed Easter Eggs
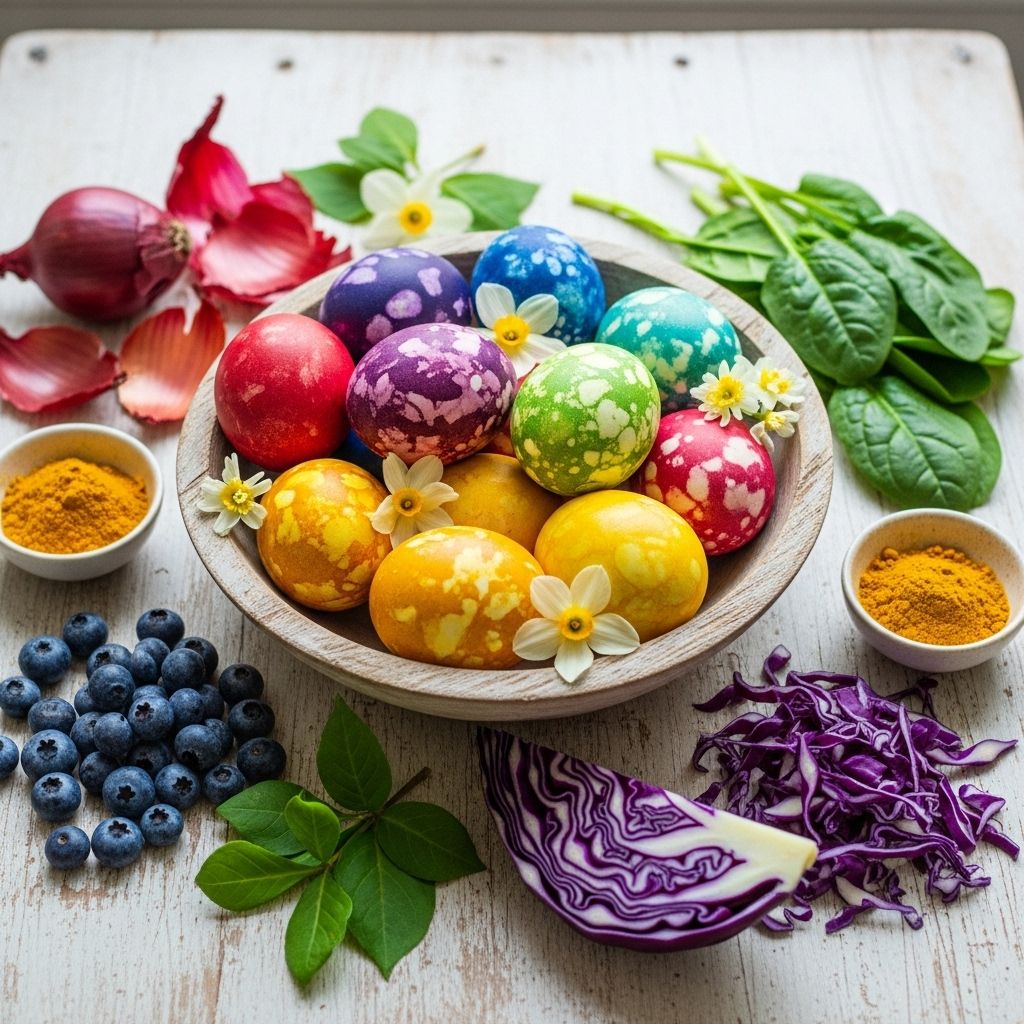
Dyeing Easter eggs with natural ingredients is an ancient tradition made new again by eco-friendly crafters and families seeking vibrant, chemical-free ways to celebrate spring. Using common vegetables, fruits, herbs, and even pantry spices, you can create a stunning array of colors—each unique and full of creative possibilities. This guide covers the supplies, techniques, color sources, safety tips, and artistic methods to help you craft beautiful, naturally dyed Easter eggs at home.
Why Choose Natural Egg Dyes?
Natural dyes are free from synthetic chemicals and often safer for small children, pets, and the environment. They offer subtle, earthy tones and surprising brightness, depending on ingredients and methods. The process turns the ritual of coloring eggs into a sensory activity, making it a beloved spring tradition for families and craft enthusiasts alike.
Essential Supplies for Naturally Dyed Easter Eggs
- Eggs: White eggs or brown heritage eggs (brown eggs provide deep, muted backgrounds).
- Natural Dye Materials: Vegetables (beets, onions), fruits (blueberries), spices (turmeric), and herbs (parsley, red cabbage).
- Mason jars, bowls, or containers: For making and soaking dyes.
- Heat source: Stove or hot plate.
- Pot and lid: Preferably stainless steel or non-reactive cookware.
- Strainer and slotted spoon: For removing solids from dye baths and handling hot eggs.
- Vinegar: Enhances dye uptake and brightness.
- Gloves and apron: Natural dyes can stain hands and clothes.
- Paper towels or drop cloth: To protect your work surface.
- Cheesecloth, veggie bags, or mesh: For eco-printing or bundle dyeing.
- Tongs: For handling hot eggs safely.
Health & Safety Tips
- Work in a well-ventilated area—even natural dye powders can be irritating.
- Wear gloves and a mask when working with fine powders.
- Keep dye pots and kitchen pots separate to avoid inedible residues.
- Supervise children around hot water and dyes.
- Protect surfaces from stains with towels, plastic, or paper drop cloths.
Color Sources: What Ingredients Create Which Colors?
| Color | Ingredient |
|---|---|
| Pink | Beets |
| Red | Red onion skins, raspberries |
| Yellow | Turmeric, yellow onion skins, chamomile flowers |
| Orange | Yellow onion skins + beet juice |
| Green | Parsley, spinach |
| Blue | Red cabbage, butterfly pea powder, blueberries |
| Purple | Butterfly pea powder + lemon juice, red cabbage with vinegar |
| Gray | Black tea, logwood chips |
| Brown | Coffee, brown onion skins |
Step-by-Step Instructions: Dyeing Your Eggs
Step 1: Prep and Boil Eggs
- Place eggs in a single layer at the bottom of your pot.
- Cover with cold water to rise about two inches above the eggs.
- Bring to a boil, cover, remove from heat, and let stand for 12 minutes.
- Drain and cool with cold water and ice cubes until eggs are easy to handle.
- Refrigerate until ready to dye (up to 5 days).
Step 2: Prepare Natural Dye Baths
Each dye bath uses different materials and methods. Below are basic recipes to create beautiful colors:
- Pink: Chop 1-2 beets, simmer in 2 quarts water with 2 tablespoons vinegar for 20 minutes. Strain and cool.
- Yellow: Simmer 2 tablespoons turmeric in 2 quarts water with 2 tablespoons vinegar.
- Blue: Simmer shredded red cabbage or butterfly pea powder in water. For light blue, use no vinegar; for indigo blues, add vinegar.
- Green: Simmer 1 bunch of parsley or spinach in 2 quarts water with 2 tablespoons vinegar.
- Purple: Use butterfly pea powder with lemon juice (acidity changes color from blue to purple).
- Orange: Mix turmeric dye with a bit of beet juice.
- Brown: Brew strong coffee, cool, and soak eggs.
Step 3: Soak Eggs in Dye Baths
- Pour cooled dye into jars or bowls deep enough to fully immerse eggs.
- Add eggs and soak for at least 30–60 minutes—deeper colors come from longer soaks.
- Turn eggs gently with a slotted spoon or tongs to ensure even coverage.
- Remove eggs and allow to dry on a paper towel or wire rack.
Step 4: Advanced Techniques for Patterns and Texture
- Tie-Dye: Wrap eggs with rubber bands or strips of fabric before dyeing for striped or speckled patterns.
- Eco-Printing: Bundle eggs with flowers (marigold, chamomile), herbs, or logwood chips in mesh bags, steam above boiling water to transfer botanical patterns.
- Layering: After initial dye, re-soak in another color for multi-toned effects.
- Stenciling: Place leaves or stickers on eggs before dyeing, then remove to reveal natural designs.
Natural Dye Egg Recipes and Color Effects
- Red Cabbage: Produces blues to bluish-purples depending on soak time and acidity. Add vinegar for deeper blue; add lemon juice for purple.
- Beets: Give pinks; prolonged soaking or adding more beets creates vibrant magenta.
- Onion Skins: Yellow onion skins yield golds and oranges; red onion skins can create reddish tones.
- Turmeric: Intense yellow; mix with beet to get orange.
- Butterfly Pea Powder: Blue shade shifts with pH. Add acid (lemon juice) and the dye bath changes from blue to purple.
- Coffee: Deep browns for earth-tone eggs.
- Herbs & Flowers: Marigold and chamomile flowers print subtle yellows and oranges.
Tips for Vibrant and Lasting Results
- Add distilled white vinegar to dye baths to help natural colors adhere to the eggshell more strongly.
- Experiment with different soak times—start with 30 minutes, go up to several hours for the richest shades.
- Use white eggs for pure colors; brown eggs for depth and natural background tints.
- Allow eggs to dry fully before handling to avoid streaks.
Eco-Friendly and Creative Craft Variations
- Bundle Dyeing: Wrap eggs in cheesecloth or mesh bags filled with flowers/herbs, steam instead of boiling for botanical prints.
- Upcycling: Use leftover veggie trimmings (onion skins, beet peels) to reduce kitchen waste.
- Composting: Shells and flowers used in the dyeing process can be composted after the holiday.
- Heritage Eggs: Colored eggs from different breeds offer creative backgrounds for dyeing.
Frequently Asked Questions (FAQs)
Q: Are natural dyes safe for kids?
Yes, natural dyes from vegetables and fruits are generally non-toxic, but adult supervision is recommended when handling hot water and powders. Always prevent ingestion of dye materials.
Q: What eggs should I use?
White eggs yield bright colors. Brown eggs give muted, dramatic backgrounds and pastel hues. Heritage eggs with blue or brown shells offer extra creative variety.
Q: How do I get bold colors?
Longer soak times and higher concentration of dye materials (use more veggies per batch) result in deeper, brighter color. Adding vinegar or lemon juice can enhance intensity.
Q: Can I eat the dyed eggs?
Eggs dyed with natural, edible ingredients are safe if they were hard-boiled and kept refrigerated. Eggs decorated with non-edible botanical dyes or steamed in non-food pots should not be eaten.
Q: How do I make my own natural dye at home?
- Simmer your chosen dye material (e.g., beet, cabbage, turmeric) in water for about 20–30 minutes.
- Strain and cool the dye bath.
- Add a tablespoon of vinegar to help colors set.
Q: What creative designs can I make?
- Tie-dye bands
- Stenciled leaf and flower prints
- Layered ombré colors
- Botanical imprints with eco-print technique
Conclusion: Celebrate Spring with Sustainable, Colorful Eggs
Dyeing Easter eggs with natural colors is a rewarding, eco-friendly art that lets you bring the beauty of nature to your spring celebrations. With only kitchen staples, a bit of planning, and some creative experimentation, you can make eggs that feel personal, meaningful, and safe for all ages. Try new combinations, discover unexpected colors, and enjoy a hands-on tradition that connects you with the season and the earth.
References
Read full bio of Sneha Tete


