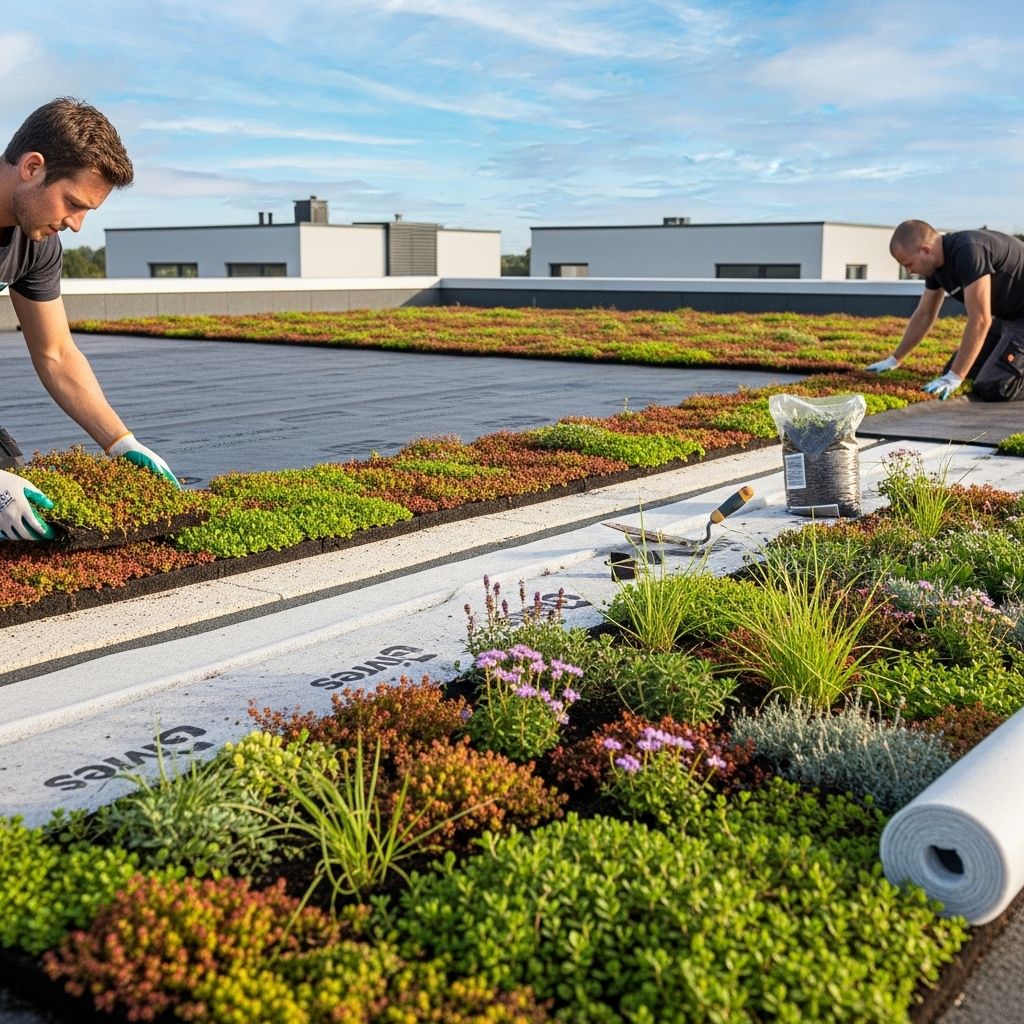
How to Install a Green Roof: Step-by-Step Guide for a Lush, Eco-Friendly Rooftop
Transform your home and the environment with our comprehensive guide to successful green roof installation and maintenance.

Green roofs are innovative rooftop gardens that offer compelling environmental and aesthetic benefits. Whether for urban dwellings or commercial buildings, these living roofs can moderate the heat island effect, enhance stormwater management, insulate your home, and add vibrant life to otherwise unused spaces. This comprehensive guide covers every essential step to installing a green roof, from initial planning to ongoing care, ensuring both sustainability and stunning results.
Why Choose a Green Roof?
- Environmental Benefits: Reduces stormwater runoff, combats urban heat, supports pollinators, and sequesters carbon.
- Energy Efficiency: Improves insulation and lowers energy bills by regulating indoor temperature year-round.
- Aesthetic Appeal: Transforms your roof into a lush, living landscape that increases property value and curb appeal.
- Sound Insulation: Dampens outside noise, especially beneficial in urban areas.
Step 1: Assess Structural Capacity and Consult Experts
Before moving forward, determine whether your existing roof can handle the added weight of a green roof. The saturated growing medium and plants can increase load to 30 pounds per square foot, often more than traditional roofing can support. It’s critical to:
- Hire a structural engineer to evaluate your roof’s integrity.
- Strengthen joists, add bracing, or enhance structural supports as required.
- Ensure minimum pitch: even flat roofs need at least a ¼ inch per foot slope for adequate drainage.
Tip: It’s essential to get professional advice at this stage. Compromising safety or skipping upgrades can lead to costly damage and structural failure. Always address any roof upgrades or reinforcements upfront.
Step 2: Prepare and Clean the Roof Surface
A clean, damage-free roof surface is the foundation for a successful green roof installation. Begin with thorough inspection and repair:
- Remove any dirt, debris, and loose materials from the surface with a broom or pressure washer.
- Check for leaks, cracks, or membrane tears; repair any found issues before continuing.
- Relocate or secure obstacles like satellite dishes or HVAC units.
- Level out the surface to prevent future pooling or uneven plant growth.
| Surface Preparation Step | Description |
|---|---|
| Remove Obstacles | Clear away any items that impede installation or drainage. |
| Apply Protective Layer | Install a root barrier or waterproofing membrane to shield the roof structure. |
| Level Surface | Ensure the roof is even for proper water movement. |
Step 3: Apply Waterproofing and Root Barriers
Waterproofing is a green roof’s first line of defense. It protects the building from water intrusion while the root barrier prevents roots from damaging the roof membrane. The typical process includes:
- Install a high-quality waterproofing membrane, such as EPDM or TPO, extending up any parapet walls.
- Add a dedicated root barrier—often a thick rubber layer—to prevent root penetration and keep plants contained.
- Use a geotextile fabric to separate layers and aid drainage while protecting the membrane below.
The result is a multi-layer shield that preserves roof integrity, prevents leaks, and ensures a long-lasting green roof foundation.
Step 4: Install Drainage Layers
Efficient drainage is crucial to keep plant roots healthy and avoid waterlogging. A proper drainage system includes:
- Drainage mats: Placed over the waterproofing and root barrier, these hold soil while letting excess water flow through.
- Interconnected cells or mats: Facilitate movement of water toward gutters, preventing pooling and helping with overall plant health.
- Inspection and cleaning: Regularly check for clogs and remove accumulated debris to maintain performance.
For DIY systems, ensure each layer is compatible with your roof design and the weight it will bear. Poor drainage can severely impact plant health and building structure.
Step 5: Edge and Border Installation
Edging materials keep soil and plants within the boundaries of your roof, providing a clean look and support throughout the installation. The process typically includes:
- Install L-shaped aluminum edging around roof perimeter, temporarily weighted down to mark locations.
- Work from the lowest edge upward, placing trays or border elements securely as you go.
- Edging stabilizes all modules and protects roof sides from water or root intrusion.
After laying out edging, verify its alignment and stability before continuing with planting or tray installation.
Step 6: Add Planted Trays or Growing Medium
Most modular green roof systems use pre-planted trays or modules, while larger projects might utilize bulk growing medium and direct planting. The advantages of modular trays are many:
- Arrive 95% covered with established vegetation, dramatically speeding installation.
- Trays can be removed for maintenance without disturbing others—ideal for future repairs.
- Tray installation: Begin in one corner, preferably at the lowest end, and move across and up the roof slope.
- Each tray is typically elevated slightly above the roof to allow for runoff and drainage.
For non-tray systems:
- Spread soil mix evenly, typically a blend of lightweight aggregate, compost, and topsoil.
- Ensure soil depth matches plant root requirements (often 3-6 inches for sedums and ground covers).
At this stage, your rooftop starts to transform from bare surface to burgeoning garden.
Step 7: Connect and Adjust Trays for Seamless Coverage
Once trays are in place, make sure they’re interconnected for:
- Stability: Overlapping lips and connectors hold modules firmly, minimizing seams and temperature fluctuation.
- Elevation: Feet or risers on trays keep them slightly raised for easy water flow underneath.
- Maintenance access: Modular systems let you remove a tray without unseating its neighbors.
Double-check every connection to verify stability and coverage, reducing risk of erosion or plant displacement.
Step 8: Custom Fit and Cutting of Modules
Roof dimensions inevitably require some trays to be cut to fit between edging and full trays. Steps include:
- Measure for each end piece and mark trays with wax pencil.
- Cut trays with a masonry blade on a gas-powered concrete saw—best done on the ground for safety.
- Butt cut pieces snugly against full trays for complete edge coverage.
- Send finished, cut trays up to installers for precise placement.
This custom fitting ensures a professional, seamless finish for your green roof project.
Step 9: Remove Soil Elevators and Facilitate Soil-to-Soil Contact
Pre-planted trays are shipped with soil elevators—bands that temporarily raise soil to allow for easier installation. To integrate all modules:
- After a few rows, pull out the soil elevator at a gentle angle, taking care not to spill any planting medium.
- The added height and close contact between trays promote lateral movement of water, nutrients, and beneficial organisms.
- Proper soil-to-soil contact produces a more unified, blended roof, eliminates dry spots, and enhances insulation value.
Step 10: Fit the Final Modules and Secure Edges
With most of the roof covered, fit the last few trays carefully:
- Minimize foot traffic on planted sedums; plan your route so you can exit without damaging the vegetation.
- From a ladder at roof’s edge, attach the aluminum edging to trays using exterior-grade screws.
- This final securing protects against wind uplift and keeps everything neat.
Take extra care in this step to ensure the roof’s longevity and a seamless, attractive finish.
Step 11: Initial Watering and Ongoing Irrigation
After installation, water thoroughly to settle the soil and help plants acclimate:
- Soak all modules after install to remove air gaps and stabilize medium.
- Most green roof plants, especially sedums, are drought-tolerant and may only require supplemental irrigation during extended dry spells.
- If drought persists for over four weeks with less than an inch of rainfall, irrigate to prevent the planting medium from shrinking and weeds from invading.
- Install a garden hose or drip irrigation system connected to a convenient water source for easy care.
Step 12: Routine Maintenance, Inspection, and Plant Care
- Annual Trim: Give plants a yearly haircut to keep growth tidy and promote new shoots.
- Fertilize as Needed: Use soil tests to determine fertilizer requirements; apply only as indicated.
- Weed Vigilance: Remove invasive weeds promptly to preserve the integrity of the landscape.
- Module Management: Replace or maintain trays easily by removing individual units without affecting others.
- Drainage Inspection: Periodically clear debris from drainage modules to prevent water buildup and roof damage.
With minimal maintenance, your green roof will thrive—providing lasting beauty, insulation, and ecological benefits.
Choosing Plants for Your Green Roof
Sedums are the preferred choice thanks to their adaptability, drought tolerance, and shallow root systems. Consider these additional options:
- Native wildflowers for biodiversity.
- Low-growing grasses for texture and coverage.
- Herbs and edible plants (for intensive systems with deeper soil).
Always select plants suited to your climate, rooftop sunshine, and soil depth. Pre-planted modules simplify the selection process and guarantee success.
Green Roof System Types
| Type | Soil Depth | Maintenance | Plant Variety |
|---|---|---|---|
| Extensive | 3–6 inches | Low | Sedums, ground covers |
| Intensive | 6+ inches | Moderate to High | Grasses, shrubs, edibles |
| Semi-Intensive | Varies | Medium | Mix of extensive and intensive species |
Extensive systems are best for DIY projects, while intensive green roofs are suitable for larger buildings with high structural support and maintenance resources.
Frequently Asked Questions (FAQs)
Can I install a green roof on any building?
Not every structure can support the weight of a green roof. A professional structural assessment is essential before proceeding, with upgrades as needed to ensure safety.
How much maintenance does a green roof require?
Green roofs need yearly trimming, periodic soil tests, minimal watering (except during drought), and occasional weeding. Modular trays simplify the process by enabling easy maintenance and replacement.
What plants are best for green roofs?
Sedums are the most popular due to their resilience and shallow roots. Depending on local climate and soil depth, you can also use native wildflowers, grasses, or edible herbs.
Are green roofs expensive to install?
Costs vary depending on roof size, structural needs, materials, and plant selection. A professional consultation early in the process will clarify budget and requirements.
Do green roofs reduce energy bills?
Yes. Green roofs act as natural insulation, keeping buildings cooler in summer and warmer in winter, which can significantly reduce energy consumption.
Conclusion: Unlocking the Benefits of Eco-Friendly Rooftops
Installing a green roof transforms your home, boosts sustainability, and supports local ecosystems. By following this step-by-step guide and maintaining your green roof throughout the year, you’ll enjoy a vibrant, enduring, and environmentally responsible addition to your building. From structural assessment to plant selection and ongoing care, green roofs offer an array of benefits for conscientious homeowners and urban dwellers alike.
References
- https://www.thisoldhouse.com/green-home/21016395/how-to-install-a-green-roof
- https://therooftechnician.ca/green-roofing-solutions/installing-a-green-roof-your-how-to-guide/
- https://www.youtube.com/watch?v=KJTme3wdsqc
- https://www.3riverswetweather.org/sites/default/files/Green%20Roof%20Resource%20Guide.pdf
- https://pacifichorticulture.org/articles/the-green-roof-manual-a-professional-guide-to-design-installation-and-maintenance/
- https://stormwater.pca.state.mn.us/index.php/Operation_and_maintenance_of_green_roofs
- https://www.epa.gov/sites/default/files/documents/GreenRoofsSemiAridAridWest.pdf
Read full bio of Sneha Tete


