How to Compost at Home: A Complete Beginner’s Guide
Learn everything you need to start composting at home – from setup to troubleshooting and harvesting nutrient-rich compost.

Composting is an eco-friendly way to recycle kitchen and yard waste, create nutrient-rich soil for your garden, and reduce landfill waste. Whether you have a large backyard or a small apartment, composting can fit your lifestyle and help you build healthier soil while supporting a greener planet. This guide offers practical steps, helpful tips, and answers to common questions so you can confidently start composting at home.
What Is Composting?
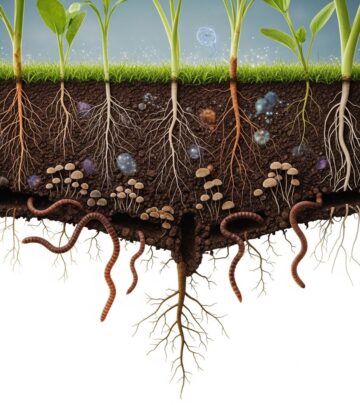
Composting is the natural process of breaking down organic matter—such as food scraps and yard trimmings—into a rich, dark soil amendment known as compost. Microorganisms, worms, and insects convert waste into a nutrient-dense material that can be used to enrich garden soil, improve plant growth, and reduce environmental impact.
Benefits of Home Composting
- Reduces landfill waste by diverting organic materials from garbage disposal.
- Produces free soil amendment for gardens, potted plants, and landscaping.
- Cuts greenhouse gas emissions, especially methane, by decomposing waste aerobically.
- Supports healthy soil, improving structure, moisture retention, and plant health.
- Promotes sustainability by closing the loop on household organic material.
Types of Home Composting
- Backyard pile or bin: An accessible outdoor space for larger volumes of waste and yard trimmings.
- Tumbler bins: Enclosed rotating bins; speed up decomposition and help contain odors.
- In-ground composting: Directly bury food scraps in the soil for simple decomposition.
- Vermicomposting: Utilizes worms (usually red wigglers) for compact, odorless composting, suitable for indoors and apartments.
Fundamentals of the Composting Process
Successful composting depends on a correct balance of four main elements:
| Element | Role | Examples |
|---|---|---|
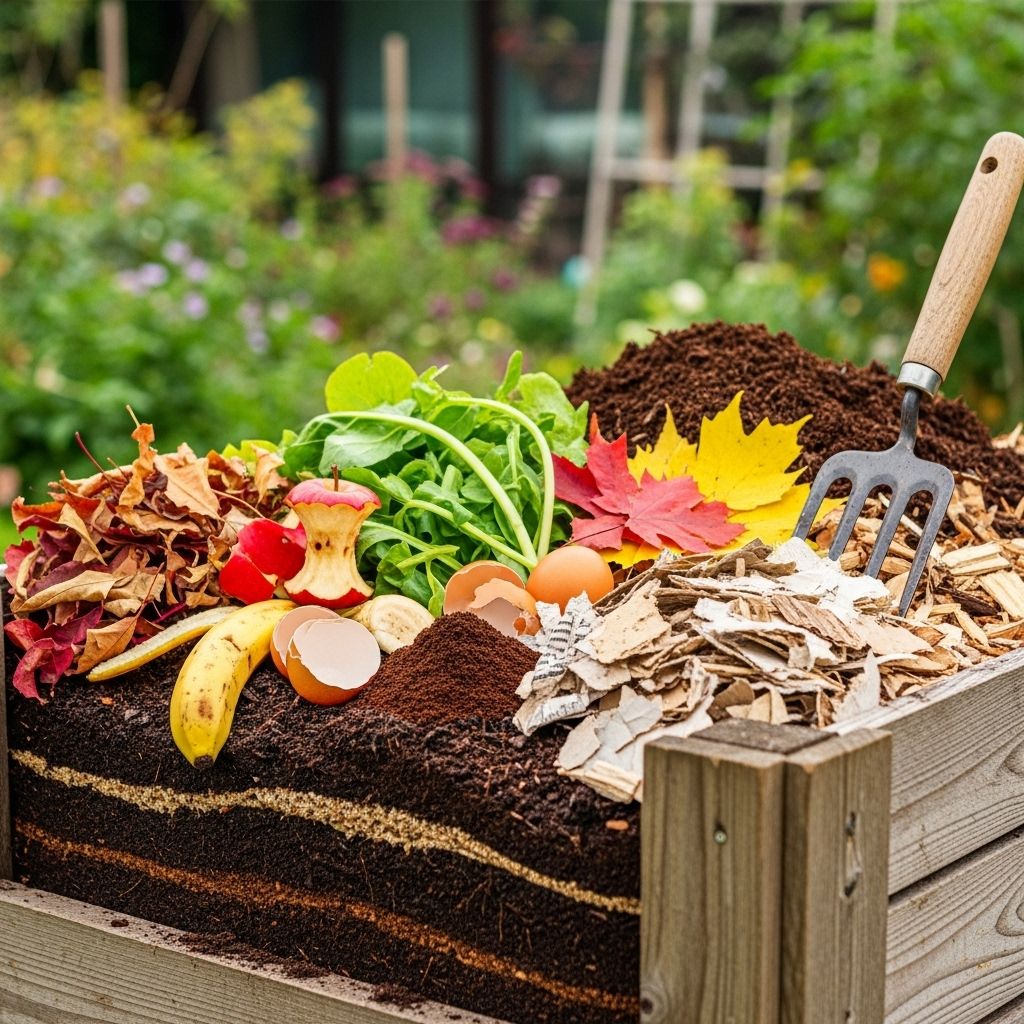
| Carbon (“browns”) | Provides energy and structure | Dry leaves, twigs, wood chips, shredded paper, cardboard |
| Nitrogen (“greens”) | Provides protein for organisms | Fruit & veggie scraps, grass clippings, coffee grounds, eggshells |
| Water | Maintains moisture for microbial activity | Hose water, rain, moist food scraps |
| Air (oxygen) | Supports aerobic breakdown and prevents odors | Turning the pile, layering sticks and leaves |
What to Compost: Browns and Greens
Maintaining a healthy balance of carbon-rich “browns” and nitrogen-rich “greens” is essential. Aim for 2–3 parts browns to 1 part greens by volume; this prevents unpleasant odors and speeds decomposition.
Carbon-Rich Materials (“Browns”)
- Dry leaves and pine needles
- Twigs, wood chips (untreated)
- Shredded paper (uncoated, non-glossy), brown paper bags
- Cardboard (shredded, no wax or tape)
- Sawdust from untreated wood
- Straw, hay (organic)
Nitrogen-Rich Materials (“Greens”)
- Fruit and vegetable scraps
- Grass clippings
- Coffee grounds (and paper filters)
- Tea bags (no staples, non-plastic fabric)
- Eggshells (crushed)
- Fresh garden trimmings
What NOT to Compost
Some materials slow the composting process, create safety hazards, or attract pests. Avoid the following items:
- Meat, fish, bones (attract animals)
- Dairy products, cheese, fats, oils, or grease
- Cooked food (small amounts may be okay)
- Pet waste and cat litter
- Herbicide-treated plants or grass
- Diseased, pest-infested plants
- Aggressive/weedy plants with seeds
- Treated or painted wood
- Glossy or colored paper
- Dryer lint (possible synthetic fibers)
- Produce stickers
Commercial facilities may be able to compost some of these (like meat and cooked food); check your local options.
Step-by-Step: How to Set Up Your Compost Pile or Bin
- Choose a site:
- Pick a level, well-drained spot with access to water and shade, away from fences and structures.
- Select your container:
- Use a compost bin, tumbler, wire enclosure, wooden box, or simply a corner of your yard. Enclosed bins help control pests and odors.
- Layer materials:
- Begin with 4–6 inches of bulky browns (twigs, wood chips) for drainage and airflow.
- Alternate layers of greens (food & yard scraps) and browns, like a lasagna.
- Cover every addition of greens with 4–8 inches of browns to deter pests and smells.
- Moisten the pile:
- Water until all material is as moist as a wrung-out sponge.
- Turn and aerate:
- Mix the pile every few weeks to supply oxygen, speed decomposition, and break up clumps.
Tips for Quick and Odor-Free Composting
- Chop or shred ingredients: Small pieces decompose faster and more evenly.
- Maintain the brown-to-green ratio: Too many greens cause odor and slow decomposition; extra browns resolve this.
- Keep the pile moist: Dry piles stall; overly wet piles become anaerobic and smelly. Adjust with water or dry materials.
- Turn regularly: Oxygen speeds up composting and prevents foul smells.
- Keep a second pile: While one pile ‘cooks,’ start a new one for ongoing food scrap management.
- Prevent odor: Always cover fresh greens with a generous layer of browns.
- Compost urine safely: If comfortable, urine adds nitrogen; balance with enough brown material.
Speeding Up Your Compost
- Mince & break up materials: The smaller the piece, the faster it turns into finished compost.
- Mix often: Frequent turning speeds up the process by increasing oxygenation.
- Stockpile materials: Keep handy piles of straw, dry leaves, or manure for fast, balanced decomposing.
Maintaining and Monitoring Your Compost Pile
- Temperature: Healthy piles heat up (up to 160°F) as microbes work. Warm piles decompose and kill pathogens/weeds more quickly.
- Moisture: Should always feel like a wrung-out sponge. Add water or dry browns to maintain.
- Odor: Finished compost smells earthy. Foul smells signal imbalance—turn the pile and add browns.
- Size: For efficiency, aim for at least 3’x3’x3’ if space allows. Larger piles retain heat and break down faster.
Harvesting and Using Finished Compost
- Time: Compost is ready in several months to a year, depending on temperature, moisture, and size.
- Finished compost: Dark, crumbly, earthy-smelling, and mostly unrecognizable material.
- Remove uncomposted pieces: Sift or pick out large bits, sticks, nutshells; return to the next pile.
- Application:
- Mix into garden beds before planting.
- Top-dress lawns, trees, shrubs, flower beds, and potted plants.
- Make ‘compost tea’ by steeping compost in water (optional).
Composting Without a Yard: Indoor and Apartment Solutions
- Vermicomposting: Worm bins fit under sinks or in closets and handle food scraps without odors.
- Bokashi: A fermentation system for food scraps; ideal for small spaces and can handle dairy/meat.
- Community green bins: Participate in local food-scrap recycling programs if available.
- Dig and bury: In-ground composting works if you have access to bare soil—simply dig, deposit, and cover scraps.
Common Composting Problems and Solutions
| Problem | Cause | Solution |
|---|---|---|
| Bad smells (rotten) | Too many greens No air (anaerobic) | Add more browns Turn pile for aeration |
| Pile too dry | Insufficient water, hot/dry weather | Sprinkle with water until moist |
| Pile not decomposing | Too small Wrong material ratio | Add more greens, Chop ingredients, grow pile size |
| Attracting animals | Uncovered food Meat/dairy included | Cover with thick browns Remove restricted items |
Frequently Asked Questions (FAQs)
Q: Can I compost citrus peels and onion scraps?
A: Yes, citrus and onions can be composted in moderation. They break down slowly and may deter worms, but do not harm the overall process.
Q: How long does compost take to be ready?
A: The process can take from a few months to a year, depending on the pile’s size, frequency of turning, and material ratios. Smaller, well-managed piles break down more rapidly.
Q: Will my compost pile smell?
A: A properly balanced pile (with enough browns and regular turning) should only emit an earthy smell. Foul odors indicate too much nitrogen or lack of oxygen—a signal to add browns and turn.
Q: Can I compost pet hair and cotton?
A: Yes, in small amounts. Natural fibers like pet hair, cotton, and old rope decompose slower, so sift out larger remnants before using finished compost.
Q: Is it necessary to use a special compost bin?
A: No, you can compost directly on the ground or in simple DIY bins. Enclosed commercial bins offer benefits like pest control, insulation, and easier turning.
Conclusion
Composting at home is a simple, rewarding way to reduce waste, enrich gardens, and support sustainability. By following these steps and guidelines, you can transform kitchen and yard scraps into ‘black gold’ for your soil and help build a healthier environment—one pile at a time.
References
- https://www.epa.gov/recycle/composting-home
- https://zerowastechef.com/2022/04/01/mine-for-black-gold-compost-heap/
- https://www.smallfootprintfamily.com/100-things-you-can-compost
- http://www.co.dakota.mn.us/Environment/Residential/Organics/Pages/composting-at-home.aspx
- https://ofhousesandtrees.com/composting-for-beginners/
- https://home.howstuffworks.com/composting.htm
- https://www.delish.com/food/a36165243/how-to-start-composting/
Read full bio of medha deb


