A Complete Guide to Hot Composting: Step-by-Step Instructions for Rapid, Sustainable Compost
Learn the Berkeley hot composting method to turn organic waste into fertile soil in under a month.

Hot Composting: Transforming Organic Waste into Rich Compost
Hot composting is an efficient, science-driven technique to convert organic matter into nutrient-rich compost rapidly. Unlike traditional cold composting, hot composting leverages controlled heat and microbial activity to break down materials in as little as two to four weeks, making it ideal for gardeners and sustainable living enthusiasts seeking quick turnaround and high-quality soil amendments.
What Is Hot Composting?
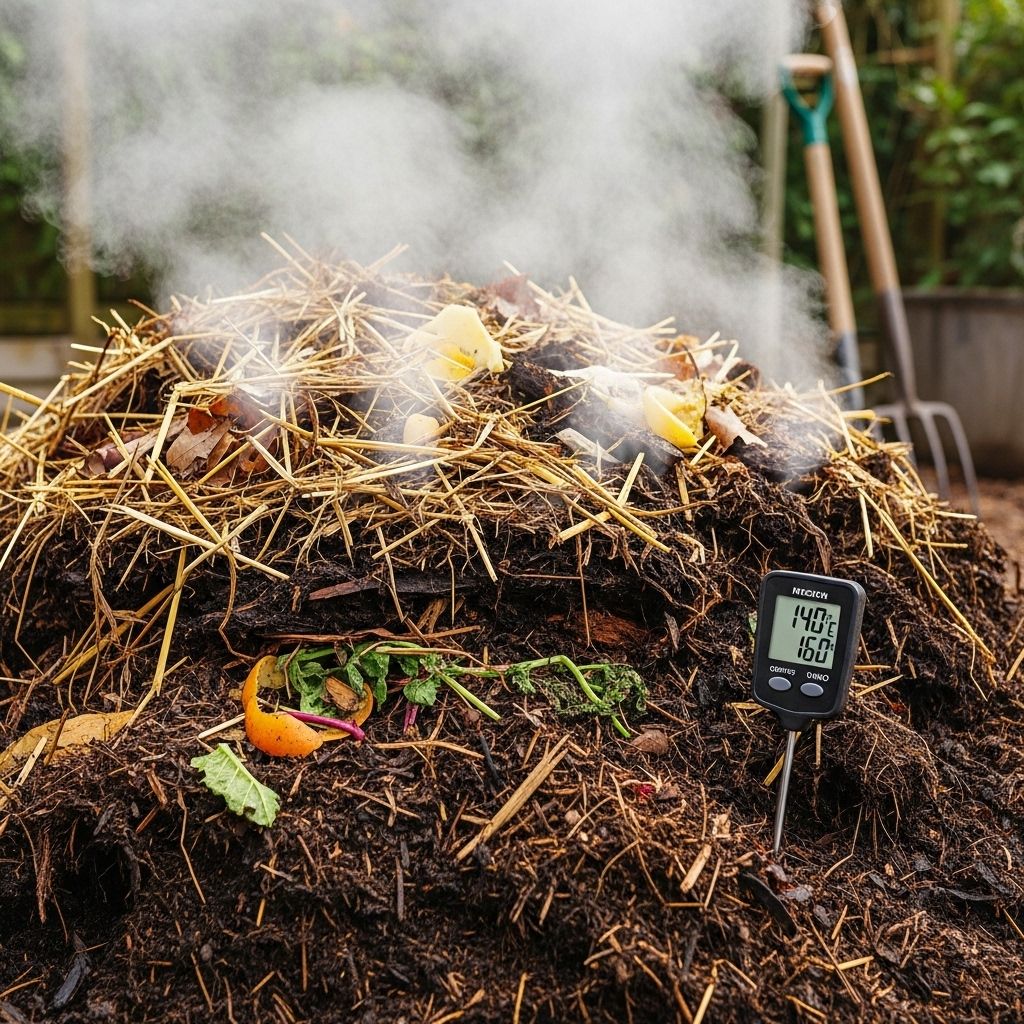
Hot composting is a method of decomposing organic material at high temperatures (between 130°F and 160°F or 55°C to 71°C) to produce finished compost more quickly than standard methods. The process is fueled by thermophilic (heat-loving) microbes that break down carbon-rich and nitrogen-rich materials, transforming kitchen scraps, garden waste, and other organics into a dark, crumbly compost full of plant nutrients and beneficial microbes.
Benefits of Hot Composting
- Fast Results: Properly managed, the process takes 18 to 30 days versus several months in cold systems.
- Pathogen and Weed Seed Destruction: High temperatures kill most plant diseases and weed seeds, resulting in a cleaner, safer compost.
- Rich, Balanced Compost: Hot compost is loaded with nutrients and beneficial soil organisms for a healthier garden.
- Odor and Pest Control: Rapid decomposition and heat minimize common compost problems like smells and pests.
- Sustainable Waste Reduction: Diverts a significant portion of household and yard waste from landfills.
How Hot Composting Works: The Science Explained
Hot composting relies on microbial activity to generate heat. When carbon (browns) and nitrogen (greens) are mixed with the right moisture and air, bacteria and fungi rapidly multiply. As they break down organic matter, they raise the internal temperature of the pile, accelerating the process, sanitizing it, and producing nutrient-rich humus.
- Carbon-to-Nitrogen Ratio (C:N): Ideal balance is 25–30 parts carbon to 1 part nitrogen.
- Moisture: Compost should feel like a wrung-out sponge – moist but not soggy.
- Oxygen: Regular turning introduces air, fueling aerobic (oxygen-loving) microbes and keeping the process hot and fast.
The Berkeley Method: Hot Composting in 18 Days
The Berkeley method, developed at the University of California, is a popular hot composting technique noted for speed and reliability. Its structure facilitates maximum heat generation, thorough decomposition, and a high-quality finished product in less than a month.
Essential Requirements
- Pile Size: At least 3 feet x 3 feet wide and 3 to 5 feet tall for stable temperatures.
- Material Mix: 25–30:1 carbon-to-nitrogen ratio. Alternate layers of greens and browns for best results.
- Turning Schedule: Initial period of rest, then frequent turning to mix and aerate.
- Consistent Moisture: Maintain dampness; add water as needed.
- Temperature Monitoring: Keep pile within target range. Turn or cool if it exceeds 160°F (71°C).
Step-by-Step Guide to Hot Composting
Step 1: Gather Materials
- Carbon-rich “browns” – dried leaves, straw, shredded cardboard, wood chips, sawdust.
- Nitrogen-rich “greens” – grass clippings, kitchen food scraps (excluding dairy, meat, oils), coffee grounds, fresh manures (herbivore).
- Water – ideally rainwater, to avoid chlorine that can affect microbes.
- Optional activators – comfrey leaves, nettles, yarrow, old compost, or even urine to jumpstart microbial activity.
Step 2: Build the Pile
- Select a spot with good drainage and access, sheltered from extreme weather.
- Lay a base of coarse materials (twigs, small branches) to improve airflow at the bottom.
- Layer browns and greens, alternating several inches (4–6 inches) thick. Mix each layer gently for best contact.
- Wet materials as you build. The pile should be evenly damp but not soggy by the time assembly is complete.
- Finish with a brown (carbon) layer to reduce odors and pests.
Step 3: Initial Heating Phase
- Do not disturb the pile for the first four days. Microbes will multiply, and temperatures will rise rapidly.
- Monitor internal temperature daily with a compost thermometer.
- Pile should reach between 130°F and 160°F (55°C–71°C) during this startup phase.
Step 4: Active Turning Phase
- On day 5, turn the pile thoroughly, moving outer materials to the inside and vice versa. This aerates the pile and redistributes heat.
- Allow to rest for one more day.
- Continue to turn the pile every two days for the next two weeks (for a total of 7–8 turns).
- With each turn, check moisture levels. Add water if it feels dry; fork in dry browns if it feels soggy.
Step 5: Maturation and Curing
- After the final turn, let the pile rest and cure for at least another week to allow slower-acting organisms (like fungi and worms) to finish decomposition.
- Finished compost should be dark, crumbly, cool, and have an earthy aroma.
- Sift to remove large pieces; return them to a new pile.
Choosing Hot Composting Materials: What Can and Can’t Go In?
| Type | Examples | Notes |
|---|---|---|
| Browns (Carbon) | Dried leaves, straw, shredded cardboard, wood chips, paper | Shred or chop larger materials for faster breakdown |
| Greens (Nitrogen) | Grass clippings, fruit and vegetable scraps, coffee grounds, fresh weeds (before seeds), animal manure (herbivore only) | Avoid large quantities of protein-rich manures or food scraps which can cause odor if balance is off |
| Do Not Compost | Meat, dairy, oils, diseased plants, pet waste, plastic, synthetics | These attract pests, cause odors, or may introduce pathogens/toxins |
Maintaining the Pile: Monitoring, Turning, and Troubleshooting
Monitoring Temperature
- Use a long-stemmed compost thermometer inserted deep into the pile’s core.
- Optimal: 130°F–160°F (55°C–71°C).
- If below target, add more greens and moisture; if too hot, turn and aerate to release heat.
Turning Technique
- Use a pitchfork or compost fork to transfer outer material to the center and vice versa.
- Thorough mixing maximizes exposure of all material to heat and microbial action.
- Turning schedule (Berkeley method): Every other day for two weeks following initial heating phase.
Moisture Management
- Compost should glisten but not drip water when squeezed.
- Add water if it’s dry; add more browns if soggy.
- Covering the pile (with a tarp or lid) helps maintain consistent moisture in dry weather and prevents leaching in rainy conditions.
Troubleshooting Common Issues
- Foul odors: Usually too wet, compacted, or too many greens. Turn pile, add browns, improve drainage.
- Pile won’t heat up: Too small, too dry, insufficient greens, or poor aeration. Add material, moisten, and mix thoroughly.
- Too dry: Layer in more greens and moisten lightly during turns.
- Too wet: Add dry browns, fork in air, and create drainage channels or lift onto a drier surface.
Using Your Finished Compost
- Top-dress garden beds and containers to enrich soil and retain moisture.
- Work into planting holes or mix with potting blends for starts and transplants.
- Apply as mulch or side-dressing for ongoing fertility throughout the growing season.
- Sift to remove large unbroken pieces for re-composting if desired.
Hot Composting vs. Cold Composting
| Hot Composting (Berkeley Method) | Cold Composting | |
|---|---|---|
| Decomposition Speed | 2–4 weeks | Several months to one year |
| Temperature | 130–160°F (55–71°C) | Ambient (often below 100°F/38°C) |
| Pathogen/Weed Seed Destruction | Yes; high heat kills most | Less effective; some survive |
| Turning | Frequent and scheduled | Occasional or not required |
| Labour | Moderate to high | Low |
Safety and Environmental Tips
- Always wash hands after handling compost and tools.
- Do not compost pet waste, diseased plants, or chemically treated materials.
- Chop or shred large items before composting to speed breakdown.
- Monitor pile size to ensure heat retention – bigger piles heat up better but may need more turning.
- Store unused browns (dried leaves, wood chips) for adding to new piles throughout the year.
Frequently Asked Questions (FAQs)
Q: Do I need a special compost bin for hot composting?
A: No special bin is required, but a large, enclosed space or sturdy three-bin system makes turning and aerating easier and helps retain heat and moisture.
Q: How do I know when my hot compost is ready?
A: Finished compost will be crumbly, dark brown with an earthy scent, with little recognizable original material and cooled to near air temperature.
Q: Can I compost meat, dairy, or oily foods?
A: These should be avoided as they can attract pests and cause odors, even in hot composting systems.
Q: What if my compost never heats up?
A: It’s likely too small, imbalanced in C:N ratio, too dry, or lacking greens. Rebuild with the right mix and moisture, and ensure your pile is at least 3’x3’x3′.
Q: Is hot composting suitable for all climates?
A: Hot composting works best in moderate to warm climates, but with diligence (covering the pile, using insulating materials), you can maintain heat in cooler regions as well.
References
- https://deepgreenpermaculture.com/2010/05/08/hot-compost-composting-in-18-days/
- https://growinginthegarden.com/how-to-compost-10-simple-steps/
- https://compost.bc.ca/wp-content/uploads/2021/03/4-Hot-Composting.pdf
- https://www.youtube.com/watch?v=x4JssQPTYF8
- https://www.epa.gov/recycle/composting-home
- https://ma-northampton.civicplus.com/DocumentCenter/View/15090
- https://extension.okstate.edu/fact-sheets/compost-turning-the-key-to-quick-composting.html
Read full bio of medha deb


