A Step-by-Step Guide to Saving Flower Seeds
Unlock your garden's full potential with this comprehensive guide to harvesting and storing flower seeds for next year's blooms.

Saving your own flower seeds is one of the most rewarding and sustainable gardening practices. Not only does it save money and preserve your favorite blooms, but it also helps create a thriving, resilient garden year after year. This detailed guide covers everything you need to know about collecting, cleaning, storing, and replanting your own flower seeds, including helpful tips for beginners and the benefits of seed saving for both you and the environment.
Why Save Flower Seeds?
Harvesting and saving seeds from your flower garden allows you to:
- Save money: Grow new plants for free every year rather than buying new seeds or seedlings.
- Preserve unique varieties: Keep beloved heirlooms or unusual flowers in your garden forever.
- Create more resilient plants: Seeds saved from your healthiest and best-adapted plants will be better suited for your local conditions.
- Increase ecological sustainability: Promote biodiversity and reduce your reliance on commercial seed companies.
- Gain gardening insight: Deepen your understanding of plant life cycles and connect more intimately with your garden’s rhythms.
What Seeds Should You Save?
Nearly any species of non-hybrid flowering plant can be saved, but annuals, biennials, and open-pollinated perennials usually give the most reliable results. However, beware of the following:
- Hybrids: Seeds from hybrid (F1) plants may not produce offspring true to their parent—results are unpredictable.
- Disease-Prone Plants: Avoid saving seeds from plants that appeared unhealthy or prone to disease.
Some popular easy-to-save flowers include:
- Marigolds
- Cosmos
- Sunflowers
- Zinnias
- Calendula
- Poppies
- Larkspur
- Sweet peas
When to Harvest Flower Seeds
Timing is critical when collecting seeds. Harvest when the seedheads are mature and fully dry. For most flowers, this is two to three weeks after the plant has stopped blooming and the seedpods or heads have turned brown and dry on the plant.
- Patience is key: Let the flower complete its full life cycle until seeds are hard and dry.
- Watch for natural dispersal: Some seeds, like poppies and foxgloves, will scatter quickly if you wait too long. For these, consider covering the seed heads with a mesh or paper bag as they dry.
Essential Tools and Materials
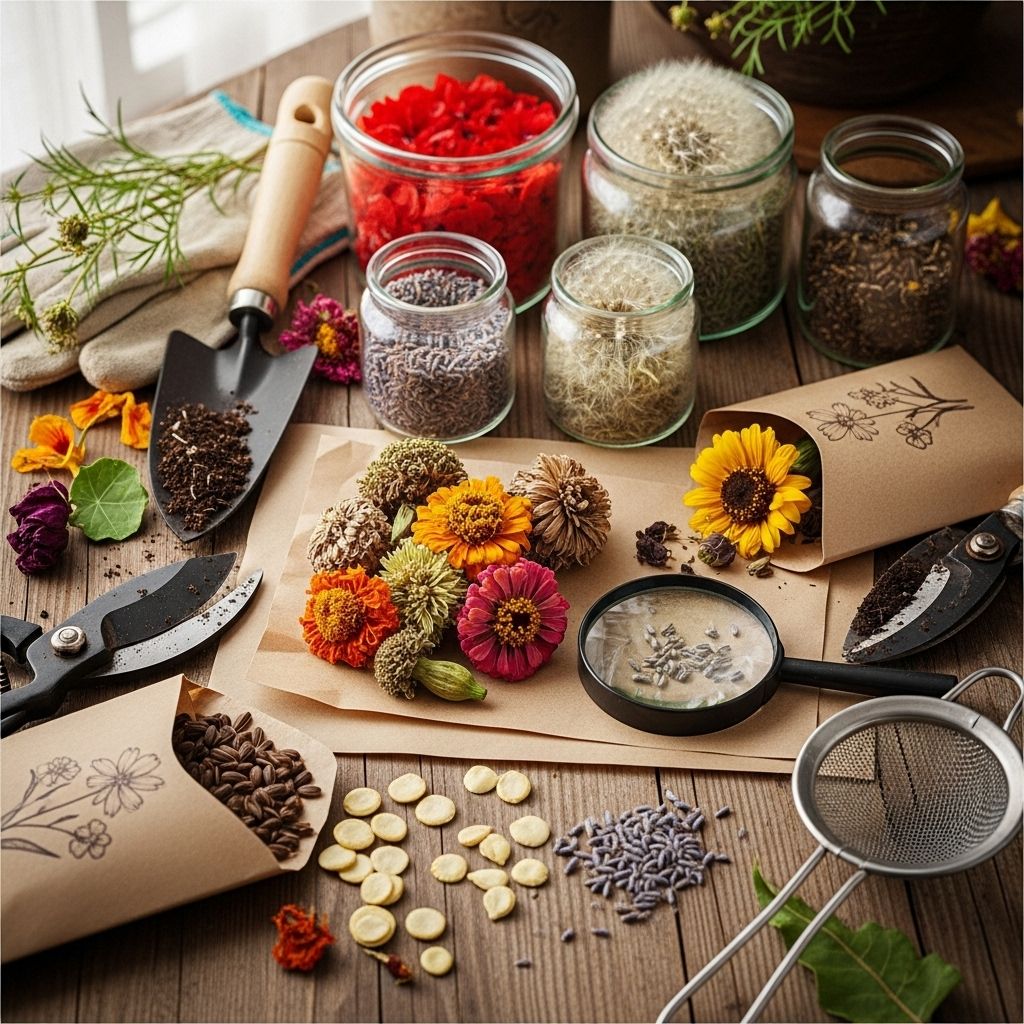
- Paper bags: Lunch-size bags are ideal for collecting and drying seed heads without trapping moisture.
- Scissors or garden shears: For cutting seed heads cleanly from plants.
- Gloves (optional): Some seedpods can be prickly or irritating.
- Scrap paper or labels: For recording plant varieties and harvest dates.
- Envelopes or small paper packets: Used for long-term storage of dried seeds.
- Plastic bags or containers: For temporary storage (ensure seeds are completely dry before sealing to avoid mold).
How to Collect Flower Seeds
The basic procedure for collecting flower seeds involves several careful steps:
- Identify mature seed heads. Look for flowers whose seeds have ripened on the plant—usually these will have brown, dry pods or heads.
- Harvest on a dry day: Moisture can introduce mold; harvest when the weather is dry.
- Cut the seed head: Snip the seed pod or head, keeping enough stem for handling.
- Bag the heads: Immediately place the heads in a labeled paper bag. If the seeds are not yet fully dry, leave bags open in a warm, well-ventilated area for a week or more.
- Gently shake or rub heads: Once thoroughly dry, gently break open or shake the heads over a clean surface to release the seeds.
How to Clean and Separate Seeds
Once you’ve collected your flower seeds, you’ll often need to separate the seeds themselves from the surrounding chaff or debris. This step helps reduce mold and makes sowing easier later on. Some ways to clean seeds include:
- Manual Separation: Rub dried seed heads gently between your fingers or against a piece of cardboard to release seeds.
- Kitchen Strainer: Sift the mixture through a fine mesh; some seeds will fall through while chaff is left behind.
- Use the Wind: If seeds are heavier than their chaff, pour the mixture from one container to another on a breezy day to let lightweight material blow away.
How to Dry Collected Seeds
Proper drying is crucial to prevent mold during storage. When seeds are dry enough, they will often feel hard and can snap, rather than bend, when you pinch them.
- Spread seeds out: Place cleaned seeds in a single layer on a ceramic plate, tray, or piece of paper in a warm (but not hot), dry, and well-ventilated spot.
- Avoid direct sun: Excess heat can damage seeds.
- Allow at least one week: Some thick or large seeds may require longer drying time.
Labeling and Storing Seeds
Once seeds are fully dry, store them in labeled paper envelopes, small paper packets, or glass jars with a tight seal. Make sure each packet is labeled with:
- Plant name and variety
- Harvest date
For added protection, consider the following storage tips:
- Include a silica gel packet: This helps absorb residual moisture for longer viability.
- Store in a cool, dark, and dry place: Pantry shelves, closets, or a dedicated seed box work well. Some gardeners store seeds in the refrigerator for maximum lifespan.
Tips for Successful Seed Saving
- Always choose the healthiest, strongest plants for seed collection. This practice ensures great genetics in next year’s flowers.
- Never collect seeds from diseased or weak plants.
- Keep different varieties separate: To prevent cross-pollination and maintain true-to-type plants, only save seeds from one variety per species (especially for open-pollinated plants) unless you are intentionally experimenting with hybridizing.
- Be patient: Allow plants to mature fully, even if they appear unsightly late in the season.
Frequently Asked Questions (FAQs)
Q: Can I save seeds from hybrid flowers?
A: You can, but results will be unpredictable. Hybrid seeds rarely produce plants identical to the parent, so stick to open-pollinated or heirloom varieties for reliable offspring.
Q: How long do saved flower seeds remain viable?
A: Most flower seeds remain viable for 1-3 years if kept cool, dry, and dark. Some hardy seeds may last longer, but fresh seed is always more reliable.
Q: Should I remove chaff before storing seeds?
A: Yes, removing as much chaff as possible prevents mold, reduces bulk, and makes sowing easier in spring.
Q: Is it necessary to refrigerate saved seeds?
A: It’s not strictly necessary, but refrigeration (in a moisture-proof container) can extend seed viability, especially in humid climates.
Q: How do I know when seeds are dry enough to store?
A: Seeds should feel hard and not pliable. When bent, a dry seed will snap or crack. If you’re unsure, allow an extra week of drying before storage.
Common Mistakes to Avoid
- Storing damp seeds: This is the number one cause of mold and failed seed saving.
- Forgetting to label seeds: Always label immediately to avoid confusion later.
- Collecting seeds from the wrong plant: Make sure you’re collecting from the plant you intend to grow next year.
- Mixing varieties: Don’t mix seeds from similar-looking flowers if you want to preserve specific types.
- Exposing seeds to extreme temperatures: Heat and high humidity shorten seed lifespan drastically.
Quick Reference Table: Flower Seed Tips
| Flower | Seed Collection Tip | Storage Advice |
|---|---|---|
| Sunflower | Wait until flower heads are fully brown and dry on the plant. Remove seeds by rubbing head gently. | Air dry fully, store in paper envelopes in a cool place. |
| Cosmos | Harvest spiky, dark seeds from spent flower heads when dry. | Dry thoroughly, store with minimal chaff. |
| Poppy | When pods rattle and holes appear, cut pods and tip out seeds. | Spread seeds to dry, then store in labeled packets. |
| Zinnia | Pick dry, brown heads; pluck pointy seeds from under each petal. | Ensure dryness, avoid humidity during storage. |
| Marigold | Remove dry, brown seedheads; strip seeds away from base. | Store in ventilated packets or glass jars. |
Reusing and Sowing Saved Seeds
The joy of seed saving is realized when you plant your harvested seeds the following year. Sow according to each species’ requirements—some need direct sowing in spring, others prefer starting indoors. Always check if your seeds require a period of cold stratification.
- Test small batches: If unsure of viability, try a germination test by sprouting some seeds on a damp paper towel indoors before sowing outdoors.
- Adjust planting to your climate: Saved seeds will often perform especially well in the climate where their parents thrived.
Connecting with Nature through Seed Saving
Seed saving deepens your connection to seasonal cycles and fosters a sense of stewardship over your garden. It encourages patience, observation, and mindful cultivation. By harvesting, storing, and growing your own flower seeds, you can share plants with friends and family, expand your garden, and celebrate nature’s abundance each year.
Frequently Asked Questions
Q: Can I save seeds from plants bought at a nursery?
A: Yes, if the plant is open-pollinated or an heirloom. Be cautious with hybrids, as their seeds often don’t breed true.
Q: How can I share saved seeds with others?
A: Place seeds in labeled paper envelopes, include planting instructions, and give to friends or participate in local seed swaps. Seed exchanges build gardening communities and preserve valuable plant varieties.
Q: What should I do if my seeds get moldy in storage?
A: Discard any moldy seeds and dry the remainder thoroughly. Ensure future batches are completely dry before storing and use silica gel packets to absorb excess moisture.
References
- https://growitbuildit.com/how-to-save-and-store-flower-seeds/
- https://rootsandrefuge.com/a-complete-guide-to-seed-saving/
- https://wonderground.press/botanica/saving-seeds-with-jac-semmler-seed-queen/
- https://forksinthedirt.com/seed-saving-annual-flowers/
- https://www.youtube.com/watch?v=AE5-Hr2tjQQ
- https://www.flowersfromthefarm.co.uk/seed-saving/
Read full bio of medha deb


