Top Home Remedies for Defogging Headlights
Restore clarity and safety with simple household solutions

Foggy, hazy headlights are more than just an aesthetic problem for your vehicle—they represent a significant safety hazard that can reduce visibility and compromise your ability to drive safely at night. Over time, headlights become clouded due to UV exposure, oxidation, and the accumulation of road debris, which creates a yellowed or opaque layer on the plastic lens surface. While professional restoration services and commercial kits are available, many effective solutions can be found right in your home. These household remedies offer cost-effective alternatives that can restore your headlights to near-original clarity without breaking the bank.
Understanding why headlights become foggy is the first step toward effective restoration. Modern headlights are made from polycarbonate plastic, which is lightweight and impact-resistant but susceptible to degradation from environmental factors. When exposed to sunlight, the UV rays break down the protective coating on the headlight surface, causing oxidation that manifests as cloudiness or yellowing. Additionally, road grime, salt, chemicals, and microscopic scratches contribute to the deterioration of headlight clarity. Fortunately, several household items possess the chemical properties needed to remove this oxidized layer and restore transparency.
Vinegar and Baking Soda Solution
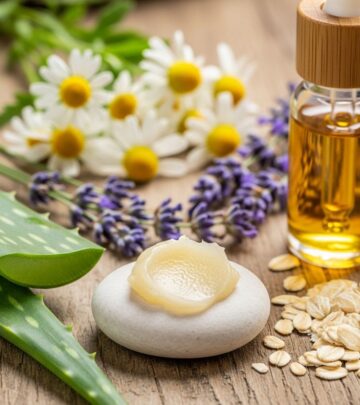
One of the most popular and effective home remedies for defogging headlights combines the cleaning power of vinegar with the abrasive properties of baking soda. This dynamic duo works through a combination of chemical reaction and gentle mechanical scrubbing to remove oxidation and restore clarity to clouded headlight lenses.
To create this powerful cleaning solution, mix two parts distilled white vinegar with one part baking soda in a container. The mixture will fizz and bubble as the acidic vinegar reacts with the alkaline baking soda, creating carbon dioxide gas. This chemical reaction helps to lift dirt and oxidation from the headlight surface. Add a couple of tablespoons of baking soda to your water and vinegar solution to create the ideal consistency for application.
The application process is straightforward and requires minimal supplies. Use a clean rag or microfiber cloth to soak up the solution, then gently scrub the foggy areas of the headlight in circular motions. The baking soda acts as a mild abrasive that physically removes the oxidized layer without scratching the underlying plastic, while the vinegar’s acidity helps dissolve stubborn residue that cannot be removed by soap and water alone. Continue scrubbing until you notice the cloudiness beginning to lift, then rinse the headlight thoroughly with clean water and dry with a soft towel.
For particularly stubborn oxidation, you may need to repeat the process multiple times or let the solution sit on the headlight surface for a few minutes before scrubbing. The beauty of this method lies in its safety—both vinegar and baking soda are non-toxic and won’t damage your vehicle’s paint or surrounding components when used properly.
Toothpaste Method
Perhaps the most surprising and convenient home remedy for foggy headlights is regular toothpaste. This bathroom staple has been used for years to clean away hazy headlights and help restore them to their original clarity. The effectiveness of toothpaste lies in its formulation, which includes mild abrasives designed to remove plaque and stains from teeth—the same properties that make it excellent for removing oxidation from plastic headlight lenses.
Using toothpaste to restore your headlights is remarkably simple and accessible since absolutely everyone has toothpaste at home. There are no excuses for keeping those headlights looking clean when such an effective solution is already in your medicine cabinet. For best results, choose a white, non-gel toothpaste that contains baking soda or is labeled as “whitening,” as these varieties typically have stronger abrasive properties.
The application process mirrors that of the vinegar and baking soda solution. Take a clean rag or soft cloth and apply a solid amount of toothpaste directly to the rag. Then, using moderate pressure, scrub around the hazy area of the headlights in circular or back-and-forth motions. The toothpaste will begin to break off the old, dirty particles that collect on your headlight surfaces, gradually revealing clearer plastic beneath. You should notice the toothpaste changing color as it picks up the yellowed oxidation from the lens.
Continue scrubbing for several minutes, adding more toothpaste as needed. Some enthusiasts recommend using a toothbrush for more aggressive scrubbing in particularly oxidized areas, which can help work the paste into microscopic scratches and crevices. After thoroughly working the toothpaste across the entire headlight surface, rinse with clean water and dry with a microfiber towel. For maximum clarity, you may need to repeat the process or follow up with a plastic polish.
Advanced Hydrogen Peroxide Combination
For headlights with more severe oxidation, a powerful three-ingredient combination offers impressive restoration results. This method combines baking soda, white vinegar, and hydrogen peroxide to create a potent cleaning solution that leverages multiple chemical reactions simultaneously.
Hydrogen peroxide is known as an excellent bleaching agent and powerful oxidizer, making it particularly effective at breaking down the yellowed, oxidized layer on headlight surfaces. When combined with baking soda, it forms a paste that can be applied directly to the headlight. The addition of vinegar creates a complex series of chemical reactions that produce carbon dioxide bubbles, which help lift oxidation away from the plastic surface.
To use this method, create a paste by mixing baking soda with hydrogen peroxide instead of water. The consistency should be thick enough to adhere to the vertical surface of the headlight without running off. Apply this paste directly to the headlight lens, coating the entire foggy area with a generous layer. Next, spray white vinegar over the paste and wait a few seconds to allow the chemical reaction to occur. You’ll notice vigorous bubbling as the vinegar and baking soda react, while the hydrogen peroxide simultaneously works to bleach away yellowing.
Using a toothbrush or soft-bristled brush, scrub the mixture into the headlight surface, paying special attention to areas with heavy oxidation. The bubbles you observe are carbon dioxide created by the chemical reaction between the vinegar and baking soda. Allow the mixture to remain on the headlight for approximately ten minutes, periodically checking to ensure it hasn’t dried completely. After the waiting period, rinse thoroughly with plain water and buff dry with a clean microfiber cloth. This method often produces dramatic results, especially on headlights that have been neglected for years.
Alternative Home Remedies
Beyond the primary methods discussed above, several other household items have proven effective for headlight restoration, each offering unique advantages depending on the severity of oxidation and available materials.
WD-40: This versatile lubricant and solvent can temporarily improve headlight clarity by filling in microscopic scratches and creating a water-repellent barrier. Simply spray WD-40 onto a clean cloth and wipe it across the headlight surface. While this method provides quick results, the improvement is temporary and will require reapplication as the WD-40 wears away.
Diet Coke: The phosphoric acid in cola beverages, particularly diet varieties, can help dissolve oxidation and grime. Apply Diet Coke using a spray bottle, let it sit for a few minutes, then scrub and rinse. While less effective than other methods for severe oxidation, it works well for light haziness and mild surface contamination.
Dish Soap and Warm Water: For newly formed haze or light surface dirt, a simple solution of dish soap and warm water may suffice. This method is gentler than abrasive alternatives and serves as an excellent starting point before escalating to more aggressive treatments. Use a soft sponge or microfiber cloth to wash the headlight thoroughly, then rinse and dry completely.
Acetone or Nail Polish Remover: For extremely oxidized headlights, acetone-based nail polish remover can provide rapid results. Apply acetone to a clean rag and rub until the haze is removed. This method works quickly, often restoring clarity in just five minutes, but requires caution as acetone is harsh and can damage paint if it comes into contact with your vehicle’s finish. Always tape off the area around the headlight before using this method, and work in a well-ventilated area.
Step-by-Step Restoration Process
Regardless of which home remedy you choose, following a systematic approach ensures the best results and protects your vehicle from accidental damage during the restoration process.
Step 1: Preparation and Protection
Begin by thoroughly washing your vehicle’s headlights with mild soap and water to remove loose dirt and debris. This initial cleaning prevents you from grinding contaminants into the plastic during the restoration process. Once clean, use masking tape to tape around the edges of your headlights, creating a protective barrier between the headlight and your car’s paint. This precaution helps you avoid getting chemicals or abrasive materials on the surrounding surfaces.
Step 2: Surface Preparation
Before applying your chosen cleaning solution, clean the headlight surface thoroughly with any mild cleanser. Spray the headlight and wipe away anything that has accumulated on the surface. For heavily oxidized headlights, some restoration experts recommend using fine-grit sandpaper (400- to 600-grit) to remove the damaged outer layer. If using sandpaper, wet the surface first and sand in straight, horizontal lines with light pressure. This optional step removes the most severely damaged plastic and provides a fresh surface for your home remedy to work on.
Step 3: Apply Your Chosen Remedy
Take whichever cleaner you have selected—whether it’s the vinegar and baking soda paste, toothpaste, hydrogen peroxide mixture, or another solution—and spread a slightly thick layer evenly around the headlight. If using a baking soda-based cleaner, mix a small amount of water or hydrogen peroxide to create a workable paste. Once the cleaner is applied, let it set for three to five minutes, allowing the active ingredients time to break down the oxidation.
Step 4: Scrubbing and Removal
After the cleaner has had time to work, use a soft-bristled brush or toothbrush to gently scrub around the surface of the headlamp in circular motions. Apply moderate pressure and work systematically across the entire lens. As you scrub, you should start to see the fogginess beginning to disappear, with the cleaning solution changing color as it picks up oxidation and discoloration.
Step 5: Rinse and Inspect
Once you’ve thoroughly scrubbed the headlight, there may be residual cleaner on the lens. Spray water liberally on the surface and wipe your lenses with a clean towel or microfiber cloth. Inspect the results carefully. If significant haziness remains, you may need to repeat the process or try a more aggressive method. For maximum clarity after cleaning, consider applying an automotive plastic polish or UV-protective sealant to protect your newly restored headlights.
When Professional Help Is Needed
While home remedies work exceptionally well for mild to moderate headlight oxidation, some situations require professional intervention or complete headlight replacement. If cleaning your headlights with vinegar, baking soda, toothpaste, or other home remedies does not improve clarity after multiple attempts, the damage may extend beyond the surface layer that these methods can address.
Deep crazing, cracks in the plastic, or internal fogging (moisture inside the headlight assembly) cannot be resolved with external cleaning methods. In these cases, professional restoration services may be able to perform more aggressive polishing and resealing, or you may need new replacement headlight assemblies. Additionally, if your headlights have become so degraded that they compromise your nighttime visibility even after cleaning, replacement is the safest option to ensure you can see and be seen while driving.
Remember that headlight restoration, whether done at home or professionally, is not a permanent solution. The same environmental factors that caused the original oxidation will continue to affect your headlights over time. Regular maintenance, including periodic cleaning and the application of UV-protective coatings, can significantly extend the time between major restoration efforts and keep your headlights clearer for longer.
Preventive Maintenance Tips
After successfully restoring your headlights using home remedies, taking preventive measures can help maintain their clarity and extend the results of your hard work. Regular washing of your headlights as part of your normal vehicle cleaning routine removes contaminants before they can bond to the plastic surface. Park in shaded areas or use a car cover when possible to minimize UV exposure, which is the primary cause of headlight oxidation.
Applying a UV-protective sealant or automotive wax to your headlights creates a barrier against environmental damage. These products are available at auto parts stores and can significantly slow the oxidation process. Reapply the protective coating every few months for best results. Some car owners apply clear protective film designed specifically for headlights, which provides long-lasting protection against both UV damage and physical impact from road debris.
Consider the frequency of headlight cleaning as part of your overall vehicle maintenance schedule. Addressing minor haziness early prevents the need for more aggressive restoration later. A quick wipe-down with a vinegar solution or gentle toothpaste treatment every few months can maintain clarity and prevent heavy oxidation from developing.
Frequently Asked Questions
Q: How often should I clean my headlights with home remedies?
A: For maintenance purposes, cleaning your headlights every 3-4 months with mild home remedies like dish soap or diluted vinegar can prevent heavy oxidation from developing. If you notice haziness forming, address it promptly rather than waiting for it to worsen.
Q: Will toothpaste scratch my headlight lenses?
A: When used properly with a soft cloth and moderate pressure, toothpaste should not scratch headlight lenses. The abrasives in toothpaste are mild enough to be safe for teeth enamel, making them generally safe for plastic headlights. Avoid using whitening toothpastes with large abrasive particles and always test on a small area first.
Q: Can I use these methods on glass headlights?
A: Most modern vehicles have polycarbonate plastic headlights, but if your vehicle has glass headlights (more common in older cars), these methods are still safe to use. Glass is more resistant to scratching than plastic, but the oxidation typically occurs on plastic lenses rather than glass ones.
Q: Why do my headlights become foggy again after cleaning?
A: Headlights become foggy again because the same environmental factors—UV exposure, oxidation, and contaminants—continue to affect the plastic surface. Home remedies remove the damaged layer but don’t prevent future damage. Applying a UV-protective sealant after cleaning helps extend the results.
Q: Is vinegar safe to use near my car’s paint?
A: Diluted white vinegar is generally safe for car paint when used briefly and rinsed thoroughly. However, to avoid any risk, always tape off the area around your headlights before applying any cleaning solution. This prevents accidental contact with painted surfaces.
Q: How long do home remedy results last compared to professional restoration?
A: Home remedy results can last several months to over a year, depending on environmental conditions and whether you apply protective coatings afterward. Professional restorations typically last longer because they often include heavy-duty polishing and professional-grade UV sealants, but the difference may not justify the cost for many vehicle owners.
Q: Can I combine multiple home remedies for better results?
A: Yes, many people achieve excellent results by using multiple methods in sequence. For example, starting with toothpaste for initial cleaning, followed by the vinegar and baking soda solution for deeper restoration, and finishing with a protective coating provides comprehensive restoration.
Q: What should I do if home remedies don’t work?
A: If multiple home remedy attempts fail to improve headlight clarity, the oxidation may be too severe for DIY methods, or there may be internal fogging or damage. In these cases, consider purchasing a commercial headlight restoration kit with more aggressive compounds, seeking professional restoration services, or replacing the headlight assemblies entirely.
References
- https://headlights.com/4-care-tips-for-maintaining-your-vehicles-headlights/
- https://www.aaa.com/autorepair/articles/how-to-clean-foggy-headlights-at-home
- https://headlights.com/top-home-remedies-for-defogging-headlights/
- https://www.youtube.com/watch?v=cZjKYC2h58A
- https://www.instructables.com/Restore-Hazy-Fogged-Yellowed-Headlights-in-5-Minut/
- https://www.youtube.com/watch?v=rXHTXdlWw1w
- https://headlights.com/steps-to-repairing-a-dim-headlight/
Similar Articles


Read full bio of medha deb


